



















Campground leftovers in an RV fridge: a cool-store-reheat plan
A practical RV refrigerator workflow for portioning hot campground leftovers, choosing a cooling lane, dating containers and reheating each serving to 165°F.


Campground leftovers in an RV fridge: a cool-store-reheat plan
By Romana
Category: Cooking
A compact RV refrigerator can hold safe leftovers, but it is a poor place to park one deep, steaming pot. The food needs a short route from serving dish to shallow container, enough open shelf space for cold air to move, a dated label, and a 165°F check when it comes back to the table.
The short answer: Refrigerate perishable leftovers within two hours after cooking or removal from hot holding. Cut that deadline to one hour once the outside air tops 90°F. Split large amounts among shallow containers. Keep the refrigerator at 40°F or below, use most cooked leftovers within three to four days, and reheat the portion you plan to eat to 165°F.[1][2][3]
This guide starts after the meal is cooked and served. It is about the container, shelf and reheating decisions that follow, not raw-meat setup, power failures, make-ahead freezer meals, foil packets or egg cookery.

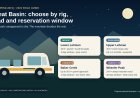
Give leftovers a cooling lane before dinner. Original illustration by RVCamping.info.
Make room before the serving spoon comes out
Open the refrigerator once, before dinner, and decide where the leftovers would go. You need a visible appliance thermometer reading 40°F or below, one usable shelf, and space around the containers. A temperature-control dial is a setting, not a measurement. FDA recommends an appliance thermometer and warns against packing a refrigerator so tightly that cold air cannot circulate.[2]
Take out cardboard drink cases, empty produce bags and anything else that wastes cold shelf area. Move frequently used drinks to a separate cooler if you have one. Do not solve the space problem by pushing a warm container against milk, deli food and every other perishable item in the box.
Set out the containers while the food is still being served. A practical campground kit is:
- several shallow containers with tight-fitting lids;
- painter's tape or dissolvable food labels and a marker;
- a clean ladle or serving spoon;
- an appliance thermometer for the refrigerator;
- a food thermometer for reheating;
- a wash basin or larger pan that can become an ice-water bath.
The number of containers should match the likely second meals. Two lunch-size boxes are usually more useful than one large tub that must be warmed, cooled and opened repeatedly.
Start one clock, not a collection of guesses
Write down when the food left active cooking or verified hot holding. USDA allows two hours to refrigerate it; in weather hotter than 90°F, the window drops to 60 minutes.[1] The time spent eating, talking and clearing the picnic table counts. Moving a dish into the shade does not pause the clock.
Use the shortest applicable limit for the meal. If a casserole sat out for 45 minutes, then spent another 40 minutes on the RV counter, its elapsed time is 85 minutes. Do not start over when the location changes.
Food that has exceeded the limit is a discard decision, not a reheating project. A later trip to 165°F does not undo an unknown or excessive room-temperature hold. Smell and appearance do not provide a reliable history.
Make the keep-or-discard call before packing. Refrigerating food you already plan to throw away wastes the cold capacity the good portions need.
Choose the cooling lane by space and food shape
USDA says hot food may go directly into a refrigerator. Another option is to pre-chill the containers in a pan holding ice and cold water.[4] Either route begins with smaller portions in shallow containers, not a stockpot squeezed between the shelves.[1][4]
Use this campsite decision:
Lane A: shallow containers go straight into the RV refrigerator
Choose the direct route when all of these are true:
- The refrigerator thermometer reads 40°F or below.
- Shallow containers fit on a shelf without being stacked while warm.
- There is room for air to circulate around them.
- The door can close without a lid, pan handle or tall bottle interfering.
- Adding the leftovers will not require holding the door open while the refrigerator is rearranged.
Portion first, cover the containers, label them, and load them in one quick door opening. FDA says hot food does not harm the refrigerator and recommends smaller containers so leftovers cool faster.[2]
Lane B: use an ice-water bath before the shelf
Choose the bath when the food is a hot liquid, the batch is large, or the compact refrigerator lacks open space for several warm containers. Divide the food before bathing it. Set each closed or securely covered container in a larger pan of ice and cold water, keeping the water below the lid seam. Stir the food with a clean utensil if that can be done without splashing bath water into it, then close it again.
This is active cooling, not a reason to leave dinner beside the sink indefinitely. Keep the original one- or two-hour deadline in view. Move the containers into the refrigerator while there is still time and after you have made enough shelf room. USDA lists an ice or cold-water bath as a rapid-chilling option.[1][4]
Lane C: use a properly cold cooler for overflow
A food cooler can handle the extra containers when the RV refrigerator cannot. Start with plenty of ice or frozen gel packs and verify that the cooler holds 40°F or below. Put the leftovers in sealed containers above meltwater, surround them with cold sources, and keep drinks in another cooler so the food lid stays shut.
The cooler is a storage lane only while its thermometer confirms refrigerator temperature. It is not a place to hide a deep hot pot under one bag of ice. Portion and rapidly cool the food first, then load it. Plan which containers will return to the refrigerator as shelf space opens.
If none of the three lanes can keep the wanted portions cold within the time limit, keep less. Container capacity is part of meal planning in a small rig.
Match the container to the leftover
"Shallow" describes the food layer, not the height printed on the package. A tall container filled only partway can cool faster than the same container packed to the rim, but it may waste precious vertical space. Wide, low boxes usually make the best use of an RV shelf.
Use the food's shape to decide what happens next:
| Leftover | Cooling move | Storage container | Reheating advantage |
|---|---|---|---|
| Soup, stew, chili or gravy | Ladle into several small portions; use an ice-water bath if the batch would crowd the fridge | Leak-resistant, shallow lidded boxes | Each portion can go into a saucepan and reach a full boil |
| Casserole, lasagna or dense rice dish | Cut the remaining food into meal-size sections rather than chilling the deep pan | Shallow rectangular boxes | A thinner layer is easier to stir or check in several places |
| Cooked meat with sides | Separate thick pieces and spread rather than pile them | One meal per covered container, with sauces packed where practical | The coldest, thickest pieces are easy to identify with a thermometer |
| Pizza or flat foods | Arrange in a low stack only after the pieces stop trapping heavy steam against one another | Wide covered box or sealed bag after prompt cooling | Only the amount wanted needs to leave refrigeration |
| Mixed picnic-table odds and ends | Keep only food whose set-out time is known | Separate small boxes labeled by meal | Different foods can be reheated by the method that suits them |
Do not invent an exact safe depth from the word "shallow." Federal consumer guidance does not give one universal inch measurement on these pages. The useful test is whether a large mass has been divided so cold can reach it quickly.
Load the shelf so the labels can be read
Label every container before it enters the refrigerator. Write the food and the date it was cooked. Add a use-first mark to the oldest safe container. FoodSafety.gov lists cooked meat and poultry leftovers for three to four days at 40°F or below, and USDA gives the same three-to-four-day refrigerator window for leftovers.[1][3]
Use that window as a limit, not a promise that every leftover will remain appealing for four days. Discard spoiled food sooner. When the history is uncertain, a fresh label does not repair it.
Keep leftover containers above any raw meat, poultry or seafood that could leak. USDA says raw foods should be securely wrapped or placed in a sealed container to prevent their juices from contaminating other food.[4] In a small refrigerator, a rigid raw-food tray on the lowest practical shelf creates a useful boundary.
Do not stack warm leftovers. After they have chilled, compact stacking may be reasonable if it does not block circulation or hide the thermometer, but keep labels facing out. Avoid placing food where a package prevents the door from sealing.
The refrigerator check is simple:
- Read the appliance thermometer after the containers have been loaded and again later.
- Confirm that it continues to hold 40°F or below.[2][4]
- Look for leaking lids and raw-food drips.
- Move the oldest dated leftovers to the front.
- Keep the air path open rather than filling every gap.
This is routine temperature management, not an outage procedure. If the appliance stops cooling, switch to a dedicated emergency food-safety plan rather than extending this workflow.
Reheat one eating portion
Take out only what the group plans to eat. Leaving the whole container on the counter while one person decides between soup and pizza spends time from every future serving.
All reheated leftovers need to reach 165°F on a food thermometer.[1] Check the part most likely to remain cold: the center of a dense portion, the thickest piece of meat, or several locations in a microwave dish. A bubbling edge does not prove the middle is ready.
For a microwave:
- Transfer food to a microwave-safe dish if the storage container is not rated for reheating.
- Arrange it in an even layer and break up dense clumps.
- Add a little liquid when appropriate, then cover with a vent for steam.
- Pause to stir or rotate the dish.
- Let the heat equalize briefly, then check several places for 165°F.
USDA specifically recommends covering and rotating microwave leftovers and checking multiple spots because cold areas can remain.[1]
For a saucepan or skillet, use a lid when suitable, stir from the bottom, and check dense pieces as well as the liquid around them. Sauces, soups and gravies should reach a rolling boil.[1] Wind can make an outdoor burner heat unevenly, so shield it only with equipment and clearances allowed by the appliance manufacturer.
For an RV oven, spread the portion in a covered, shallow oven-safe pan. Check the center and any thick pieces. Do not rely on the oven display, browned cheese or steam at the door as the food measurement.
Open every hot lid away from faces and hands. A covered reheating dish traps steam even when the food underneath still has a cool pocket.
A two-minute leftovers handoff
Before cleanup ends, one person should be able to answer these questions:
- When did active temperature control end?
- Which food stayed within the one- or two-hour limit?
- Did each large batch become shallow meal-size portions?
- Which cooling lane is each container using: refrigerator, ice-water bath, or verified-cold cooler?
- Is the refrigerator or cooler holding 40°F or below?
- What date is on each lid?
- Which portions must be used first?
- Where will the thermometer go when a portion is reheated to 165°F?
That handoff prevents the familiar morning mystery: an unlabeled tub behind the orange juice that might be yesterday's dinner, or might not. A safe leftover should have a known clock, a cold place, a readable date and a measured finish.
Source note: RVCamping.info built this original RV workflow from USDA FSIS, FDA and FoodSafety.gov consumer guidance. The container lanes, shelf-capacity test and handoff checklist are editorial decision tools; they are not federal standards or appliance-performance claims.
Sources
- Leftovers and Food Safety | USDA FSIS (USDA FSIS page, archived September 12, 2026)
- Refrigerator Thermometers: Cold Facts about Food Safety | FDA (FDA live page accessed September 13, 2026)
- Cold Food Storage Chart | FoodSafety.gov (FoodSafety.gov chart, archived September 9, 2026)
- Refrigeration & Food Safety | USDA FSIS (USDA FSIS page, archived September 12, 2026)
What's Your Reaction?