







Arriving after dark at an RV campground: a safe check-in and setup sequence
A stop-first sequence for checking in, inspecting a dark campsite, parking, chocking, leveling, checking slides, connecting shore power, and deferring nonessential setup until daylight.

Arriving after dark at an RV campground: a safe check-in and setup sequence
By Romana
Source note: This field sequence is based on current California State Parks and National Park Service campground guidance plus manufacturer instructions for a representative travel trailer and motorhome. Your reservation, posted campground rules, and the manuals for your exact RV and installed equipment control.
The campground office is dark, the loop signs are hard to read, and everyone in the rig wants the travel day to be over. This is when an ordinary setup can turn sloppy. The answer is not to work faster. It is to shrink the job.
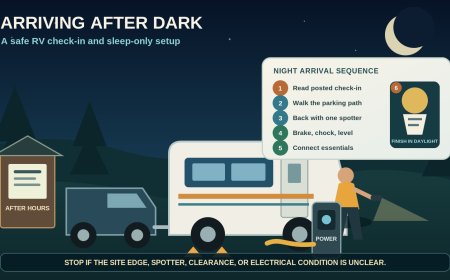
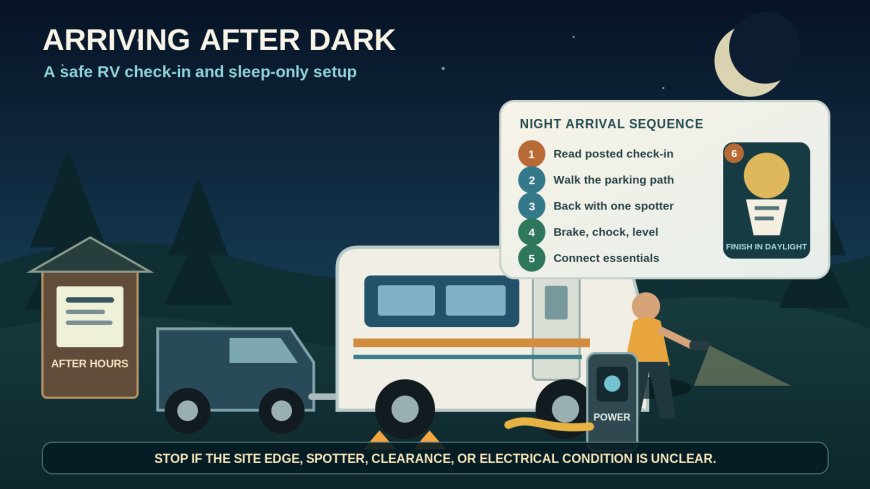
Use a night arrival for three things only: complete the property's required check-in, place the RV without hitting anything, and make the rig safe enough to sleep in. Chairs, rugs, sewer hoses, awnings, outdoor kitchens, and campsite decorating can wait for daylight.
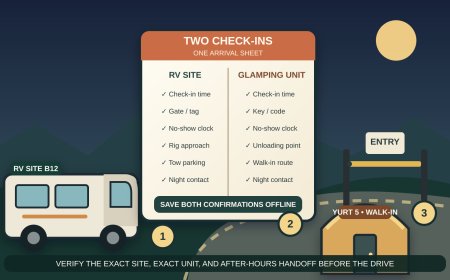
This guide begins at the campground entrance. If you still need to confirm gate codes, site assignments, or no-show rules, use our separate after-hours campground check-in plan before the travel day. The sequence below covers the physical arrival and setup once access is authorized.
1. Stop before the loop and read the after-hours instructions
Pull fully out of the entrance lane in a place the campground permits. Set the parking brake. The driver should not hunt through email while the RV is moving or stopped across a gate.
Match the posted name or reservation number to the assigned site. Take the paper map if one is supplied, photograph any temporary notice, and note the morning check-in requirement. Procedures differ even within public systems. Mather Campground tells after-hours guests to find campsite information on the kiosk window, take a map, follow the rules printed on it, and report to the kiosk the next day.[3] California's statewide policy says a reservation can become a no-show after noon on the following day, and a still-later arrival requires notice to preserve the remaining stay.[1]
If the assignment is missing, the gate method does not work, or the instructions conflict with the reservation, stop. Use the listed host or after-hours contact. Do not occupy a site that merely looks empty.
2. Set the light and communication rules before moving
Give one adult the map and one adult the outside role. If there is only one adult, plan to stop, get out, inspect, and move in short stages. A camera is useful, but it does not prove that the roof, passenger side, or swing path is clear.
Use the lowest light that makes the maneuver safe. Aim flashlights at the road edge, site number, branches, and utilities rather than through neighboring windows. The National Park Service asks campers to shield lights and point them down, and it notes that most campgrounds post quiet hours, often around 10 p.m. to 6 a.m.[2] Safety comes first, but a broad light bar left on while discussing the site is rarely necessary.
Agree on one stop signal. If the driver cannot see the spotter, does not understand a signal, or loses the site edge, the RV stops. No exceptions and no shouted debate beside a moving trailer.
3. Drive the loop once, slowly
Follow one-way arrows even if the campsite appears closer from the opposite direction. Keep the map open. Read the site numbers in sequence so a missing marker does not trigger an abrupt stop.
As the assigned site comes into view, continue past it only if the marked loop clearly returns. Avoid improvised backing on the campground road. If another vehicle approaches, pause in a place where both rigs can pass without either one leaving the road.
At Mather, vehicles must remain on pavement and face the loop's one-way direction.[3] That rule is site-specific, but the habit travels well: treat the pad, arrows, posts, and barriers as boundaries rather than suggestions.
4. Walk the site before backing
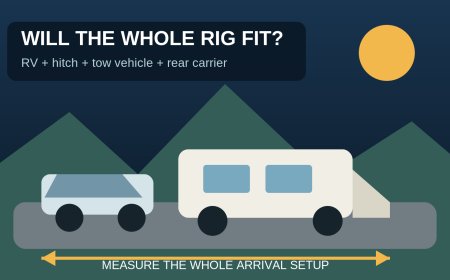
Stop with the rig straight and visible. Turn on hazard flashers if they help other drivers understand that you are stationary. The spotter walks the complete parking path with a downward-facing light.
Check the ground and everything the RV can reach:
- pad edges, drop-offs, soft shoulders, holes, and large rocks;
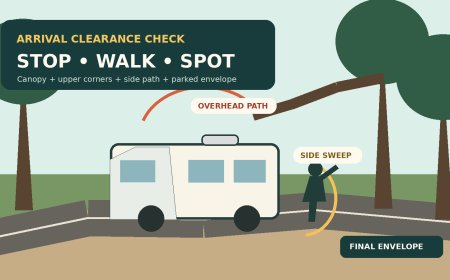
- tree limbs and trunks at roof, awning, and slide height;
- the pedestal, water spigot, picnic table, fire ring, posts, and neighboring gear;
- the door side, utility side, and space needed for slides;
- the route outside each emergency exit;
- the final position of the tow vehicle or towed car.
A current Grand Design travel-trailer manual says to inspect a back-in site before parking, confirm clearance, look for limbs, posts, and rocks, back slowly, and use another person outside to assist.[4] The same inspection logic applies to a motorhome, but the equipment-specific parking and leveling procedure must come from that motorhome's manual.
If the site cannot be read with confidence, ask the host for help or use the planned fallback. Darkness does not make a marginal site fit better.
5. Back with a stop-first rhythm
The spotter stands where the driver can see both the person and the hazard, never between the RV and a fixed object. Use short movements. Stop to recheck the opposite rear corner, roof clearance, and front swing.
Do not let a waiting neighbor rush the maneuver. It is faster to pause for 20 seconds than to pull forward repeatedly after losing the line. If the driver and spotter disagree, stop and walk the path together.
For a fuller signal plan, see our RV backing and spotter guide. At night, the short version is enough: one spotter, one set of signals, and an immediate stop whenever visual contact is lost.
6. Secure the rig before anyone starts setup
Once the RV is in the chosen position, keep people clear while the driver completes the parking steps for that rig. For a towable, leave the tow vehicle attached until side-to-side positioning is finished. Apply the tow vehicle parking brake, shut off the ignition, and chock the trailer wheels before unhitching.
Grand Design's current Imagine manual gives that order explicitly: set the tow vehicle parking brake, switch off the ignition, then block the trailer wheels with chocks. Its setup procedure also places wheel blocking before disconnecting the tow vehicle.[4]
A motorhome is different. Apply its parking brake and follow its chassis and leveling manuals. Do not borrow a trailer sequence for hydraulic jacks, air suspension, or automatic leveling.
7. Level only as the exact manual directs
Use the least correction that produces a safe overnight position and keeps required appliances within their operating limits. If leveling blocks are needed, place them while the driver can still see the spotter and the tires clearly. Nobody should stand under the RV or in its travel path.
For the representative travel trailer, Grand Design says stabilizer jacks are for stabilizing rather than lifting or leveling. It directs owners to level before operating the slideout and warns that uneven stabilizer pressure can twist the unit.[4] Those details are not universal instructions. Read the manuals for the actual RV, leveling system, refrigerator, and slide mechanism.
If the site would require an improvised stack, a wheel off the ground contrary to the manual, or repeated noisy repositioning, leave the slides in and reassess in daylight. A slightly inconvenient interior is better than unstable support.
8. Check slide clearance again, then deploy only what you need
Walk every slide path after leveling because the RV's position may have changed. Look high and low. A tree branch can clear the wall but catch a slide topper; a pedestal can hide below a window; the neighbor's hookup hose can cross the space you thought was open.
Keep people outside the movement zone and watch the complete extension. Stop at the first unusual sound, tilt, or obstruction. If a bed or required aisle can be used with the slide retracted, consider leaving it in until morning. Never extend an awning during the sleep-only setup.
Before settling in, confirm that the main door and emergency exit routes open onto usable ground rather than a stump, drop, or neighboring obstacle.
9. Connect shore power as an electrical task, not a dark chore
Skip power if the pedestal area is wet, damaged, scorched, loose, or too poorly lit to identify the correct receptacle and breaker. Contact campground staff rather than opening or repairing campground equipment.
Follow the RV and electrical-protection manuals in their stated order. The Grand Design manual calls for testing the external receptacle first. It says not to connect if a tester shows reversed polarity or a missing ground. Its sequence then switches off the RV's main 120-volt breaker, fully extends and connects the cord, and turns the main breaker on.[4] Winnebago recommends shutting off the campground receptacle breaker before engaging or disengaging the shoreline cord.[5]
Those examples agree on a useful boundary: make and break the connection without an energized plug, but use the exact sequence specified for your equipment. Do not improvise with a household extension cord or a damaged adapter.
10. Defer water and sewer unless they are truly needed
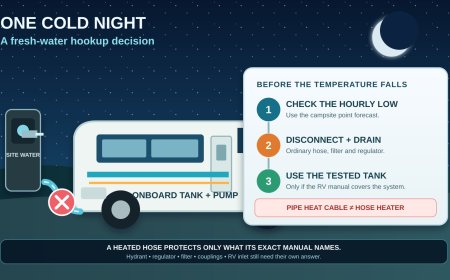
Most rigs can manage one night from a prepared fresh tank and holding capacity. If yours can, leave the dark-side plumbing job for morning. This avoids dragging hoses across a site you have not fully inspected and reduces door slams, compartment noise, and trips around the rig.
If water is necessary for a medical, sanitation, heating, or equipment reason, light the whole work area downward and follow the potable-water and freeze procedures for the exact system. If sewer service is necessary, inspect the cap, valve area, hose route, and connection before opening anything. Never assume a dark fitting is secure by touch alone.
11. Do a final outside lap
Before everyone goes inside, one adult walks clockwise around the RV with a light:
- wheels are chocked or the motorhome is secured as its manual requires;
- jacks and blocks sit squarely on suitable ground;
- no cord or hose crosses a walking or vehicle path;
- slides have clearance and no one left a compartment door open;
- the entry step lands on firm ground;
- tow vehicle or towed car is parked legally;
- exterior work lights are off or reduced to the minimum allowed setting;
- the site number and emergency exit route are easy to find.
Inside, check that the smoke, carbon-monoxide, and propane alarms show normal status. Confirm that no vehicle or generator exhaust is aimed toward the RV. Then stop. The site does not need to look finished tonight.
12. Finish the setup in daylight
Return to the office by the posted deadline. Walk the pad again without night shadows, check tire and jack positions, and inspect every electrical and plumbing connection you made. Correct the RV's level if needed before operating equipment that depends on it.
Only then add the sewer hose, chairs, rug, grill, awning, outdoor kitchen, bicycles, and other campsite gear. The night sequence is successful when nothing was struck, nobody entered a pinch zone, the rig cannot roll, essential systems were connected according to their manuals, and the neighbors barely noticed the arrival.
Sources
- California State Parks: Camping Information and Reservations Policies - statewide no-show and late-arrival notice rules; retrieved October 11, 2026.
- National Park Service: Camp Etiquette - quiet-hours and campsite-light guidance; retrieved October 11, 2026.
- Recreation.gov: Mather Campground - property-specific after-hours kiosk, loop direction, parking, and quiet-hours instructions; retrieved October 11, 2026.
- Grand Design RV: Imagine Travel Trailer Owner's Manual - representative towable backing, parking, chocking, leveling, slide, and shore-power procedures; retrieved October 11, 2026.
- Winnebago: 2026 Revel Operator Manual - representative motorhome shoreline breaker guidance; retrieved October 11, 2026.
What's Your Reaction?