







RV propane quick-connect grill setup: match the pressure path before lighting
Match an RV propane quick-connect, approved hose and compatible grill before using a valve-off connection, safe hose route, leak check and shutdown routine.

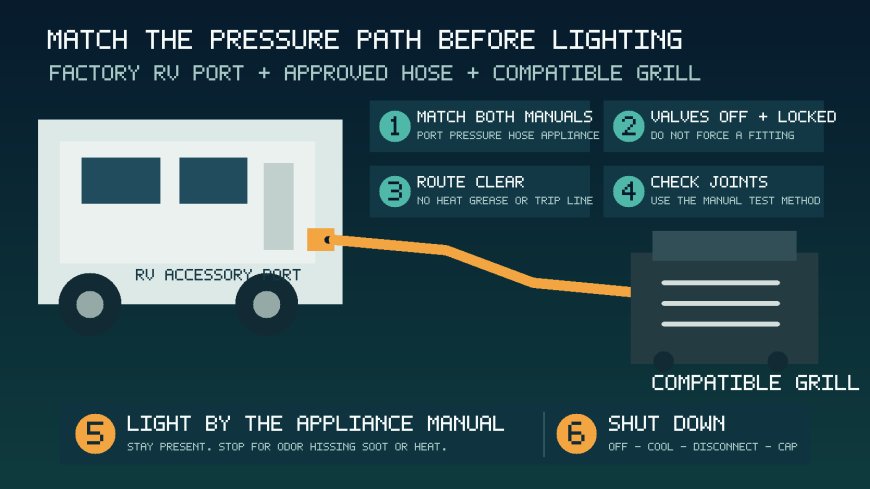

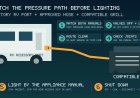
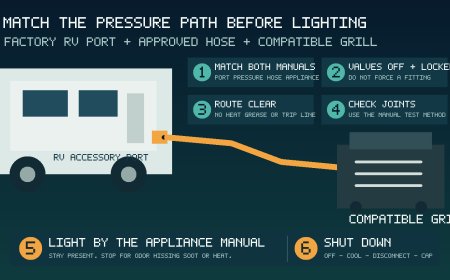
An exterior propane quick-connect looks simple: plug in a hose, turn a handle and cook. The connection is only safe and useful when the RV port, hose and appliance were designed to work together. A coupler that clicks is not proof of fuel-pressure compatibility, an approved hose or a safe grill location.
This guide covers a campsite workflow for an existing factory RV connection and a compatible portable grill. It does not cover adding a port, removing a regulator, building an adapter chain or altering the RV propane system. Winnebago tells owners to obtain additional hoses or fittings from a dealer or propane retailer, while current Jayco instructions refer owners to the exact grill and RV manuals.[1][2] If the paperwork does not explicitly support the combination, stop before buying a hose.
First decide whether the equipment belongs together
Start at both ends, not in the adapter aisle. Photograph the RV port and its labels, then record the RV year, make, model and VIN. Do the same for the grill's model and rating plate. Download the owner manuals for the exact RV and appliance.
A factory RV accessory port may sit downstream of the coach regulator. Winnebago's propane accessory bulletin says its named connection is on the low-pressure side and warns that a portable appliance with another built-in or added regulator may not operate correctly.[2] That is a compatibility boundary, not permission to remove the appliance regulator. A cylinder-fed grill sold with its own regulator may be a different configuration from a grill approved for a regulated RV outlet.
The manuals must answer all of these questions:
- Is the RV outlet intended to supply a portable cooking appliance?
- Is the grill approved for the pressure supplied at that outlet?
- Does the appliance maker approve connection to a regulated RV system?
- What hose assembly and mating plug are specified?
- Must the grill use a particular stand, rail or tray?
- What clearances, surface, ventilation and weather limits apply?
- When does the manufacturer require a connection leak check?
Do not solve a mismatch by removing a regulator, changing an orifice, defeating a shutoff or assembling reducers until the threads meet. Those changes can move the appliance outside its listed configuration. Have the RV maker, appliance maker, dealer or qualified propane professional identify an approved connection path. The National Supply YH1801RV-1 manual, for example, describes a specific RV grill, flexible hose and quick coupler arrangement; its details belong to that model rather than every portable grill.[3]
Choose the grill location before uncoiling the hose
The RV port fixes one end of the layout, but it does not make every nearby patch of ground suitable. Read the appliance's location and clearance instructions before opening the gas valve. Jayco says its named exterior grills are for outdoor RV use, must be properly mounted, and must meet the cooking appliance's required clearances.[1] CPSC also says grills belong outside in a well-ventilated area, not indoors or beneath a surface that can burn.[4]
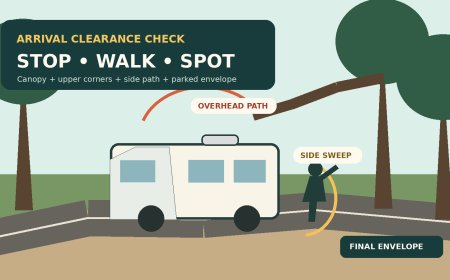
Walk the complete footprint with the grill, lid and any side shelves in their operating positions. Include the RV sidewall, awning, slide, windows, doors, appliance vents, dry vegetation, table coverings and neighboring site. A grill can be outdoors and still be too close to something combustible.
Now trace the hose. It should not cross the entry step, a walkway, a neighboring site's path or a place where children and pets circulate. Keep it away from the firebox, hot surfaces and dripping grease. CPSC specifically tells users to inspect for sharp bends and to keep grill hoses away from heat and grease.[4] Do not stretch a hose tight between the RV and grill or bury it under a rug where damage disappears from view.
If the approved hose cannot reach a compliant operating spot without becoming a trip, heat or damage hazard, the setup does not work at that campsite. Moving the grill closer to the RV is not a safe substitute for the appliance's clearance instructions.
A connection workflow for an approved combination
The following sequence is a planning aid. The exact RV, grill and hose manuals control whenever their steps differ.
- Make the site quiet. Shut off the grill controls and the accessory-port valve. Extinguish smoking materials and other flames nearby. Keep people who are not involved away from the connection area.
- Inspect the entire path. Check the outlet body, shutoff handle, protective cap, plug, sleeve and full hose. Reject cracked, brittle, abraded, swollen, heat-damaged or kinked hose. Stop for a nicked plug, damaged seal, dirty socket, loose outlet or a fitting that no longer locks cleanly. CPSC recommends checking grill hoses for cracking, brittleness, holes, leaks, sharp bends and secure connections before lighting.[4]
- Set the grill first. Put it in the approved operating position on the stand or surface required by its manual. Secure every bracket and support. Open the lid before admitting gas when the grill manual calls for that sequence; Jayco gives that instruction for its named grill arrangement.[1]
- Keep both ends off. Do not connect while the grill valve or RV accessory valve is open. Do not use tools to force a quick coupler that should operate by hand.
- Seat the approved plug. For the current Jayco quick coupler, the handle starts OFF, the sleeve pulls back, the plug inserts, and the sleeve must snap forward before the handle turns ON.[1] That sequence is evidence for the system described in Jayco's manual, not a universal substitute for another coupler's instructions.
- Prove the lock. With the accessory valve still off, tug the hose lightly in line with the plug. The sleeve should remain in its locked position. If it releases, sits halfway or binds, turn nothing on. Clean or service the connection only as its manual permits.
- Route once more. Confirm that opening the lid, moving a side shelf or walking through the site cannot pull the hose or push it toward heat. Keep excess hose visible and relaxed rather than tightly coiled or hidden.
- Open gas only as directed. Use the RV and appliance sequence. Winnebago's named accessory connection has a separate shutoff valve, and Jayco turns its quick-coupler handle ON only after the plug is locked.[1][2]
- Perform the specified leak check. The National Supply grill manual directs users to apply its stated leak-check solution to fittings and the grill control-valve inlet and to return the unit for repair when a detected leak cannot be corrected.[3] CPSC similarly advises using a soapy solution at the connection and closing the gas valve for qualified repair if tightening the tank connection does not stop bubbles.[4] Use the method and solution named in your own manuals. Never use a flame to search for a leak.
- Light from the manual. Do not improvise a lighting order. Stay at the grill through ignition and operation. If ignition fails, the flame is abnormal, soot appears, the hose heats up, the connection moves, gas odor persists or anyone hears hissing, turn off gas if this can be done safely and follow the manual's emergency directions.
A quick bubble check at exposed fittings is not the same as a professional propane-system pressure or leak test. If a port is loose, a system component was changed, gas service was interrupted, the RV alarm activates or a leak cannot be cleared, leave the system off and call a qualified propane professional.
Shutdown, disconnect and cap
Finish in an order that does not trap a rushed, live disconnection. Follow the appliance manual for which control closes first. Then close the RV accessory-port valve, confirm the flame is out and allow the grill to cool fully. Jayco instructs owners to disconnect the propane coupler before stowing its outside-kitchen unit and to cool the grill before storage.[1]
Disconnect only after the relevant valves are off. Keep your face away from the joint, release the sleeve as the coupler manual directs, and replace the outlet's protective cap or cover. Do not leave an open socket exposed to road dirt, water or insects. Coil the cool hose without tight bends and store it where cargo cannot cut, crush or contaminate the fittings.
Before travel, verify that the accessory valve is off, the hose and grill are detached and stowed, the port is capped, and any exterior kitchen or grill mount is latched. The Jayco manual treats disconnection and secure stowage as separate departure checks.[1]
Recheck during a multi-night stay
A connection that passed on arrival still deserves attention. Recheck the hose route after chairs move, a slide is operated, wind changes the awning plan or a neighbor parks nearby. Look again before each use for abrasion, heat exposure, a loose coupler, grease buildup and blocked burner areas. CPSC's guidance calls for hose inspection and regular cleaning according to the grill manual.[4]
Disconnect the appliance rather than leaving a hose across the site when it is not in use. If rain, mud or foot traffic has reached the fitting, do not reconnect until the parts are clean, dry and acceptable under the manufacturer instructions.
The stop conditions are more useful than a universal shopping list
Stop and use the grill's original approved fuel arrangement, a different appliance or no grill at all when:
- the RV port pressure and appliance inlet requirement are not documented as compatible;
- the plan requires removing or bypassing an appliance regulator;
- the hose, plug or coupler is an unidentified part chosen only because it appears to fit;
- the only operating location violates the grill's clearances or places the hose in traffic;
- the plug will not lock with the valve off;
- bubbles persist during the specified connection check;
- gas odor, hissing, an alarm, abnormal flame or soot appears;
- the shutoff valve, outlet or hose is damaged; or
- the campsite prohibits the appliance or current fire restrictions do not clearly allow it.
There is no useful universal hose length, adapter stack or pressure number for every RV and portable grill. The dependable workflow is to identify the factory pressure path, match a manufacturer-approved appliance and hose, prove the mechanical connection with both valves off, check the exposed joints as directed, keep the hose clear of heat and traffic, and shut down before disconnecting.
Sources
- Jayco, 2026 Towable Owner's Manual — Propane grill quick-coupler, outdoor-use and stowage instructions; consulted October 11, 2026.
- Winnebago Industries, Propane Accessory Connection service tip — Low-pressure connection, shutoff and compatibility warning; consulted October 11, 2026.
- National Supply / Forest River, YH1801RV-1 Portable LP Gas Grill User Guide — Model-specific RV hose, coupler and leak-check instructions; consulted October 11, 2026.
- U.S. Consumer Product Safety Commission, Fire It Up Safely — Hose inspection, leak response and outdoor-use guidance; consulted October 11, 2026.
What's Your Reaction?