







Thawing frozen meat during an RV trip: fridge, cold water, or microwave?
Choose a safe RV meat-thawing method by checking refrigerator temperature, potable-water capacity, cooking timing, and dependable microwave power.

Thawing frozen meat during an RV trip: fridge, cold water, or microwave?
By Romana
Category: Cooking
Dinner plans get awkward when the chicken is still a brick, the RV refrigerator has been cycling through a hot travel day, and the campground limits generator hours. The safety rules do not bend for a small galley. Your practical choices are a verified refrigerator, an attended cold-water thaw, or a microwave thaw that runs directly into cooking.[1][2]
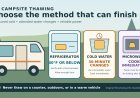
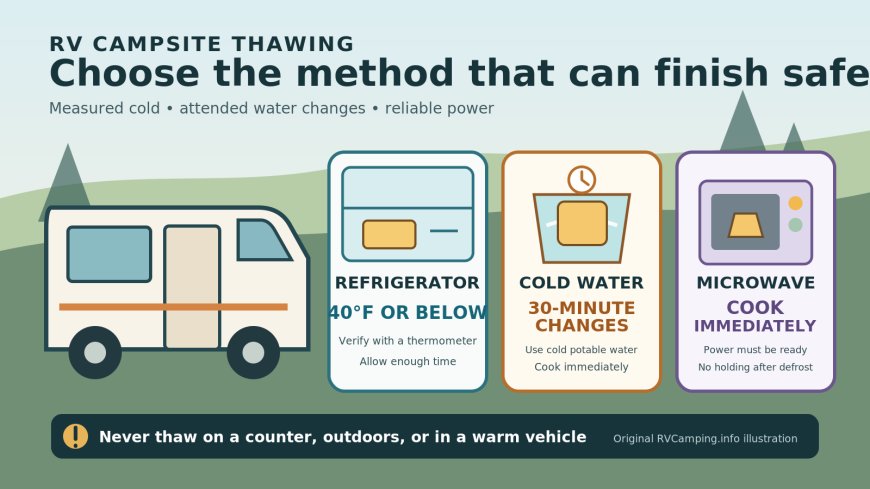
The short answer: Use the refrigerator when it can hold 40°F or below and you have enough time. Use cold water only with a leak-proof package, cold potable tap water, a 30-minute water-change schedule, and a plan to cook immediately. Use the microwave only when the cooking appliance and power supply are ready, because cooking must begin as soon as defrosting ends. Never thaw meat on the counter, outdoors, in a warm vehicle, or in hot water.[1][2]

Pick the method before opening the freezer
A good choice starts with four questions: How long until the burner, grill, or oven is ready? Is the RV refrigerator actually at 40°F or colder? Can you spare potable water and dispose of it properly? Can your electrical setup finish both microwave defrosting and the immediate cooking step?
That last word matters: finish. A pedestal breaker that trips halfway through defrosting, a generator quiet hour, or an inverter low-voltage cutoff can strand partly warmed raw meat. Cold-water thawing has its own failure point if you cannot replace the water on schedule. Refrigerator thawing is slower, but it leaves the widest margin when dinner moves by an hour.
USDA says frozen food remains safe indefinitely while frozen, though quality can change. Trouble begins as the food warms: the center may remain hard while the outside enters temperatures where bacteria can multiply.[1] A frozen middle is not protection for a warm surface.
The RV method selector
| Campsite situation | Best fit | Why | Do not choose it when… |
|---|---|---|---|
| Dinner is tomorrow; refrigerator is verified at 40°F or below | Refrigerator | Slow, controlled thawing; some flexibility after thawing | The refrigerator temperature is unknown or rising |
| Dinner is in a few attended hours; potable water and drainage are available | Cold water | Faster than the refrigerator | Nobody can change water every 30 minutes, or the package leaks |
| Cooking begins now; microwave and cooking power are dependable | Microwave | Fastest path for small portions | Cooking equipment is not ready immediately afterward |
| None of those conditions are true | Keep frozen; change the meal | Avoids inventing an unsafe fourth method | Do not use a counter, sun, hot water, porch, vehicle, or outdoor air as a thawing method[1] |
A cooler does not automatically create a fourth option. FDA treats a cooler packed with ice or frozen gel packs as cold storage when food stays at 40°F or below.[3] If meat softens there while the measured temperature stays within that limit, manage it as refrigerated food. Do not describe a bag floating in old cooler meltwater as the official cold-water method; that method has a leak-proof package, cold tap water, scheduled changes, and immediate cooking.[1]
Refrigerator: the low-attention choice
The refrigerator is usually the least complicated campsite method, provided you verify the temperature rather than trust the control dial. FDA advises keeping a refrigerator at 40°F or below and using an appliance thermometer because many controls do not display the actual temperature.[2]
Set up the thaw this way:
- Put the wrapped package in a rimmed tray or leak-resistant container. Keep it below produce, drinks, cooked food, and anything else that will be eaten without further cooking.
- Leave room for cold air to circulate. FDA specifically warns against overpacking a refrigerator because food needs circulating cold air.[2]
- Read the appliance thermometer before moving the meat from the freezer. Recheck after arrival, a long door opening, loss of shore power, or a change in the refrigerator’s energy source.
- Allow more time than a home-kitchen guess might suggest. USDA's examples show that a small package can still need an entire day under refrigeration; examples include one pound of ground meat and a similar amount of boneless chicken.[1]
- Keep the package contained as it thaws. Drips can spread contamination inside a compact RV refrigerator.[2]
Refrigerator thawing gives you a limited scheduling cushion. USDA says ground meat, stew meat, poultry, and seafood generally remain safe and good quality for another one or two days after thawing; red-meat roasts, chops, and steaks get three to five days. Those intervals assume continuous refrigeration at 40°F or below. Food thawed in the refrigerator may be refrozen without cooking, though quality can decline.[1]
An RV refrigerator deserves closer attention than a kitchen refrigerator because travel, leveling, ventilation, fuel changes, power transfers, and repeated door openings can affect operation. Follow the refrigerator manufacturer’s operating instructions. If the thermometer shows a problem, treat it as a cold-chain problem rather than granting the meat extra thawing time.
Cold water: fast, but not unattended
Cold-water thawing fits a late dinner plan only when one person can own the job until cooking starts. USDA requires a leak-proof package or plastic bag, full submersion in cold tap water, and a water change every 30 minutes. USDA estimates an hour or less for a small package near one pound, while three to four pounds may require two or three hours. Treat those figures as planning estimates, not permission to skip a final check.[1]
At a campsite, make the method deliberate:
- Inspect the wrapper and add a second food-safe leak-proof bag if there is any doubt.
- Use a clean basin or pot that will not be needed for ready-to-eat food during the thaw.
- Fill it with cold potable tap water and submerge the package.
- Set a 30-minute timer. Replace the water when it rings; do not stretch the interval to save water.[1][2]
- Control splashes around the small sink. Keep the faucet handle, clean dishes, produce, and drinking-water equipment away from raw-meat juices.
- When the meat is thawed, start cooking immediately. USDA says food thawed by this method should be cooked before refreezing.[1]
- Wash the basin, utensils, sink, and contacted surfaces with hot soapy water, then use an appropriate food-contact sanitizer as directed.
This method may be a bad match for boondocking. It consumes potable water and creates wastewater. Do not substitute lake or stream water, warm water, or cooler meltwater. Do not dump the used water on the ground; follow campground rules and the RV’s wastewater plan. If your water budget or disposal setup cannot support the official process, keep the meat cold and serve the backup meal.
Microwave: defrost only when cooking is queued
Microwave thawing is a relay race, not a pause button. USDA explains that parts of the food may warm or begin cooking during defrosting. The agency directs cooks to move immediately into cooking, whether that happens in the microwave, a conventional oven, or on a grill.[1] FDA gives the same immediate-cooking instruction.[2]
Before pressing Defrost:
- Confirm that the package contains no foam tray, absorbent pad, metal tie, or wrapper that is not microwave-safe.
- Place the meat in a microwave-safe dish that can catch liquid.
- Check the RV’s appliance, inverter, generator, battery, and shore-power instructions. Do not assume the microwave’s advertised wattage tells you the full electrical load.
- Ready the next cooking appliance first. If the grill still needs assembly or generator hours end soon, the method is not ready.
- Follow the microwave and food-package directions. Turn, separate, or rearrange pieces as instructed so softened edges do not sit while a thick center remains frozen.
- Begin the full cooking step immediately. Do not return partly warmed raw meat to the refrigerator for later.[1][2]
A short power interruption does not authorize countertop waiting. If the microwave route cannot continue promptly into cooking, do not improvise. The safest operational choice may be to discard food whose time and temperature history has become unsafe or uncertain.
What if the RV refrigerator or cooler warms up?
FDA says perishable food should not remain unrefrigerated for more than two hours, with the limit reduced to one hour when the air temperature is above 90°F.[2][3] These are maximum exposure limits, not recommended thawing schedules. Loading, a fuel stop, setup time, and time on the picnic table can accumulate.
FDA permits cooking or refreezing when the food remains 40°F or colder or retains ice crystals.[2] If you do not know how long it has been warmer than 40°F, FDA advises throwing it out rather than taking a chance.[2] Smell, color, or a cold center cannot reconstruct the missing history.
During travel, pack raw meat securely so its juices cannot reach food that will be eaten as-is. FDA advises using ice or frozen gel packs to hold cooler contents at 40°F or below. Meat can go into that cooler while frozen so it stays cold longer.[3] A thermometer turns “the cooler felt cold” into a usable reading.
Thawing is not cooking
Finishing a safe thaw only gets the meat ready for the cooking step. It does not establish doneness. Use a clean food thermometer and the safe minimum internal temperature for the exact cut and preparation. FDA notes that color and texture are not dependable safety indicators.[2][3]
Keep the workflow simple in a cramped galley: one tray for the raw package, clean utensils for cooked food, and no reuse of the raw platter unless it has been washed with hot soapy water.[3] Wash hands with soap and water after handling the package and raw meat. Keep thawing liquid away from fresh produce and drinking-water gear.
A campsite go/no-go check
Before thawing, say the method and its finish condition out loud:
- Refrigerator: “The appliance thermometer reads 40°F or below, the package is contained, and dinner is far enough away.”
- Cold water: “The bag is leak-proof, the water is cold and potable, I can change it every 30 minutes, and cooking starts when thawing ends.”
- Microwave: “Power is available, the cooking appliance is ready, and I will cook immediately after defrosting.”
- No-go: “The temperature history, water schedule, or power path is unreliable, so the meat stays frozen and we use another meal.”
That backup meal is part of the safety plan. Shelf-stable pasta, canned beans, or another no-thaw dinner is cheaper than trying to rescue meat that sat in an RV sink while the campsite lost power.
Evidence note: USDA FSIS and FDA supply the thawing methods, temperatures, timing estimates, immediate-cooking rules, and cold-storage guidance. The method selector and RV power, water, and galley checkpoints are RVCamping.info planning guidance. This article does not report hands-on appliance or campsite testing and does not address vacuum-packed fish or reheating leftovers.
Sources
- USDA FSIS: The Big Thaw — Safe Defrosting Methods — official refrigerator, cold-water, microwave, timing, refreezing, and cook-from-frozen guidance; archived evidence captured from the official page via a 2026-09-12 Wayback snapshot.
- FDA: Refrigerator Thermometers — Cold Facts about Food Safety — official 40°F refrigerator threshold, appliance-thermometer, thawing, power-loss, and cross-contamination guidance; official-page capture preserved 2026-09-21.
- FDA: Handling Food Safely While Eating Outdoors — official cooler, transport, separation, outdoor time-limit, and sanitation guidance; official-page capture preserved 2026-10-03.
What's Your Reaction?