












How to thaw frozen food safely in an RV
Choose a safe RV thawing route with practical refrigerator, cold-water and microwave steps, travel-cooler temperature checks and clear refreezing rules.

How to thaw frozen food safely in an RV
By Romana
Category: Cooking
An RV gives frozen food three safe routes to the pan: the refrigerator, cold water or the microwave. The best choice depends on the clock, available cold space, water supply and whether you can start cooking as soon as thawing ends.
The short answer: Thaw in an RV refrigerator that stays at 40°F or below when you can plan ahead. For a faster method, seal the food in a leak-proof bag, submerge it in cold tap water and replace the water every 30 minutes. A microwave works only when cooking will follow immediately. Never thaw perishable food on the counter, in hot water, in a parked vehicle or outside.[1]

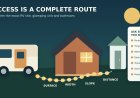
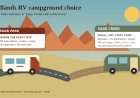
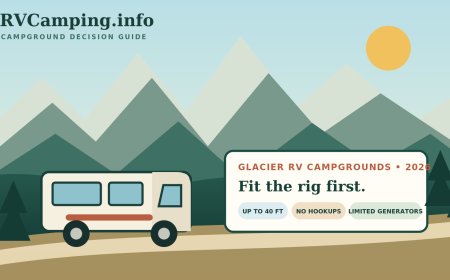
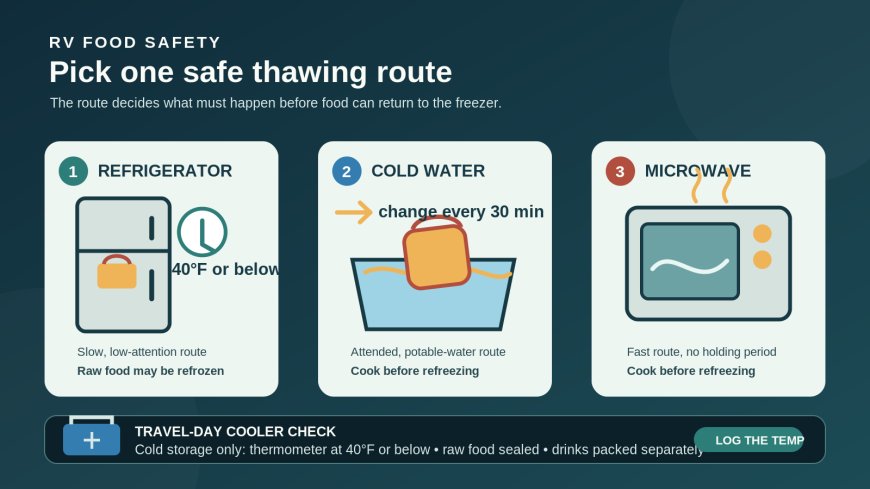
Choose the thawing route before opening the freezer. Original illustration by RVCamping.info.
First decide when the food will hit the heat
Safe thawing is easier when the cooking time drives the plan. A package intended for tomorrow's dinner can move to the refrigerator today. Food needed in a few hours may fit a cold-water schedule. Food needed now can use a microwave only if a skillet, grill, oven or microwave cooking cycle is ready to follow.
USDA lists all three methods as safe and also says food may be cooked from frozen. Cooking from frozen generally takes about 50 percent longer than cooking fully thawed meat or poultry, so it is an option only when the recipe and appliance can handle the extra time.[1]
Do not use the RV counter as a fourth method. The center can remain hard while the outside warms into the 40°F-to-140°F range where bacteria multiply rapidly. USDA also rejects thawing in hot water, a car, outdoors, on a porch and in other places where temperature is not controlled.[1]
Before choosing a route, answer four practical questions:
- Does the refrigerator thermometer read 40°F or below?
- Is there a leak-proof package and enough potable cold water for repeated changes?
- Can the microwave run without exceeding the rig's electrical capacity?
- Will the cooking equipment be ready the moment a fast thaw ends?
If every answer is no, leave the package frozen and change the meal. Shelf-stable food is a better fallback than an improvised thaw.
Method 1: refrigerator thawing
Refrigerator thawing requires the least attention and leaves the most flexibility afterward. It is also slow. USDA says a one-pound pack of ground meat or skinless chicken breast can still require a full day. A large item such as a turkey needs at least 24 hours for each five pounds, and actual time varies with refrigerator temperature and where the package sits.[1]
Use this RV setup:
- Check an appliance thermometer, not only the control dial. The box must hold 40°F or below.
- Keep the food wrapped and place it in a rimmed tray or sealed container that can catch leaks.
- Put the tray below ready-to-eat food so raw juices cannot drip onto breakfast items, produce or leftovers.
- Leave enough room for cold air to circulate. Do not wedge the package against every other item.
- Mark the date and the meal it is meant for.
- Recheck the thermometer after travel, a long door opening or a power-source change.
The refrigerator clock does not run at one universal speed. A package on a very cold back surface may stay partly frozen longer than expected. A crowded door shelf may be warmer and creates a spill risk. Treat the USDA estimates as planning ranges, then verify texture and doneness during cooking rather than promising dinner at an exact minute.
Refrigerator thawing is the only one of the three routes that permits uncooked food to return directly to the freezer. USDA says food thawed in the refrigerator can be refrozen without cooking, although moisture loss may reduce quality.[1] That permission assumes the refrigerator stayed at a safe temperature and the food was handled properly.
Method 2: cold-water thawing
Cold water is useful when the refrigerator plan started late, but it is an attended process. The package must be leak-proof. A leak can let environmental bacteria reach the food and can make the food absorb water.[1]
At an RV sink or outdoor food-prep station:
- Put the wrapped food inside a second leak-proof food-safe bag if the original seal is questionable.
- Use a clean basin or pot that is large enough to keep the package submerged.
- Fill it with cold potable tap water. Do not use hot or warm water.
- Replace the water every 30 minutes so it remains cold and continues thawing.
- Keep splash away from dishes, produce, faucet handles and the fresh-water fill connection.
- Clean the basin and nearby surfaces after the package comes out.
- Cook the food immediately once it is thawed.
USDA estimates that a roughly one-pound package of meat, poultry or seafood may thaw in an hour or less, while a three-to-four-pound package may require two to three hours.[1] Those are planning estimates, not permission to walk away. Water temperature, package shape and a frozen mass folded onto itself can all change the result.
Cold-water thawing can be awkward at a dry campsite. Replacing a basin every half hour consumes fresh water and creates wastewater that must go to an approved drain or holding system under campground rules. Do not stretch the interval to save water, and do not substitute lake, creek or melted-cooler water. If the water budget cannot support the method, keep the food cold and choose another meal.
Raw food thawed this way should not go straight back into the freezer. Cook it first; the cooked food may then be frozen.[1]
Method 3: microwave thawing
Microwave defrosting is the shortest route and the least forgiving. Thin edges and small sections can warm or begin cooking while the center remains icy. USDA therefore directs cooks to begin cooking immediately after a microwave thaw rather than holding the partly warmed food.[1]
Set up the cooking step before pressing Defrost:
- Remove foam trays, absorbent pads, metal clips and packaging not labeled microwave-safe.
- Place the food in a microwave-safe dish that will contain liquid.
- Follow the food label and microwave manufacturer's defrost instructions.
- Pause to separate pieces, turn the package or shield thin areas when the instructions call for it.
- Move directly into the full cooking cycle and verify the safe internal temperature required for that food.
In an RV, power is part of the method. Confirm that shore power, generator output or the inverter and battery bank can support the microwave without an overload. Do not start defrosting while someone is about to disconnect power or while another large appliance is likely to trip the circuit. A half-defrosted package is not a useful stopping point.
Microwave-thawed food must be cooked before refreezing.[1] If the evening plan changes after the defrost cycle, cook the food safely now, cool it promptly, and freeze the cooked portion instead of returning the raw package to the freezer.
Travel day: the cooler is cold storage, not a thawing method
A cooler can transport frozen or thawing food only while it acts like a refrigerator. FoodSafety.gov recommends enough ice, gel packs or frozen water bottles to keep perishables at 40°F or below and an appliance thermometer inside the cooler.[2]
Build the travel-day cooler around that temperature target:
- Pre-chill the cooler and load already frozen food directly from the freezer.
- Use plenty of cold sources and fill unused space with more ice rather than warm air.
- Keep raw packages sealed, in a rigid tray or secondary bag, and below ready-to-eat food.
- Put drinks in another cooler. Frequent openings dump cold air and make the food temperature harder to control.[2]
- Keep the food cooler in the shaded part of the vehicle when possible, not in a sun-heated truck bed or parked tow vehicle.
- Read the thermometer at fuel and meal stops without leaving the lid open.
- Move food to a verified 40°F-or-below refrigerator or freezer on arrival.
Do not count highway hours as a cold-water thaw. A package floating in meltwater is not receiving a controlled change of cold potable water every 30 minutes, and its wrapping may leak. Drain management also turns every stop into a contamination problem.
A cooler may let food thaw gradually while it remains at 40°F or below. In that case, treat it as refrigerated thawing only when the temperature history is verified. A single cold reading at arrival cannot reconstruct an unknown six-hour trip. If safe refreezing might matter, log the thermometer reading at departure and at stops.
Perishable food should not remain unrefrigerated for more than two hours, or more than one hour when exposed to temperatures above 90°F.[3] Those limits are total exposure time. Loading, a warm lunch stop, campsite setup and time on the picnic table all count; the clock does not restart each time the package changes locations.
When refreezing is safe, and when it is not
Use the thawing route and temperature history, not appearance, to make the decision.
| What happened | Refreeze raw? | Safe next move |
|---|---|---|
| Thawed in a refrigerator continuously at 40°F or below | Yes | Refreeze promptly; expect possible quality loss.[1] |
| Thawed by the cold-water method | No | Cook immediately, then freeze the cooked food if wanted.[1] |
| Thawed in the microwave | No | Cook immediately, then freeze the cooked food if wanted.[1] |
| Still partly frozen, with ice crystals, and no unsafe temperature exposure | Generally yes | USDA says partly frozen food with ice crystals or food as cold as a refrigerator is safe to refreeze or use, though quality may decline.[4] |
| Sat outside refrigeration beyond two hours, or beyond one hour above 90°F | No | Discard; do not cook or refreeze it as a rescue.[3][4] |
| Cooler or refrigerator temperature history is unknown | Do not assume | If you cannot establish safe handling, discard the perishable food. Never taste it to decide.[4] |
Refreezing does not reset bad handling. Freezing slows or stops microbial growth but does not destroy all harmful germs; after thawing, surviving microbes can become active again.[4] A new frozen state cannot make an unsafe warm hold safe.
Quality is a separate issue. Every freeze-thaw cycle can cost moisture and texture even when safety rules permit refreezing. Portion food before the trip so one dinner package can thaw without forcing the rest through another cycle.
A departure-to-dinner thawing card
Tape this short handoff inside a cabinet door:
- Name the meal time. Work backward before moving food out of the freezer.
- Choose one route. Refrigerator, attended cold water or microwave followed by immediate cooking.
- Record cold control. Refrigerator or cooler at 40°F or below; note travel readings if refreezing may become necessary.
- Contain raw juices. Keep the sealed package in a tray and below ready-to-eat food.
- Protect the next step. Reserve water and drainage for cold-water thawing, or reserve power and cooking equipment for a microwave thaw.
- Mark the refreeze rule. Refrigerator thaw may return raw; cold-water and microwave thaw must be cooked first.
- Discard on a broken clock. Do not repair an unsafe or unknown temperature history with cooking, freezing, smell or a taste test.
The useful RV habit is deciding early. When the route, clock and next cooking step are settled before travel or dinner prep, the frozen package stays food instead of becoming a campsite judgment call.
Source note: RVCamping.info adapted current USDA FSIS and FoodSafety.gov consumer guidance into an original RV decision workflow. Cooler logs, power checks, water-budget questions and the departure-to-dinner card are editorial planning tools, not federal standards or claims based on hands-on appliance testing.
Sources
- The Big Thaw — Safe Defrosting Methods | USDA FSIS (USDA FSIS page, archived September 12, 2026)
- Keep Food “Cool for the Summer” to Avoid Foodborne Illness | FoodSafety.gov (FoodSafety.gov page, archived February 19, 2026)
- 4 Steps to Food Safety | FoodSafety.gov (FoodSafety.gov page, archived September 5, 2026)
- Freezing and Food Safety | USDA FSIS (USDA FSIS page, archived September 12, 2026)
What's Your Reaction?