






A leveling jack will not retract: identify the system before touching an override
Secure the RV, identify the exact leveling system, use its matching manual, and know when a stuck jack requires professional recovery.

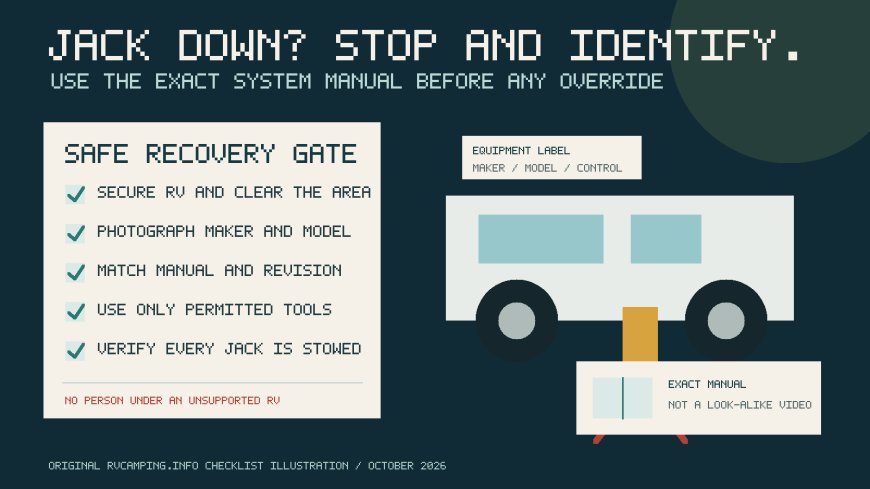
A leveling jack will not retract: identify the system before touching an override
By Romana | October 15, 2026
A leveling jack that stays down can turn checkout into a mechanical guessing game. The control panel may be dark, one leg may stop short, or an alarm may remain on after the others retract. This is the wrong time to borrow a drill and follow the first video that looks close.
RV leveling systems do not share one emergency-retraction method.[1][2] An electric jack may have a mechanical drive at the motor.[1] A hydraulic system may require a particular valve position before its pump is turned manually.[2] Controls, tool sizes, power-isolation steps and rotation directions can differ even within one manufacturer's product line.[1][2] Use the owner manual for the installed system, not a generic "RV jack" procedure.
This guide helps you make the campsite safe, identify the equipment and decide whether a manual override is appropriate. It cannot supply the override sequence for an unknown system.
Stop the departure sequence
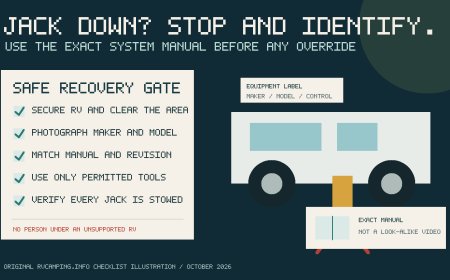
Do not move the RV to see whether the foot will fold, drag or "free itself." Set the parking brake, keep the transmission in Park, chock the wheels as the RV or chassis manual directs, and clear people and pets from the jack area. If the RV is hitched, do not change the hitch state while a leveling fault leaves the unit partly supported or out of its expected attitude.
Keep everyone out from under the RV. Leveling jacks are not service stands. HWH's hydraulic training material says leveling systems are not designed to support an RV for service and calls for adequately rated jack stands before anyone works underneath.[3] Lippert gives the same boundary for Ground Control 3.0: the system is for leveling, not tire changes or other service under the trailer.[1]
A leaking hydraulic line adds another stop condition. Do not use a hand to search for a pinhole leak.[2] The Lippert Level Up manual warns that pressurized oil can penetrate skin and tells users to keep body parts clear of leaks.[2] Keep ignition sources away, contain a spill only from a safe position, and call a qualified technician when the leak, jack motion or access point puts you in danger.
Identify the system, not just the RV
The coachbuilder or trailer brand does not uniquely identify the leveling equipment. Start with the labels on the touch pad, controller, pump/reservoir assembly and jack motor. Photograph each label without crawling under the unit. Record:
- leveling-system manufacturer and product name;
- controller or touch-pad part number;
- jack or pump model and serial number, if visible;
- whether the system is electric, hydraulic or another design;
- number and position of jacks;
- the exact display message or warning-light pattern;
- RV make, model, model year and VIN.
Then retrieve the RV owner's manual and the component manual that matches those identifiers. Read the applicability statement and revision.[1][2] The Ground Control 3.0 manual in the source list, for example, is an aftermarket manual for systems installed after June 1, 2018.[1] The cited Level Up manual is marked discontinued and applies to a hydraulic travel-trailer system.[2] Neither should be treated as universal.[1][2]
If the label is missing or the manual match is uncertain, send the photos and identifiers to the RV manufacturer, leveling-system maker or a qualified mobile RV technician. A search result that uses the right brand name but the wrong controller generation is not confirmation.
Try only the normal retraction procedure first
Once you have the matching manual, follow its ordinary retract sequence exactly.[1][2] Check only the prerequisites the manual names, such as battery state, shore-power condition, parking brake, ignition position, controller mode or hitch state.[1][2] Do not reset, recalibrate or extend other jacks merely because a forum post recommends it.
Watch from a safe position where you can see the feet without standing in their path. Stop if the RV shifts unexpectedly, a jack binds, the motor stalls repeatedly, a breaker trips again, hydraulic fluid appears, wiring heats or the structure makes a new cracking sound.
Do not assume a panel indication proves physical retraction. The departure check needs both:
- the expected control-panel state, with no unresolved jack-down warning; and
- a walkaround confirming every foot and leg is fully in its documented travel position with safe road clearance.
If those disagree, the RV is not travel-ready.
Why a borrowed override can make the problem worse
Two Lippert manuals show how different the mechanisms can be.
Ground Control 3.0 is an electric system.[1] Its manual describes an override at the jack motor, recommends disconnecting the motor's power harness for the procedure, and warns against using an impact driver because it may damage the motor.[1]
The cited Level Up system is hydraulic.[2] Its manual override calls for disconnecting the hydraulic power-unit motor from power, opening the valve associated with the affected jack, driving the pump coupler in a specified direction, and returning the override screw to its operating position afterward.[2] That is a different energy path, different access point and different restoration step.
This is why an article cannot responsibly give one socket size, drill direction, valve turn or fuse-reset routine for every RV. Even a correct direction from one manual can be wrong for another mechanism or pump orientation.[1][2] An impact tool may also apply shock loads the procedure never allows.[1]
Build a manual-override decision gate
Use manual override only when every answer below is yes:
- I have positively identified the installed system and controller generation.
- I have the applicable manufacturer manual, not a screenshot or paraphrased forum post.
- The manual provides an owner-permitted override for this symptom.
- I can reach the specified point without going under an unsupported RV.
- I can isolate power and stored energy exactly as directed.
- I have the named hand tool or permitted driver, not an impact tool unless the manual explicitly allows one.
- I understand the direction, stopping point and return-to-service step.
- The jack, bracket, wiring and hydraulic parts show no collision damage, severe bend, loose mount, active leak or fire damage.
- Another adult can keep the area clear and stop the operation if the RV moves unexpectedly.
A single no means stop. Call the system manufacturer, roadside assistance or a mobile RV technician and tell them the jack is deployed. Ordinary towing may be impossible until the equipment is secured; the towing provider needs that information before dispatch.
Do not turn troubleshooting into structural work
A jack fault may be electrical, hydraulic, mechanical, control-related or simply a prerequisite that has not been met. Visible symptoms do not diagnose the cause. Low voltage can exist under load even when a resting battery reading looks plausible. A tripped breaker may be an effect rather than the fault. A crooked foot can point to ground movement or impact, not a software error.
Do not loosen hydraulic fittings, remove a motor, pull a retaining pin, strike a leg, bypass an interlock, substitute a fuse or breaker, or lift the RV with another jack unless the exact service documentation assigns that work to an owner and provides a safe support method. Keep hands away from pinch points throughout any permitted operation.[1][2]
The Ground Control manual requires front and rear jack stands before troubleshooting or service.[1] The Level Up manual says to follow the trailer manufacturer's lifting and support recommendations and recommends a trained professional for tire changes or other service.[2] Those instructions matter more than getting out of the campsite on schedule.[1][2]
Confirm travel position before moving
After a successful normal or manual retraction, complete the manual's restoration steps.[1][2] A hydraulic override valve left in the wrong position or an electrical connector left unplugged may create a new failure. Replace access covers and protective plugs. Remove pads or blocks only when the RV is stable and the manual's sequence permits it.
Then perform a full walkaround:
- verify every jack is fully retracted or stowed in its documented travel position;
- confirm adequate ground clearance at each leg and foot;
- check that no hose, cable or harness hangs loose;
- look for fresh fluid, bent metal, damaged wiring or a shifted mounting bracket;
- confirm the control panel shows the expected travel state and no jack-down alarm remains;
- account for all tools, pads, blocks and wheel chocks;
- test the service and parking brakes before entering traffic.
If a warning remains, a jack creeps down, the override cannot be returned to normal, or the retraction required unusual force, do not depart. Arrange service. A leg that is merely "high enough for now" can drop farther with vibration or heat.
Prepare the recovery card before the next trip
Make a one-page card while the RV is parked at home. Put the leveling-system model, controller number, manual URL, manufacturer support number, normal retract steps, owner-permitted override page number, required tools and power-isolation step on it. Keep a printed copy near the controls and an offline copy on your phone.
Inspect the system on the schedule and by the method in its own manual. The cited Level Up manual, for example, specifies its own fluid-level position, electrical-connection inspection and exposed-rod care.[2] HWH separately tells technicians to follow the service manual for the specific system.[3] Those are examples of manufacturer-specific instructions, not a schedule to copy onto unrelated equipment.
A stuck jack is a recovery problem, not a speed contest. Secure the RV, identify the exact system, use its exact manual and stop when the job crosses into unsupported lifting, pressurized-fluid work or an uncertain override.
Source note: This RVCamping.info decision workflow compares manufacturer documents to show why leveling-jack retraction and override procedures are system-specific. It does not replace the manuals for the RV, chassis, leveling system or towing equipment.
Sources
- Ground Control 3.0 LCD Installation and Owner's Manual — Lippert; electric-system applicability, safety limits, normal operation and motor override.
- Level Up LCD Travel Trailer Owner's Manual — Lippert; hydraulic-system applicability, high-pressure-fluid warning, support limits, maintenance and pump/valve override.
- Basic Hydraulics, Chapter 3 — HWH Corporation; service-support boundary and direction to use system-specific service procedures.
What's Your Reaction?