







A blown RV 12-volt fuse is a clue, not a bigger-fuse invitation
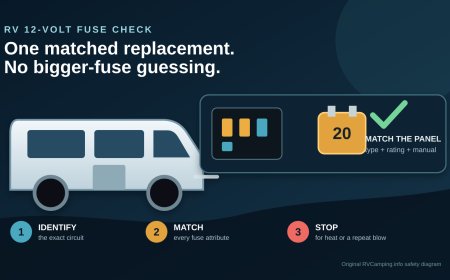
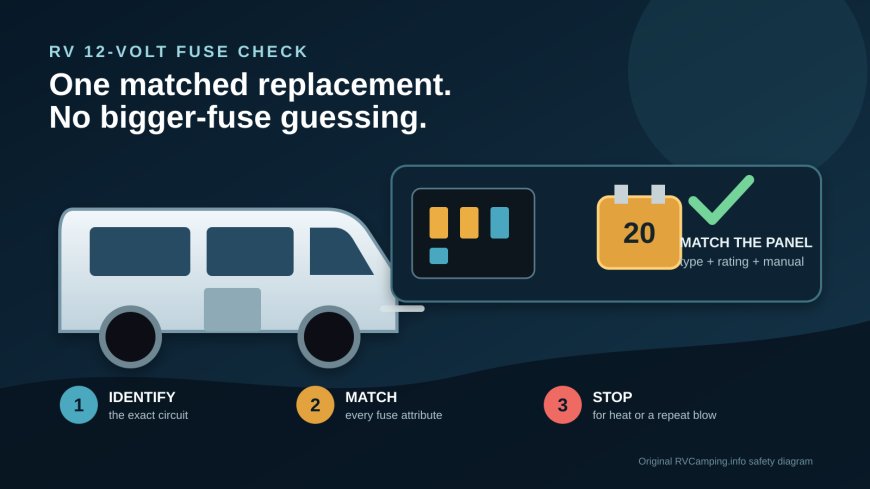
Identify the exact 12-volt circuit, match every documented fuse attribute, and stop when heat or a repeat failure points beyond a campsite repair.

A blown RV 12-volt fuse is a clue, not a bigger-fuse invitation
By Romana | October 14, 2026
A dark reading light or silent water pump can turn a campsite into a hunt for the fuse panel. Finding one burned blade fuse feels like the answer. It is only the first useful clue.
The fuse opened because current crossed the limit for that protected path. The cause might be a pinched wire, a wet connector, a failed motor, a loose terminal, a damaged appliance, or too much load on one branch. Replacing the fuse with a higher number does not give the appliance extra capacity. It removes part of the wiring's protection.
Winnebago's 2026 Solis manual says an overload or short will cause a fuse or breaker to shut down the affected 12-volt circuit. Its instruction is to turn off the affected loads and replace a fuse only with one of equal amperage; the panel label identifies the circuit and rating.[1] That is a good owner-level boundary for any RV: identify the exact system first, then follow the documentation for the coach and component in front of you.
This guide is about a small, accessible house 12-volt branch fuse whose manual permits owner replacement. It does not cover the chassis fuse box, a 120-volt breaker, a battery-mounted main fuse, an inverter fuse, a converter's internal service parts, or a fuse that requires removing live covers. Those jobs can carry different hazards and procedures.
First, prove which electrical system failed
An RV can contain chassis 12-volt DC, house 12-volt DC, and 120-volt AC equipment in the same few cabinets. A refrigerator control board may use 12-volt power even when its cooling source is propane or 120 volts. An inverter can produce 120 volts from the battery. Shore power can also feed a converter that keeps the 12-volt system energized.
Start with symptoms, not a spare fuse:
- Write down exactly what stopped working and what still works.
- Check whether the failed item has its own switch, local control, or documented reset.
- Read the panel directory and the RV manual. Do not assume a nearby fuse belongs to the dead appliance.
- If several unrelated 12-volt loads failed together, the problem may be upstream of one branch fuse.
- If a receptacle or household-style appliance failed, stop treating it as a blade-fuse problem until the manual identifies the circuit.
Winnebago lists house lights, the furnace fan, water pump, monitor panel, refrigerator controls and roof vent fans among the equipment supplied by the house 12-volt system on the cited Solis.[1] The list explains why a campground symptom can be misleading. The same appliance may have more than one power input, and another RV may be wired differently.
Read three identifiers before removing anything
The panel directory should give a circuit name and amp rating. The fuse body supplies two more checks: physical family and printed rating. You need agreement among all three.
A blade fuse that fits a slot is not automatically the correct fuse. Blade families differ in dimensions and electrical characteristics. Color can help identify a rating within a family, but dirt, fading, aftermarket parts, and poor lighting make color a bad final authority. Read the number molded or printed on the old fuse, the panel label, and the exact manual.
Photograph the panel before removal. Include the full directory, slot location and neighboring fuses. If the directory is missing, illegible, hand-corrected, or inconsistent with the installed fuse, stop. A previous owner may have moved a circuit or installed the wrong part. Do not preserve an undocumented mistake merely because it was already there.
Some fuses protect a component rather than an ordinary branch. WFCO's manual for the WF-9800-AD converter series, for example, specifies model-dependent quantities and ratings for reverse-battery-protection fuses. It tells owners to correct reversed battery connections and use the same fuse type and amperage as the original.[2] That is a component-specific repair, not permission to apply one WFCO value to another converter.
De-energize by the exact manual, not by habit
Switch the affected appliance off. Then use the RV and component manuals to isolate all sources that can energize that panel. Depending on the installation, those sources can include the house battery, shore power through a converter, a generator, solar charging, an inverter/charger, the tow vehicle, or the motorhome alternator.
A wall-mounted battery-disconnect switch is not proof that every conductor behind a panel is dead. Some safety devices, chargers or high-current paths may bypass it. Automatic systems can wake up after you think the coach is quiet.
Do not proceed if the panel is wet, hot, melted, scorched, buzzing, giving off an electrical odor, or surrounded by damaged wiring. Do not work while standing on wet ground. Remove metal jewelry and keep tools from bridging terminals. Winnebago warns owners to disconnect the power cord and turn off 12-volt equipment before battery-cable work, and to avoid sparks around batteries.[1] Fuse-panel isolation still has to follow the manuals for the actual RV.
If safe isolation cannot be confirmed with the approved procedure and suitable test equipment, leave the fuse in place and call a qualified RV electrical technician.
Inspect the old fuse and the slot as evidence
Use the puller specified for the panel. Grip the fuse body, not the wire or panel. Do not pry with a screwdriver near energized metal.
A visibly separated element supports a blown-fuse diagnosis, but a visual check is not conclusive. Likewise, a dark spot does not reveal the cause. If the manual allows an electrical continuity test, do it with the fuse removed and the circuit isolated. Never use a test method that places an ohmmeter across a live circuit.
Stop before replacement if you find:
- a melted, distorted or cracked fuse body;
- blackening, green corrosion, moisture or debris in the slot;
- a loose fuse that does not grip firmly;
- heat discoloration on the panel or adjacent conductors;
- an improvised jumper, foil, wrong-size fuse or nonstandard adapter;
- evidence that the fuse rating differs from the documented value.
Those findings point beyond a routine consumable part. Replacing the blade without repairing the holder, wiring or source of heat can hide a fault long enough to damage more of the coach.
Remove the load before the one controlled replacement
Unplug or switch off loads on the branch as the manuals permit. A pump circuit may need the pump switch off. A lighting branch may need every fixture off. Do not disconnect or dismantle an appliance beyond the documented owner procedure.
Install one new fuse that matches all required attributes: fuse family, amperage, voltage rating where specified, time-current characteristic where specified, and any manufacturer part requirement. "Same amps" is not enough when the component calls for a particular class or part. Never substitute wire, foil, a coin, a resettable breaker, or a larger fuse.
Seat the fuse squarely without forcing it. Refit the panel cover before restoring power. Keep hands and tools away from the panel while sources are reconnected in the manual's order.
Restore one load at a time
Power the circuit with its loads still off. Watch and smell from a safe position. If the new fuse opens immediately, if the panel heats, or if there is smoke, arcing or an electrical odor, shut down through the safe procedure if you can do so without approaching a hazard. Evacuate and call emergency services for smoke or fire. Otherwise, leave the system off for service.
If the fuse holds unloaded, turn on one documented load at a time. A fuse that opens when one device starts has narrowed the fault; it has not authorized another fuse. Do not repeat the test with a pile of spares. Repeated opening can coincide with wiring or equipment damage, and the fuse is doing its job.
A replacement that survives also does not prove the circuit is healthy. Check the panel after the short observation interval stated by the manual. The fuse and holder should not show new heat, odor, looseness or discoloration. If the original opening had no clear cause, arrange inspection before relying on the circuit during travel or unattended operation.
Build a useful service record
Record the date, RV make/model/year, panel location, slot label, documented fuse specification, failed loads, conditions when the fuse opened, inspection findings, replacement part, and result. Save photos of the directory and old fuse. Keep the old fuse in a labeled bag only if it is cool, clean and useful for diagnosis.
That note turns a "random" second failure into a pattern. It also keeps the next person from guessing at the slot. Add a small assortment of correctly documented spare fuses only after inventorying the RV's actual panels and component manuals. A generic variety pack is not a wiring diagram.
The practical rule is simple: one matched replacement can be a controlled diagnostic step when the manual allows it. A higher rating, repeated replacement, an uncertain panel or any sign of heat moves the job out of the campsite and into qualified service.
Source note: This RVCamping.info procedure uses an official 2026 Winnebago operator manual for house 12-volt circuit boundaries and a WFCO converter manual for an example of component-specific fuse requirements. Owners must use the current manuals and panel labels for their exact RV and installed equipment.
Sources
- 2026 Solis Operator Manual — Winnebago Industries, revision 2602260410; house 12-volt system, electrical cautions, fuse-panel labels, overload/short response and equal-amperage replacement rule.
- WF-9800-AD Series Converter-Charger Operator Manual — WFCO; model-specific reverse-polarity fuse types and ratings, cause correction and same-type/same-amperage replacement.
What's Your Reaction?