



















Your RV Spare Tire Is Not Ready Until You Can Mount It
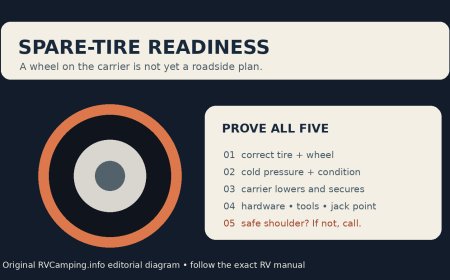
Audit the RV spare as a complete system: correct tire and wheel, cold pressure, age, carrier, hardware, tools, lifting limits, and roadside plan.

Your RV Spare Tire Is Not Ready Until You Can Mount It
By Romana
October 14, 2026
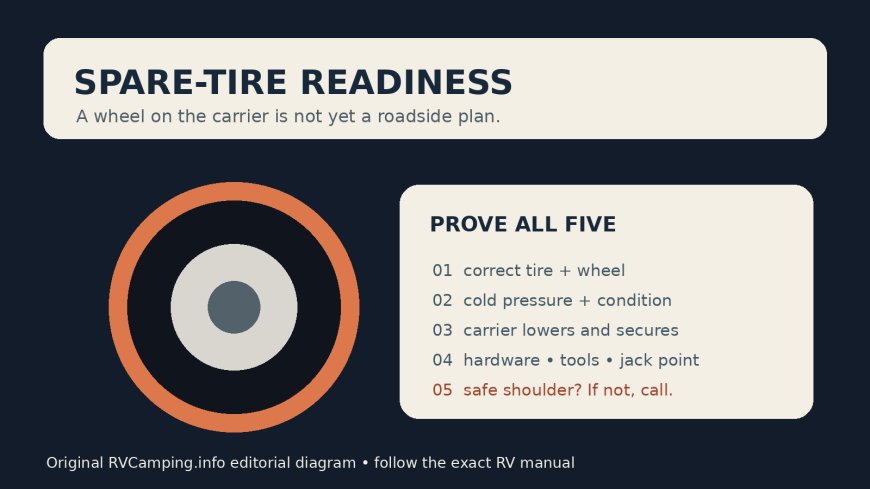
A spare tire can look reassuring while being useless at the roadside. It may be flat, aged out, the wrong size, trapped behind a seized carrier, paired with different lug nuts, or impossible to lower with the tools on board. Some RVs did not leave the factory with a spare at all. A useful pre-trip check has to cover the tire, wheel, carrier, hardware, tools, and safe-change limits as one system.
This is not a tire-changing tutorial. A loaded RV beside traffic, on soft ground, or on a slope can exceed what an owner can safely handle. The goal is to find the failure in a driveway or service bay, then decide whether you can change that exact wheel safely or need roadside assistance.
Start with the documents, not the sidewall alone
Find the RV certification label, tire-and-loading label, chassis or trailer manual, axle manual, and tire maker's guidance. Record the specified tire size, load range, wheel size, cold inflation requirement, wheel fastener type, torque specification, approved lifting point, and any restrictions on the spare.
Winnebago's 2026 towables manual notes that a spare tire and cover are not standard on every model. It also directs owners choosing a replacement to use the original size or another size the manufacturer recommends, using the tire information placard, manual, and tire sidewall as references. [1] That is a warning against assuming that whatever hangs on the rear bumper is correct.
Check the spare's wheel as carefully as its rubber. The center opening, bolt pattern, offset, load rating, diameter, and lug-seat shape must match the application. A wheel can appear close enough and still seat incorrectly or interfere with brakes or suspension. If the part numbers, markings, or fit are unclear, have the RV or chassis manufacturer, wheel supplier, or qualified tire shop identify it before travel.
Some motorhomes also use hardware that is specific to the spare. A Winnebago motorhome manual cited in the manufacturer's current operator-manual collection warns on one model that the spare uses different lug nuts and stores them in the supplied tool bag. [1] The lesson is model-specific: inventory the exact hardware your RV requires instead of borrowing a generic checklist.
Check cold pressure while the spare is still cold
The spare belongs in the same pressure routine as the road tires. Goodyear's RV tire guide says pressure should be checked when tires are cold and have not been driven more than one mile. It warns against bleeding air from a hot tire and recommends regular inspection of spare tires along with the tires in service. [2]
Use an accurate gauge that reaches the spare's valve without bending or loosening an extension. Compare the reading with the pressure specified for that spare and application. Do not copy a number from a different axle, a previous tire, or the sidewall maximum without checking the vehicle and tire instructions.
A low reading is evidence, not just a chore. Inflate to the correct cold specification, then look for the reason pressure was lost. Inspect the valve stem, valve core, rim, bead area, punctures, and signs that the tire has been run or stored underinflated. If pressure drops again, remove the spare from service and have it evaluated.
Add the result to a dated log. A spare hidden under a trailer can lose pressure for months without looking obviously flat. A quick reading before every trip is far cheaper than learning on the shoulder that it cannot carry the load.
Read the date code and inspect every surface
Find the Tire Identification Number on the sidewall and identify the date portion. You may need to look at the inward-facing side. Do not crawl beneath an unsupported RV to read it; lower the carrier safely or have a shop inspect it.
Age is not a tread-depth question. A spare can retain full tread while weather, heat, ozone, load, and storage have changed the casing. Goodyear advises regular inspection of the tread, both sidewalls, valves, caps, and extensions, looking for cuts, bulges, cracks, weathering, nails, and other damage. It also recommends professional inspection because internal or hidden damage may not be visible. [2]
Clean enough dirt away to see the rubber and wheel. Reject DIY optimism when you find a bulge, exposed cord, deep cut, cracked wheel, severe corrosion at the bead seat, damaged valve, or a history of running flat. Ask a tire professional about replacement when the tire's age or condition is uncertain. Do not create a universal retirement date from a blog post; follow the tire and vehicle manufacturers' current guidance for the exact product and service.
The spare cover deserves a look too. It should protect without hiding trapped water, abrasion, or a loose mounting point. A decorative cover is not maintenance.
Lower the carrier before you need it
A spare under the frame is only available if the hoist, cable, latch, crank interface, and access hole work. A rear-mounted spare is only available if the retention hardware can be removed with the carried tools.
Perform a controlled deployment test on level ground. Chock as the manual directs, keep clear of pinch points, and do not put any part of your body beneath a suspended tire. Use the supplied procedure to lower or remove the spare. Stop if the cable frays, the hoist binds, the bracket bends, the winch skips, or corrosion has weakened a load-bearing part.
Keystone's owner manual treats the spare, tire changing, wheel torque, and pre-trip maintenance as linked subjects, while also directing owners to component manuals for equipment-specific work. [3] That is the right way to think about the carrier. Its operating method and inspection limits come from the installed hardware, not a universal trick.
Once the spare is down, confirm that you can return it to its travel position and positively secure it. Mark the date of the test. A mechanism that moved two years ago has not passed today's inspection.
Never work under a carrier supported only by its cable. If inspection or lubrication requires access beneath the RV, use the support method and service points specified by the manufacturer or hire a shop.
Inventory the complete change kit
Set the tools on the ground beside the spare. A complete kit may include the manufacturer-specified jack, jack handle, wheel chocks, breaker bar or lug wrench, correct socket or sockets, torque wrench with adequate range, extensions, spare-specific lug nuts, wheel-cover tools, gloves, warning devices, and a light. The exact list depends on the RV.
Now test fit, without loosening road-wheel fasteners:
- Does the socket fully seat on every exposed fastener?
- Can the extension reach through wheel covers or deep dishes?
- Does the jack handle assemble and operate?
- Is the torque wrench's range suitable for the specified torque?
- Are spare-specific lug nuts labeled and complete?
- Can you access the approved lifting point without lying in traffic?
- Is the spare too heavy for the travelers to control safely?
Do not use stabilizer jacks as lifting jacks. Keystone expressly bars lifting the unit with stabilizing equipment. [3] Stabilizers are designed to limit movement at camp, not raise a loaded trailer for wheel removal.
Also check the roadside-assistance plan. Save the membership number, tire size, RV dimensions, weight class, and location-sharing method offline. Ask whether the service can handle a motorhome, dual rear wheel, travel trailer, or fifth wheel of your size. “Tire service included” may not mean the provider carries a replacement tire or has equipment for a heavy RV.
Decide whether a roadside change is within your limit
A correct spare and complete kit do not make every shoulder safe. Move as far from traffic as possible without entering soft ground that cannot support the RV or jack. Turn on hazard lights and follow local emergency rules. If the RV is leaning, the surface is loose, visibility is poor, traffic is close, weather is severe, or you cannot identify a manufacturer-approved lifting point, call for professional help.
Passengers and pets need a plan too. The safest waiting location depends on the road, barriers, traffic, fire risk, and instructions from authorities. Do not have someone stand beside the wheel to “watch.”
If a professional installs the spare, give them the vehicle-specific lifting and torque information. Afterward, follow the RV or wheel manufacturer's recheck schedule. Do not invent a torque number or sequence from a similar trailer.
Treat a temporary spare as temporary
A spare may differ from the road tires by design. The owner's manual may impose a speed, distance, axle-position, or load restriction, or may require prompt replacement with a matching tire. NHTSA language reproduced in Winnebago's towable manual says a full-size spare should not replace a worn tire except in an emergency. [1]
After installation, check clearances before moving. Confirm the tire does not contact bodywork, suspension, brake parts, or plumbing. Drive only within the documented restrictions, stop if the RV pulls, vibrates, smells hot, or handles differently, and arrange proper repair.
The flat tire and failed parts must also be secured. A loose wheel inside an RV becomes dangerous cargo. Use a mounting point or restraint rated for its weight.
A 15-minute departure audit
Run this check before a long trip and after storage:
- Confirm that the RV is supposed to have a spare and identify the exact tire, wheel, and hardware requirements.
- Measure cold pressure and record it.
- Read the date code and inspect tread, both sidewalls, valve, wheel, and fasteners.
- Lower or remove the spare using the installed carrier's procedure.
- Inspect the carrier, cable, bracket, latch, and attachment points.
- Test-fit sockets, extensions, jack handle, and wheel-cover tools.
- Confirm the approved lifting point and wheel-fastener torque in the current manual.
- Put spare-specific hardware in a labeled container.
- Save the roadside-assistance number and RV data offline.
- Re-secure the spare and verify it cannot move.
A problem in any one of those steps means the spare system is not ready. Fix it before departure or travel with a professional plan that accounts for the missing capability.
When to hand the job to a shop
Use a qualified tire or RV service shop when the wheel fit is uncertain, the spare has age or damage concerns, the carrier is corroded or jammed, the jack point cannot be identified, fasteners are damaged, or the RV's weight exceeds the available equipment. A shop can also verify that a replacement tire's size, load capability, speed rating, and wheel compatibility meet the manufacturer requirements.
The best outcome of this inspection is boring: the spare comes down, holds the correct cold pressure, fits the RV, and goes back up with every needed tool accounted for. The second-best outcome is finding out in the driveway that it does not.
Sources
What's Your Reaction?