










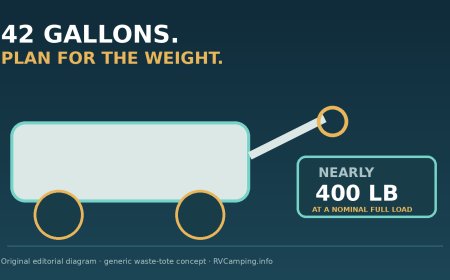

Barker 30844 review: 42 gallons means nearly 400 pounds
Research-based Barker 30844 review covering loaded weight, outlet clearance, towing limits, setup, inspection and sanitation.

The Barker 30844 is a good fit for RV campers who stay at sites without sewer hookups, have a holding tank near 40 gallons, and can tow a waste tote slowly to a nearby dump station. Its four pneumatic wheels and side-mounted 3-inch dump valve solve the worst part of using a big tote: moving and emptying it without lifting the full tank.[1][2]
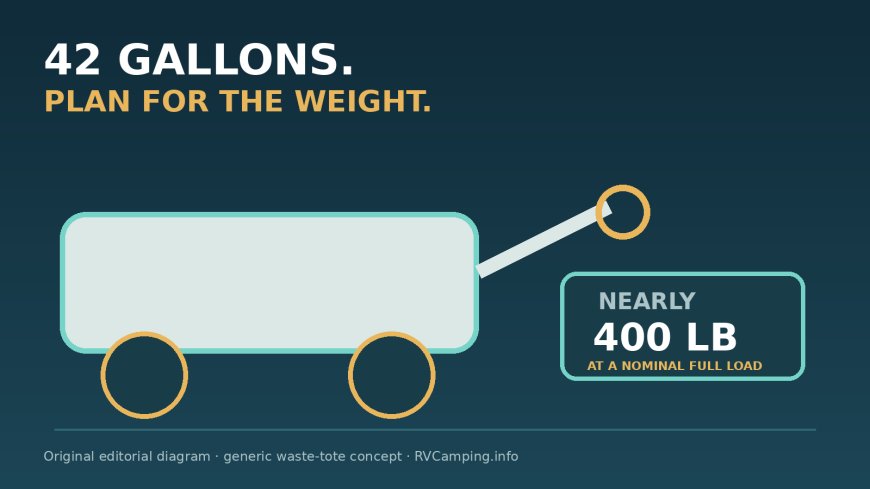
Skip it if the RV outlet sits too low to drain into a 14-inch-high tote, the route includes steep grades or rough ground, there is no safe place to store a 45-by-24-inch tank, or a full load would be difficult to control. A 42-gallon water-equivalent load weighs about 350 pounds before the tote itself. Using Amazon's current 47-pound empty-weight figure, a completely full unit approaches 397 pounds.[3]
That is the central tradeoff. The 30844 can reduce dump-station trips, but every gallon makes the tote harder to stop, turn and recover if a wheel or fitting fails. Four wheels remove the need to lift the tank for dumping. They do not make nearly 400 pounds light.
This is a research-based review. RVCamping.info did not purchase, fill, tow or physically test the Barker 30844. The verdict is based on Barker's current product page and instructions, the exact Amazon listing, current marketplace owner reports and public campground sanitation rules.[1][2][3]
As an Amazon Associate, RVCamping.info earns from qualifying purchases. If you buy through an Amazon link in this article, we may earn a commission at no additional cost to you.
Check the Barker 30844 listing on Amazon. Confirm ASIN B000OR18BE, model 30844 and the 42-gallon size before ordering.[3]
The exact model reviewed
This review covers the Barker 42-gallon 4-Wheel Pneumatic Tote-Along, part number 30844. The verified Amazon listing is ASIN B000OR18BE and identifies both the model and manufacturer part number as 30844.[2][3]
Barker lists four capacities in the 4-Wheel family. The 42-gallon version is the largest, with published body dimensions of 14 by 24 by 45 inches when the handle is removed and the front wheels are turned 90 degrees.[1] Amazon lists the same 45-by-24-by-14-inch dimensions and an empty weight of 47 pounds.[3]
Do not transfer the 30844 verdict to the 32-gallon 27844 or the smaller models. Capacity changes the weight, body height, storage fit and number of trips. It can also decide whether gravity will move waste from the RV outlet into the tote.
The current Barker page describes pneumatic wheels on the 25-, 32- and 42-gallon models: 10-inch rear tires at 50 psi and 6-inch front tires at 30 psi, with axle bearings and grease fittings.[1] Older photos or used units may show different wheels, so inspect the exact item rather than relying on a family name.
Who should buy it
The best buyer has a roughly 35- to 42-gallon gray or black tank, camps for several days without a sewer connection, and can reach an approved dump station over a short, slow, mostly level campground route. Matching tote capacity to the RV tank can turn a partial dump into one controlled trip.
The four-wheel layout matters at this size. Barker uses two large rear wheels and a swiveling pair at the front, plus a tow handle that fits over a hitch ball.[1][2] The side waste valve lets the tank drain without standing it on end.[1] That arrangement is more practical than a two-wheel tote when the load is hundreds of pounds.
Owner reports support the basic mobility case, but they also show why setup checks matter. One verified Walmart purchaser said the pneumatic tires rolled smoothly behind a truck. Other verified buyers described the tank as solid and heavy-duty.[5] Amazon's displayed review excerpts likewise include reports of easy towing on grass and dirt, along with praise for the side drain.[3]
Those are individual experiences, not a promise that every campsite route will be easy. A smooth paved loop is different from wet grass, loose gravel, potholes or a downhill turn.
The 30844 also makes sense for campers who value repairable hardware. Barker's instructions identify separate wheel, axle, valve, gasket, cap, hose and gauge parts rather than treating the tank as one sealed assembly.[2] That does not guarantee every repair is economical, but it gives an owner a better starting point when a wear item needs attention.
Who should skip it
Low-clearance RVs are the first poor match. The tote body is 14 inches high.[1][3] The RV waste outlet must sit high enough for the hose to slope into the top inlet without a belly that traps liquid. Amazon review excerpts specifically warn buyers to check outlet height, and another excerpt says the large tote works less well with campers that sit low.[3]
Measure before ordering. Put the RV on its normal campsite stance, including leveling blocks if used, then measure from the ground to the bottom of the waste outlet. Account for the height of the tote inlet, the hose fitting and the slope needed across the actual distance. If the hose would run uphill, capacity is irrelevant because gravity will not cooperate.
Skip the 42-gallon model if storage is already tight. Barker's dimensions assume the handle is removed and the front wheels are turned for storage.[1] The dirty exterior also needs a segregated location away from food, drinking-water equipment and living-space textiles. A rear bumper or ladder should not carry it unless that structure and the mount are rated for the load and the RV maker allows it.
It is also the wrong choice when no suitable towing route exists. Barker caps towing speed at 5 mph, which it equates to walking speed.[2] That rules out public-road travel and any campground run where normal traffic cannot safely pass a very slow load. The manufacturer warning is clear that excess speed can damage the tank or wheels and is not covered by warranty.[2]
A smaller tote may be safer for people who will move it by hand, cross a slope or negotiate tight turns. More trips are inconvenient, but a 20-gallon water-equivalent load is about 167 pounds lighter than a 40-gallon load before considering tote weight. Capacity should be chosen around the route and the person controlling it, not only the RV tank label.
The weight calculation buyers should do
Water weighs about 8.34 pounds per U.S. gallon. Wastewater varies with its contents, but water is a useful planning baseline. At that baseline:
- 42 gallons of liquid weighs about 350.3 pounds.
- Add Amazon's 47-pound listed empty weight and the total reaches about 397.3 pounds.[3]
- Even 40 gallons plus the tote is about 380.6 pounds.
These are planning estimates, not a certified gross-weight rating. Barker's current product page and 30844 instruction sheet do not publish a maximum loaded weight.[1][2] The honest conclusion is not that 397 pounds is approved. It is that a nominal full load is extremely heavy and should be treated with care.
Capacity matching needs headroom. An RV tank monitor is rarely a laboratory measuring device, the tote's bobber is a simple full indicator, and a hose still contains liquid when valves close. Do not plan to transfer an exact 42.0 gallons into a nominal 42-gallon tote. Stop before the bobber reaches full, close the RV valve, let the hose drain, and confirm the tote cap and side valve before moving it.[2]
For black water, a partial transfer that leaves uncertain volume in the RV tank creates a harder judgment call than gray water. If the tote cannot accept the entire expected load with margin, make two controlled trips rather than gambling on the last few gallons.
Check fit, route and storage before ordering
A useful pre-purchase check takes ten minutes:
- Read the RV's holding-tank capacities. Verify which tank fills first in your normal camping pattern.
- Measure the waste-outlet height with the RV leveled as it will be at camp.
- Mark a 45-by-24-inch rectangle in the intended storage area and allow room for the 14-inch height, caps, wheels and securing straps.[1]
- Walk the exact campsite-to-dump-station route. Look for grades, sharp turns, speed bumps, drainage channels, loose gravel and pedestrian traffic.
- Ask the campground whether portable waste totes are permitted and where they may be filled, towed, rinsed and stored. Rules vary. At Big Meadows, for example, the National Park Service directs RV sewage and wastewater to the campground dump station.[6]
- Confirm that the towing vehicle has a suitable hitch ball and can crawl at or below Barker's 5-mph limit without unsafe traffic conflict.[2]
- Decide where the contaminated hose, caps and gloves will live separately from potable-water gear.
The route deserves more attention than the product listing. A full tote follows gravity. If the dump station is downhill from the site, the driver must control the load on the way there. If the site is downhill, the tow vehicle must pull the load back uphill after filling. Neither case should be improvised after the tank is already full.
Setup and first-use inspection
Barker says the tank arrives with a tow handle, handle pin, caps, filler hose, bobber gauge, two bayonet adapters, clamps and a 5-foot sewer hose.[1][2] The instructions show that some assembly remains, including fitting the hose to its adapters and installing the tow handle.[2]
Before introducing waste:
- Inventory every part against the instruction sheet. A current verified Walmart review reported missing tow-bar hardware, so do not assume the box is complete.[5]
- Inspect the tank shell, threaded inserts, axle mounts and valve flange for cracks, distortion or damp-looking seams.
- Check both 3-inch caps, their straps, the garden-hose cap, valve seals and hose clamps.
- Verify that the rear wheels, front swivel assembly and tow-handle pin are secure. Spin each wheel and look for side play.
- Set the pneumatic tires to Barker's current published pressures: 50 psi for the 10-inch rear tires and 30 psi for the 6-inch front tires.[1] Barker tells owners to use a bicycle pump because an air compressor can overinflate and damage the tubes.[2]
- Fill the tote with clean water only for the first leak and movement test. Check the valve, cap threads, axle mounts and tank seams before the product becomes contaminated.
- Tow the clean-water test load at walking speed on the actual route, starting well below full capacity.
The clean-water test matters because marketplace reports include isolated failures. Walmart reviewers reported a leaking valve stem, a broken axle, holes near an axle area and tires that failed.[5] Amazon excerpts include rear-wheel and rear-axle-mount complaints.[3] These anecdotes do not establish a universal defect rate, but they justify inspecting the running gear before every loaded trip.
A controlled filling and dumping sequence
Wear disposable gloves, keep the work area clear, and follow campground instructions. Use only a designated dump station or other authorized sanitary connection. Public campground rules can be specific about where sewage and wastewater may go.[6]
For filling:
- Park the tote on firm, level ground below the RV outlet. Chock it if there is any chance it can roll.
- Confirm the side gate valve is fully closed and capped.[2]
- Install the bobber gauge as Barker directs, attach the 5-foot sewer hose between the RV outlet and the tote's top inlet, and lock every bayonet connection.[2]
- Open the RV valve slowly. Stay beside the setup. Do not walk away while waste is moving.
- Watch the bobber and the tank shape. Stop early if the tank swells, a connection drips or the gauge response is uncertain.
- Close the RV valve first. Let the hose drain into the tote, then disconnect the hose from both the RV and tote. Barker specifically warns not to tow with the sewer hose attached.[2]
- Cap the top opening, verify the side valve and cap again, secure the gauge or vent opening, and inspect the tow-handle pin.
For transport, keep the load at walking speed and avoid abrupt starts, stops and turns.[2] No person should ride on the tote or stand in its path. If a tire loses pressure or a wheel shifts, stop without trying to drag the tank farther.
At the dump station, connect the sewer hose from the tote's side outlet to the station inlet before opening anything. Barker instructs the user to remove the garden-hose cap or bobber gauge for ventilation, then open the side gate valve.[2] Control the hose, open the valve gradually and watch every connection until flow stops.
Use the dump station's designated nonpotable rinse supply only as allowed. Never connect a contaminated rinse hose to the RV's fresh-water system. After rinsing, close the valve, replace both 3-inch caps and return the accessories to their separate storage container.[2]
Maintenance and storage
Before each trip, check tire pressure, wheel retention, the swivel plate, tow-handle pin, valve movement, cap straps, hose condition and gasket seating. Grease the wheel fittings according to Barker's hardware design and service guidance.[1] Replace a cracked hose or questionable seal before it carries waste.
Do not depend on the bobber as the only spill prevention. Confirm that it moves freely during the clean-water test, then remain present while filling. Amazon review excerpts include complaints about poor venting and float behavior.[3] A gauge can help, but attention and unused capacity are the stronger safeguards.
Rinse the tote only where permitted. Drain it as completely as the station layout allows, then store it clean, dry and secured against movement. Keep caps and valves positioned according to Barker's instructions for transport.[2] Protect pneumatic tires from long-term sun exposure and check pressure after storage.
A tote that has carried black water should be treated as sanitation equipment even after rinsing. Store it and its hose away from fresh-water hoses, filters, cooking equipment and food. Labeling the storage bin prevents an unpleasant mix-up months later.
Verdict
The Barker 30844 earns its place when one large tote trip is safer and easier than moving the entire RV to a dump station. The pneumatic wheels, swiveling front assembly, hitch-ball tow handle and side 3-inch valve are sensible features for a 42-gallon tank.[1][2]
Its size is also the reason to hesitate. The body is 14 inches high and 45 inches long, the empty unit is listed at 47 pounds, and a nominal water-equivalent full load approaches 397 pounds.[1][3] That demands a measured outlet fit, a slow and level route, careful running-gear inspection and enough storage space to keep contaminated equipment separate.
Buy model 30844 when the RV outlet clears the tote, the tank capacities match with margin, the dump station is close, and walking-speed towing is practical. Choose a smaller tote or a different dumping plan when any one of those conditions fails.
Sources
What's Your Reaction?