









How to pre-cool and load an RV refrigerator before a trip
Use an appliance thermometer, model-specific level limits and an airflow-first loading plan to prepare an RV refrigerator without guessing a universal pre-cool time.

How to pre-cool and load an RV refrigerator before a trip
By Romana
Category: Cooking
An RV refrigerator is not ready because the light comes on or the cooling fins feel cold. It is ready when an appliance thermometer shows that the food compartment is holding 40°F or below. That measured temperature, not a guessed number of pre-cooling hours, is the safe loading gate.[1]
The short answer: Start the refrigerator early enough to follow its own manual, keep the RV within that model's leveling limits, and wait for a refrigerator thermometer to confirm 40°F or below. Load already-chilled food in one quick session, leave paths for cold air, then verify the temperature again before departure.[1][3][4]
If the refrigerator cannot stay at 40°F or below, stop adding perishables. Move them to a properly iced cooler that is also verified at 40°F or below, troubleshoot the appliance, and use time-and-temperature history rather than smell to decide what to keep.[1][2]

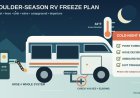
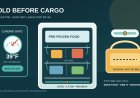
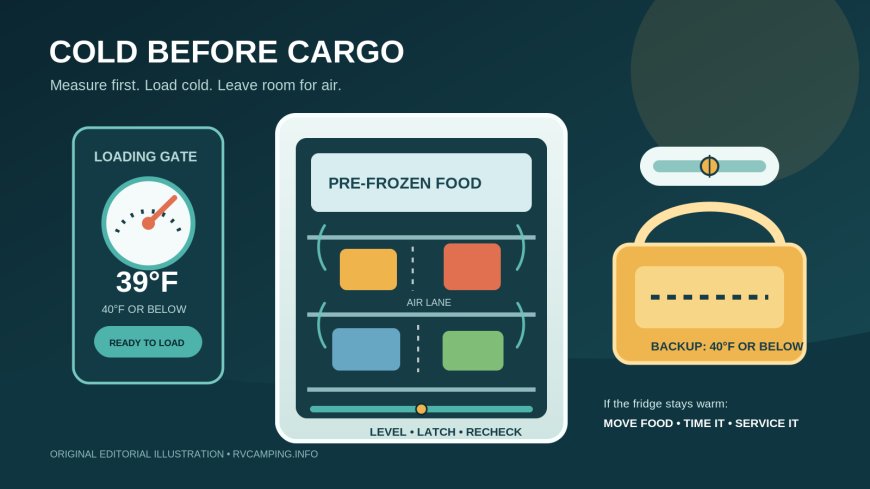
The loading gate is a measured 40°F or below, with room for air to move. Original illustration by RVCamping.info.
There is no universal pre-cool time
RV refrigerator manuals do not give one interchangeable answer. A Norcold N8DCX/N10DCX compressor-refrigerator manual says to let those models cool for eight hours before loading. A Dometic DMC4081/DMC4101 compressor manual recommends 24 hours. An older Dometic RM2453/RM2553 absorption manual says the cooling unit may need up to four hours to become fully operational on its first start, which is not the same as saying food can safely be loaded after four hours.[3][4][5]
Those examples are useful precisely because they disagree. Appliance size, installation, ambient heat, starting temperature, power supply, control mode and model design can all change the result.[4][5] Do not borrow a neighbor's schedule or turn any of those model-specific numbers into a rule for every RV.
Use two gates instead:
- Manual gate: Find the exact model number and follow its current operating instructions, including startup mode, power requirements and leveling limits.
- Temperature gate: Place an appliance thermometer in the food compartment and wait until it reads 40°F or below. FDA recommends an appliance thermometer because a refrigerator control usually does not show the actual food-compartment temperature.[1]
Starting the refrigerator the day before departure may be convenient, but it is not a safety standard. If your manual calls for a different procedure, follow the manual. If the thermometer is still above 40°F, the refrigerator is not ready for perishable food even though the suggested time has elapsed.[1]
Identify absorption or compressor before using level advice
The model number matters more than the door badge. The cited manuals direct owners to the refrigerator's identification or serial label, so use that label to retrieve the instructions for the exact model.[3][4][5]
Dometic's RM2453/RM2553 manual describes an absorption system in which ammonia moves through sloped tubing by gravity. It warns that operating while parked and out of level can allow liquid ammonia to collect, slow circulation and, in severe cases, stop cooling. For those models, Dometic says a vehicle parked for several hours with the refrigerator running must be leveled. The same manual says leveling is not critical while the vehicle is moving because its motion prevents accumulation.[3]
That moving-vehicle statement belongs to those cited models. It does not settle whether you may run another refrigerator, especially an LP-gas appliance, while driving or at fuel stations. Follow the exact refrigerator and RV manuals, plus applicable laws and tunnel, ferry and fueling restrictions.
A compressor refrigerator has different operating machinery, but "compressor" does not mean "ignore level." Norcold's N8DCX/N10DCX manual allows those specific units to operate within 10 degrees off level in all directions and still tells owners to level the vehicle before operation. It warns that exceeding the limit can damage the cooling system, increase noise and hurt cooling performance.[5] Dometic's DMC4081/DMC4101 manual also calls for level installation so the doors close and seal correctly.[4]
The practical rule is simple: level to the strictest limit in your own refrigerator and RV documentation. Do not apply an absorption threshold to a compressor model, or a compressor allowance to an absorption model.
Pre-cool with an empty, closed cabinet
Before switching on the refrigerator:
- Remove old food and wipe up spills.
- Confirm the interior vents and exterior intake and exhaust openings are not blocked.
- Check the door gasket for debris, gaps or a package that could prevent closure.
- Level the RV within the model's limits.
- Verify the required energy source is available. For a DC compressor refrigerator, that includes adequate battery voltage and wiring; for a multi-energy absorption model, use only a mode permitted by its manual and the situation.
- Put an appliance thermometer in a location you can read without unloading a shelf.
- Turn the refrigerator on, select the manual's recommended startup setting and close the door.
Do not try to make the empty cabinet cool faster by repeatedly opening it; both cited compressor manuals advise limiting door-open time or identify frequent opening as a cooling problem.[4][5] Read the thermometer quickly, then give the refrigerator time to recover. If the appliance has a display, treat that as a control or sensor reading unless the manual explicitly says it is the food-compartment temperature.
A cup of water is sometimes suggested as a homemade test load, but it does not replace the appliance thermometer or the manual. The decision point remains whether the compartment is maintaining 40°F or below.[1]
Chill groceries somewhere else first
An RV refrigerator is better at holding cold food than absorbing the heat from a trip's worth of room-temperature groceries all at once. The Dometic DMC manual says not to put hot food inside and identifies a large new load and warm food as reasons cooling may lag. Norcold gives similar model-specific advice for its N8DCX/N10DCX units: let hot food cool before loading and let air move freely through both compartments.[4][5]
Prepare the load in a house refrigerator or a verified food cooler:
- Chill meat, dairy, eggs, prepared meals and cut produce to 40°F or below before transfer.[1]
- Freeze items that are meant to travel frozen. Do not expect a small freezer compartment to quick-freeze a warm package unless its manual says it can.
- Group food by shelf or meal before opening the RV refrigerator.
- Put drinks in a separate cooler when space is tight or the door will be opened often.
- Use covered, leak-resistant containers. Keep raw meat, poultry and seafood contained below ready-to-eat food so a leak cannot drip onto lunch.
Move the food in insulated totes or a cooler, especially if the RV is parked in sun or the walk from the house is long. FDA's limit for perishables outside refrigeration is two hours, shortened to one hour when the air temperature is above 90°F.[1] Loading time counts toward that limit.
Load once, with air lanes
Cold air needs somewhere to go. FDA says not to overpack a refrigerator because air must circulate around food to keep it properly chilled.[1] The Dometic DMC and Norcold DC manuals make the same airflow point for their models.[4][5]
Use this loading sequence:
- Check before opening. Confirm 40°F or below and note the time.
- Load the coldest, most perishable food first. Put it in the part of the cabinet recommended by the manual, not automatically against a cooling fin.
- Leave gaps. Keep space between packages and do not press food against interior air vents.
- Do not paper over shelves. Solid liners, foil or tightly packed bins can interrupt designed airflow. Use only shelf accessories the manufacturer permits.
- Protect the door seal. Nothing should protrude far enough to catch the door. Latch it for travel if the model has a travel latch.
- Close and wait. Give the refrigerator a recovery period with the door shut, then read the appliance thermometer again.
Do not load warm cans merely to fill empty space. A warm bulk load asks the cooling system to remove all that heat at departure time, and Dometic lists a large newly added load among the reasons its DMC refrigerator may not cool enough.[4]
Make a departure temperature record
A two-line note is more useful than trying to remember how the refrigerator felt:
- Before loading: 36°F at 7:10 a.m.
- After loading and recovery: 39°F at 8:00 a.m.
Record the compartment temperature and time just before leaving. If practical, check one representative chilled package with a clean food thermometer during transfer. Do not puncture sealed food; place the probe between two cold packages or follow the thermometer maker's instructions. The appliance thermometer is still the ongoing cabinet check.
A reading above 40°F immediately after the door was open does not, by itself, reveal how warm each food became or for how long. Close the door, allow recovery and keep the food's transfer history. If you cannot establish how long perishable food has been above 40°F, FDA advises discarding it rather than relying on appearance, smell or taste.[1]
If it will not hold 40°F
Treat a warm refrigerator as a food-storage problem first and an appliance problem second.
- Stop loading. Do not add another warm case of drinks or a pot of food.
- Protect the food. Move perishables to a cooler with ice or frozen gel packs and confirm the cooler is holding 40°F or below with a thermometer.[1]
- Keep a clock. FDA says perishable food that has been above 40°F for two hours or more should be discarded.[2] If the duration is unknown, discard it.[1]
- Check the simple causes. Confirm the refrigerator is on, the selected mode is appropriate, power or fuel is available, the door is fully sealed, interior air paths are open and exterior vents are unobstructed.
- Correct level only within safe setup procedures. If a parked absorption refrigerator is outside its manual's limit, turn it off as directed, level the RV and follow the manual's restart instructions. Do not assume leveling instantly repairs a cooling unit that has stopped circulating.[3]
- Reduce the heat load. Remove warm drinks, keep the door closed and shade or cool the RV interior where practical without blocking refrigerator ventilation.
- Call for service when the manual's checks do not restore cooling. Gas, refrigerant-circuit and electrical repairs belong to qualified technicians.
During a power outage, FDA says an unopened refrigerator can keep food cold for about four hours. That is an estimate based on keeping the door shut, not permission to keep food that is known to have been above 40°F for two hours or more.[2] Check the thermometer and the timeline.
Do not move questionable food into a cold cooler and reset the clock. Cooling it again does not erase the warm period.
A pre-trip checklist worth taping inside the pantry
- Find the exact refrigerator model and manual.
- Level the RV within that model's operating limits.
- Clear interior air paths and exterior vents.
- Start the refrigerator according to the manual.
- Wait for a measured 40°F or below; do not rely on elapsed time alone.
- Pre-chill or pre-freeze food elsewhere.
- Load in one short session with gaps around packages.
- Latch the door and verify 40°F or below again after recovery.
- Carry a thermometer-equipped cooler as the backup cold-storage plan.
- If temperature control fails, protect food first, document the timeline and arrange service.
The best departure test is boring: a stable thermometer reading, a door that seals and food that went in cold. If one of those is missing, delay the load rather than asking the refrigerator to catch up on the road.
Evidence note: Food-temperature, time-limit and discard guidance comes from FDA consumer food-safety pages.[1][2]
Pre-cooling times, leveling limits, cooling-system descriptions and troubleshooting details are attributed only to the named refrigerator manuals and are not presented as universal specifications.[3][4][5]
RVCamping.info created the loading sequence, temperature log and pantry checklist as practical editorial tools; they are not manufacturer procedures.
Sources
- Refrigerator Thermometers: Cold Facts about Food Safety — FDA — Food-compartment temperature, appliance thermometers, airflow and time limits; accessed September 17, 2026.
- Power Outages: Key Tips for Consumers About Food Safety — FDA — Outage duration and discard guidance; accessed September 17, 2026.
- RM2453/RM2553 Installation and Operating Instructions — Dometic — Absorption-system operation and model-specific leveling cautions; accessed September 17, 2026.
- DMC4081/DMC4101 Installation and Operation Manual — Dometic — Compressor-model pre-cooling, airflow, loading and troubleshooting instructions; accessed September 17, 2026.
- N8DCX/N10DCX Owner’s Manual — Norcold — Compressor-model pre-cooling, airflow and model-specific off-level limit; accessed September 17, 2026.
What's Your Reaction?