










Before you plug in: inspect the RV shore-power cord for heat damage
Inspect a disconnected RV shore-power cord and plug for heat damage, loose contacts, moisture, jacket damage and other stop-use signs before connecting.


Before you plug in: inspect the RV shore-power cord for heat damage
By Romana
Category: Tips and Trends
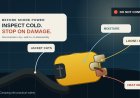
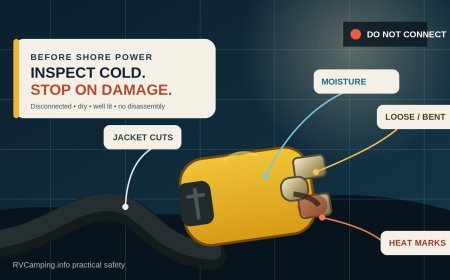
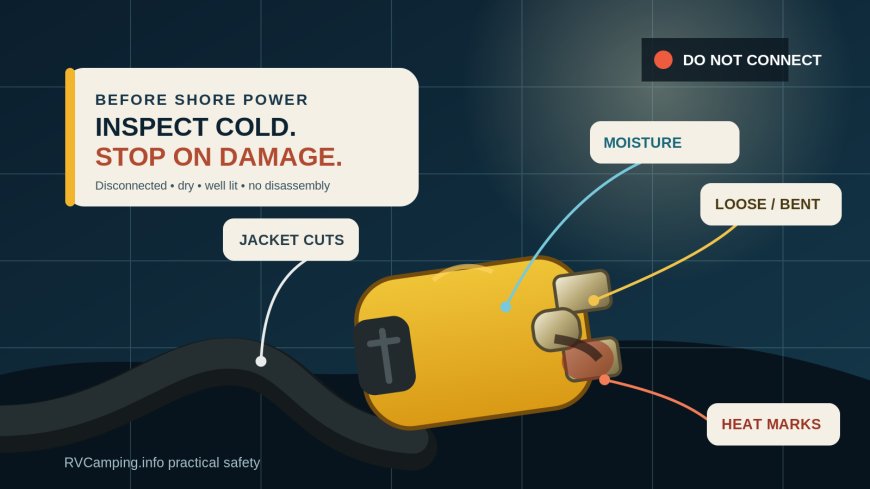
A shore-power cord can look serviceable from six feet away and still be telling you to stop. The useful clues are close to the connection points: a brown halo around one blade, plastic that has gone glossy or soft, a connector that no longer feels solid, green corrosion, or dampness where the contacts should be clean and dry.[1][5]
Make this check while the cord is disconnected at both ends. It takes a few minutes and requires no meter, no disassembly and no electrical diagnosis. If anything looks burned, loose, wet inside or mechanically damaged, do not connect it.[1][2][5] Tag the cord so nobody else tries it, and have the cord, matching inlet or receptacle, and any adapter or portable power protector evaluated by qualified RV or electrical service.
The short answer
Before connecting, identify the exact cord, RV inlet and any inline power-protection device, then follow their manuals. With all ends de-energized and disconnected, inspect the plug blades or pins, molded bodies, strain reliefs, cable jacket and the detachable RV-side connector. Look for discoloration, pitting, melting, cracks, exposed conductor, crushed areas, corrosion, contamination and trapped moisture. The parts should be straight, intact and firm, with no loose blade, separating plug body or damaged weather seal.
Stop for heat damage, a burned odor, missing or bent contacts, exposed wire, evidence of water inside a connector, or any part that moves when it should be fixed. A connection that previously ran hot, buzzed, crackled, smoked, flickered, tripped repeatedly or displayed an overheat fault also stays out of service until the cause is found. A new cord end alone may not solve damage in the mating pedestal receptacle or RV inlet.
Start with the manual, not a generic hookup sequence
RV connections vary. A cord may be permanently attached, detachable with a threaded locking ring, or paired with a straight-in latching connector. A portable electrical management system can add another plug-and-receptacle pair. The coach maker may specify which breakers or loads to switch off and the order in which to connect the RV side and pedestal side.
Jayco, for example, tells owners of the models covered by its 2024 towable manual to switch off the RV's main 120-volt breaker and the external-source breaker, fully seat the RV connector, and secure its locking mechanism by hand without overtightening.[1] Tiffin's 2026 Open Trail instructions call for its main breaker and the breaker at the plug end to be off before connection, and for covers and compartment doors to keep the equipment clean and dry.[4] Those are examples, not a universal sequence. Your RV, cord reel, inlet and power-protection manuals control.
This article stays on the owner-visible side of the system. Do not remove a plug shell, inlet face, pedestal cover or electrical panel to hunt for a loose terminal. Do not tighten conductors, sand damaged contacts or splice a shore cord unless the exact manufacturer documentation assigns that procedure to the owner and you have the required qualifications. Heat damage can continue beyond the part you can see.
Inspect both ends while everything is disconnected
Set the cord on a dry surface in good light. If it has just been used, let it cool before deciding what you are seeing or feeling.
1. Read the metal contacts
Look at every blade, pin and socket. They should match the shape shown in the equipment manual. Stop if one is:
- bent, missing, recessed or visibly out of alignment;
- loose in the plug body;
- blackened, browned, blued or otherwise heat-discolored;
- pitted, eroded, rough or scorched;
- coated with green, white or heavy dark corrosion;
- contaminated with mud, grit, grease or an unknown deposit.
Do not bend a contact back and assume it is restored. Tiffin specifically tells Open Trail owners to check that the male plug pins are correctly oriented and not bent or damaged.[4] SmartPlug's maintenance guidance likewise calls for inspecting its inlet and connector for cracks, discoloration and corrosion-free contacts.[5] The correct remedy depends on the exact connector; visible deformation or heat damage deserves manufacturer-approved replacement or qualified service.
2. Check the plug body and strain relief
Examine the plastic or rubber where each contact enters the body and where the cable enters the plug. Compare all sides. Heat often leaves an uneven clue near one current-carrying contact rather than changing the whole plug uniformly.
Reject the cord for melted, bubbled, warped, charred or unusually glossy material. Cracks, a body pulling apart, a gap that has opened around the cable, or exposed inner insulation are also stop-use conditions. Gently support the disconnected plug and cord; the molded body, contacts and strain relief should not shift independently. Do not perform a live wiggle test.
3. Walk the full cable jacket
Run your eyes and hands along the entire disconnected cable without sharply flexing it. For the models covered by its manual, Jayco directs owners to replace a cord immediately when its insulation is cut, cracked or worn.[1]
Look for:
- cuts, splits, abrasion or teeth marks;
- flattened, crushed, pinched or kinked sections;
- bulges, soft melted areas or hard, brittle patches;
- exposed inner insulation, shielding or conductor;
- a repair made with tape, an unknown splice or a replacement end with no documentation;
- damage where a slide, compartment door, reel, tire or leveling equipment may have caught the cable.
Do not use tape as a campsite verdict that a damaged high-current shore cord is safe. Protect the cord from traffic and sharp edges, and have questionable damage assessed against the cord maker's instructions.
Moisture changes the answer
Outdoor-rated equipment is built for a stated environment; that does not make a wet contact ready to energize. If rainwater, condensation or wash water is on or inside a plug, connector, adapter, portable protector or RV inlet, leave it disconnected. Do not handle an energized connection with wet hands.
Check the inlet cap, plug cap, gasket, locking ring or latches specified for your system. A torn or missing seal, a cracked cover, pooled water, droplets inside the contact area, mineral tracks or corrosion means the connection needs attention before use. SmartPlug notes that its weather-resistant seals are intended to protect against moisture and debris; that claim applies to its own system, not every RV connector.[5]
Do not wrap a suspect connection in a plastic bag, spray it with a household water-displacing product, heat it with a flame or hair dryer, or energize it "to dry it out." Move the cord to a dry, protected place and follow the manufacturer procedure. If moisture entered the connector, the seal failed, corrosion is present or you cannot establish that the assembly is dry and intact, ask the manufacturer or a qualified RV electrician for the correct remedy.
Loose means stop, even if the lights still work
A plug that will not seat fully, lock as designed or stay supported is not a usable connection.[1][2][4] Nor is a blade that rocks in the plug body, a detachable connector with a cracked locking ring, or an RV inlet that moves in the sidewall. The visible looseness may be only part of the fault.
Do not use the weight of the cord to test a connection. Do not wedge, tie or tape a plug into place. A campground receptacle that cannot hold the plug firmly belongs to campground maintenance; ask for repair or another site. Our separate RV pedestal pre-connection check covers the supply side in detail.
Loose internal terminals are not an owner visual check. A connection can overheat without an obvious breaker trip, and a molded plug gives no safe access to its terminations. If the cord end, inlet or adapter has run hot, service should inspect the mating parts and upstream connection rather than replacing only the most visibly melted piece.
Heat evidence is a history, not a cosmetic flaw
Brown plastic, black marks, a burned-electrical odor, pitted metal and a distorted contact all record abnormal heating or arcing. Cleaning away the mark does not erase the event. CPSC consumer guidance says to stop using a cord that feels hot and to replace cracked or worn cords.[2] Southwire's Surge Guard 34930/34950 manual treats "RECEPT OVERHEAT" as an overheating plug/receptacle fault; its exact display and response apply only to those models.[3]
If the previous hookup produced unusual warmth, shut down safely according to the manuals and record where the heat was strongest: pedestal plug, adapter, portable protector, RV-side connector or inlet. Also record the loads running, any fault code, odor, sound, flicker or breaker trip. That information helps service trace the cause.
Never reconnect solely to reproduce heat for a photo. If there was smoke, active melting, sparking or fire, keep clear, call emergency services as conditions require, and do not handle the equipment until the source is de-energized and the area is safe.[2][3]
A cautious first connection after the cord passes
A clean visual check is not a certification. It only means you found no owner-visible stop sign.
- Inspect the campsite pedestal separately and test it with equipment approved for that purpose.
- Confirm that the cord, inlet, adapter and protector ratings and configurations match the RV and source.
- Arrange the cable fully as the exact manual requires, clear of standing water, tires, sharp edges and pinch points. Jayco warns owners of the covered models not to leave the shore cord coiled in the compartment or on the ground because retained heat can melt its casing.[1]
- Switch loads and breakers as directed by the RV and component manuals. Make each connection fully and secure the locking device exactly as designed.
- Energize only after the connections are complete and covers are in their intended position.
Stay nearby during the first period under ordinary load. Do not disturb an energized plug to judge its fit. Watch for an overheat code, flicker, buzzing, crackling, smoke or a hot-plastic smell.[2][3] If anything is abnormal, reduce or switch off RV loads and de-energize at the pedestal breaker if it is safe to do so. Disconnect by the plug only after power is off; never yank the cable. Jayco expressly tells owners to grasp the plug rather than pull on the cord.[1]
CPSC's hot-cord rule is simple: stop using it.[2] Do not keep checking a warming connection by hand. Let qualified service determine whether the fault is in the cord, adapter, protector, pedestal receptacle, RV inlet or internal termination.
Stop-use card
Keep the cord disconnected and arrange service for any of these:
- melted, warped, blistered, charred or heat-discolored material;
- a burned odor, soot, pitting or eroded metal;
- a bent, missing, recessed or loose blade or pin;
- a cracked or separating plug body or failed strain relief;
- cuts, crushing, bulges, brittle jacket or exposed inner material;
- water inside a connection, a failed seal or significant corrosion;
- a connector that will not seat and lock normally;
- a plug, adapter, protector or inlet that ran hot;
- buzzing, crackling, flicker, smoke, sparking or repeated trips;
- an EMS or protector overheat/fault indication.
Tag the cord "DO NOT USE" and keep it separate from serviceable equipment. Ask the technician to inspect both halves of every affected connection. If the pedestal side is suspect, leave its breaker off and notify campground staff rather than attempting a repair.
FAQ
Is slight discoloration on an RV plug safe?
Do not assume it is cosmetic. Brown, black or blue discoloration near a contact can be evidence of heat.[3][5] Keep the cord out of service until the cord and mating connection are evaluated under the exact manufacturer's criteria.
Can I tighten a loose shore-power blade myself?
Not on a molded cord end, and not by opening equipment unless the manufacturer explicitly provides an owner procedure and you are qualified to perform it. A loose blade, shifting inlet or separating connector is a stop-use sign.
Can I plug in after rain if the outside of the cord is dry?
Only if the contacts, seals, inlet and every inline connection are also dry, clean and undamaged, and the equipment manual permits use in those conditions. Visible droplets inside, pooled water, corrosion or a failed cover means do not connect.
Sources
- Jayco 2024 Family of Companies Towable Owner’s Manual
- CPSC Warns Consumers About Faulty Extension Cords, Power Strips and Surge Protectors
- Southwire Surge Guard 34930/34950 Installation and Operating Instructions
- Tiffin 2026 Open Trail Owner Manual: Electrical Features
- SmartPlug: Tips for Maintaining Your SmartPlug System
What's Your Reaction?