










RV fire extinguisher check: place it by the escape path, not behind the fire
Place an RV fire extinguisher along a clear escape path, inspect its gauge and condition monthly, and know when replacement, professional service or immediate evacuation is the right call.

Tips and Trends
RV fire extinguisher check: place it by the escape path, not behind the fire
Place an RV fire extinguisher along a clear escape path, inspect its gauge and condition monthly, and know when replacement, professional service or immediate evacuation is the right call.
By Romana

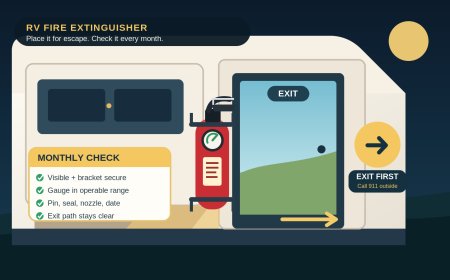
An RV fire extinguisher has two jobs before anyone ever pulls its pin: stay reachable and leave the exit reachable. The factory location near the entry door is deliberate on many RVs. It lets an occupant take the extinguisher while keeping a way out behind them, rather than crossing the galley or reaching over a stove fire.
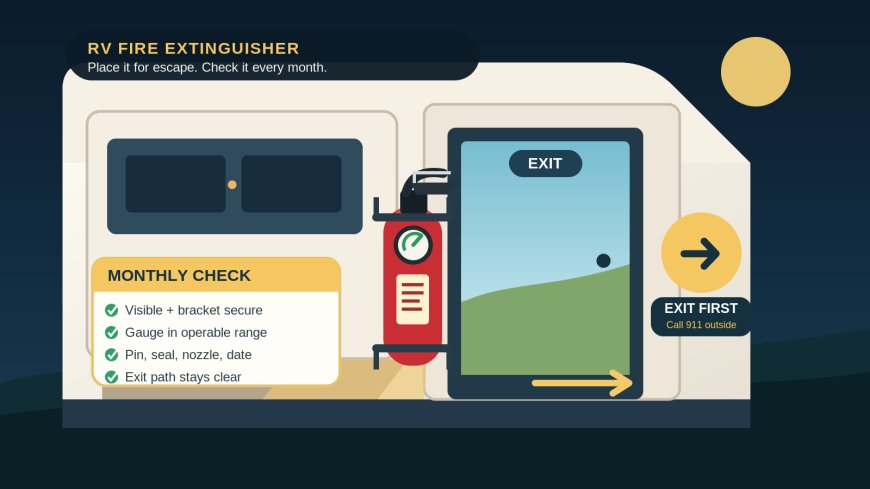
Check the extinguisher every month and before a long trip. Confirm that it is in its proper vehicle bracket, visible, unobstructed, undamaged, in date, and showing the operable pressure indication described on its own label. Do not squeeze the handle to “test” it. If there is a fire, get everyone outside and call 911 first. An extinguisher is an optional tool for a very small, contained fire only when smoke is not threatening you and a clear exit remains behind you.
The short answer
Keep the RV’s primary extinguisher in the location specified by the coach maker, commonly near the main or sliding entry door. The 2026 Winnebago Solis manual, for example, places its dry-chemical extinguisher near the sliding entrance and requires the same type and size if it is replaced.[3] NFPA’s placement guidance says extinguishers should be visible, readily accessible and normally along a path of travel; it also says they do not replace prompt evacuation.[2]
Once a month, look at the unit without discharging or dismantling it: verify access, bracket security, pressure indication, pin and seal, hose or nozzle, cylinder condition, readable instructions, date, model and recall status. The extinguisher’s label, its manual and the RV manual control the details.
Replace a disposable unit when its maker or RV manual says to, after any use, if it is expired, recalled, damaged or outside its operable pressure range. Send a serviceable rechargeable unit to qualified extinguisher personnel after any discharge and for required maintenance. Owners should not open, depressurize, recharge, hydrotest or repair a pressurized cylinder.
Where an RV extinguisher belongs
Start by finding the factory mount and reading the RV manual. Do not relocate the extinguisher simply because another wall looks tidier. Winnebago specifies a location near the sliding entry in the 2026 Solis, while the current Grand Design Reflection manual identifies a dry-chemical B/C extinguisher near the entry door.[3][5] Your RV may specify a different rating, size or bracket.
A useful placement passes four checks:
- You can see and reach the extinguisher immediately.
- The entry door or another usable exit is behind you when you take it down.
- You do not have to move a chair, dog crate, shoe bin, curtain or luggage first.
- The cylinder is held in a vehicle-appropriate bracket on a solid mounting surface.
NFPA identifies visibility and accessibility as the two central placement factors. When an obstruction cannot be avoided, its fact sheet calls for a sign, arrow or light to identify the location.[2] In a compact RV, the simpler fix is usually to remove the obstruction.
Do not bury the extinguisher in a pantry, outside compartment or under a bed unless the exact RV design and manual call for that location. A unit beside the cooktop may also be a bad trade if reaching it would mean moving toward a pan fire. The Amerex portable-extinguisher owner manual says to mount the extinguisher in a clean, dry, accessible area, preferably near an exit, using the supplied bracket or an approved vehicle bracket when required.[4]
If you want a second extinguisher for a tow vehicle, outdoor kitchen or motorhome cab, match the hazard, installation environment and vehicle rules rather than copying the coach unit. Ask the RV maker, extinguisher maker or a qualified fire-equipment professional to confirm the rating, size and mounting hardware. A second unit does not make it safe to pass a fire to reach the first one.
A monthly check that does not discharge the unit
Put the inspection on a recurring calendar date and repeat it before an extended trip. Amerex calls for monthly inspection, or more often when conditions warrant; Winnebago also specifies at least a monthly charge check for the Solis.[3][4]
1. Confirm location and access
The extinguisher should be in its designated place, easy to see and reachable without unloading the RV. Open the entry door and make sure camping gear cannot trap the extinguisher behind it. Confirm that the exit itself opens and that the exterior landing area is not blocked.
2. Check the mount
The bracket should be fixed firmly to the mounting surface, and its retaining strap or latch should hold the cylinder as designed. Look for a cracked strap, loose fastener, bent bracket or chafe marks. Do not improvise with a bungee cord or store a pressurized cylinder loose in a cabinet.
3. Read the gauge or indicator
Use the unit’s own label. On a typical gauged extinguisher, the pointer must be in the marked operable range, often the green area. A high reading is not automatically “extra full”; both low and high readings can be outside the operable range. Temperature can affect some gauges, so follow the manufacturer’s directions rather than tapping the dial or assuming the reading is harmless.[4]
Some extinguishers use a different indicator or no gauge. Do not invent a test. If the label is missing, illegible or unclear, identify the model and get the maker’s instructions.
4. Inspect the pin, seal and discharge path
Check that the pull pin is present and the tamper seal is intact. The nozzle and hose, if fitted, should be secured, unobstructed and free of cracks. Look over the cylinder and valve for dents, rust, corrosion, leakage, residue or other damage. Wipe dirt and grease from the outside so the operating directions remain readable.[1][4]
Never press the lever for a “quick test.” Winnebago warns that even partial discharge can leak pressure or contents and leave the unit inoperative when it is needed.[3]
5. Record identity, age and recall status
Photograph the front and back labels. Record the brand, model, serial number, manufacture date, expiration or remove-from-service date, and the RV’s specified type and size. Check the manufacturer’s current safety notices and CPSC recalls.
This is not paperwork for its own sake. CPSC’s 2017 Kidde recall covered tens of millions of plastic-handle and push-button units, including extinguishers supplied with recreational vehicles. The recalled products could clog, demand excessive discharge force or lose a nozzle; the remedy was replacement, not a good-looking gauge.[6]
Replace it, service it or leave it alone?
The cylinder tells you which lane applies. Read the nameplate and manual before arranging service.
| Condition | Owner action |
|---|---|
| Disposable or non-rechargeable unit used even briefly | Replace it according to the maker’s instructions. |
| Rechargeable unit used even briefly | Remove it from ready service and have qualified personnel recharge and inspect it. |
| Gauge or indicator outside the stated operable range | Do not rely on it. Follow the maker’s replace-or-service direction. |
| Expired or beyond a stated service life | Replace or remove from service as the exact manual directs. |
| Dented, corroded, leaking, missing a pin/seal, clogged or otherwise damaged | Remove it from ready service and contact the manufacturer or a qualified extinguisher company. Do not dismantle it. |
| Model/date falls within a recall | Follow the recall remedy; a normal gauge does not cancel a recall. |
| Label unreadable or history unknown | Identify it through the maker if possible; otherwise replace it rather than guessing. |
| Correct rechargeable unit, undamaged and in range | Keep inspecting it and obtain the professional maintenance required by its manual and applicable rules. |
Amerex separates the quick monthly look from professional work. Its portable-extinguisher manual calls annual maintenance a professional inspection, specifies professional recharge immediately after use, and lists deeper maintenance and hydrostatic-test intervals that vary by agent and cylinder type.[4] Those intervals are not permission to service the unit yourself, and they are not universal replacement dates for every small RV extinguisher.
The RV manual can set another boundary. Winnebago directs Solis owners to replace an expired or insufficiently charged extinguisher with the same type and size as the original.[3] A disposable unit is replaced; a properly identified rechargeable model may be serviced by qualified personnel if its manufacturer permits it. When the sources conflict or the identity is uncertain, take the conservative path: put a correct, ready unit in the RV before the next trip.
The exit-first response plan
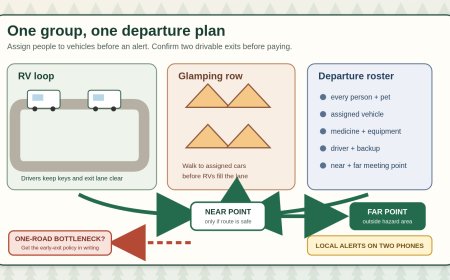
Practice this plan without discharging the extinguisher:
- Alert everyone. Treat a smoke alarm, visible flame or growing smoke as an evacuation signal.
- Get every person and pet out by the safest available exit. Do not delay evacuation to collect gear or disconnect utilities.
- Account for everyone at a preselected meeting place away from the RV, fuel source and traffic.
- Call 911 from outside. Give the campground loop, site number and best access route.
- Stay out. Warn nearby campers and follow emergency responders’ directions. Do not re-enter for an extinguisher.
Grand Design’s RV manual puts evacuation first and warns readers not to let extinguisher use take priority over getting out safely.[5] That is the default. The extinguisher comes later, if at all.
USFA says a person should attempt extinguisher use only after alerting others and having someone call the fire department, and only when the user is physically able, the fire is small and contained, toxic smoke is not a threat, and there is a clear escape route. If any answer is no or uncertain, leave and call 911.[1]
If every condition is met and you choose to act, keep your back to the clear exit. Follow the exact label and remember PASS: pull the pin, aim low at the base, squeeze the lever slowly and evenly, and sweep side to side.[1] Leave immediately if the fire is not controlled, it grows, smoke builds, heat intensifies, your exit changes, or the extinguisher empties. Do not turn your back on the fire and do not make a second attempt.
The card to keep with the RV manual
Every month and before a long trip
- Factory-specified location; visible and reachable.
- Correct vehicle bracket secure.
- Exit and outside landing path clear.
- Gauge or indicator in the label’s operable range.
- Pin and tamper seal intact.
- No dents, corrosion, leaks, residue or blocked nozzle.
- Instructions readable; model, date and recall status known.
- Replacement or professional service arranged for any failed check.
If there is a fire
- Alert, evacuate, account for everyone, call 911 outside.
- Stay out unless all USFA conditions for optional extinguisher use are met.
- Keep a clear exit behind you and abandon the attempt at the first sign of danger.
A green gauge is one check, not a guarantee. Placement, condition, identity and an exit-first household plan all have to work together. The best outcome is everyone outside while the extinguisher remains unused.
Sources
What's Your Reaction?