







An RV water-heater relief valve is dripping. What should you do?
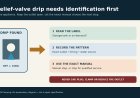
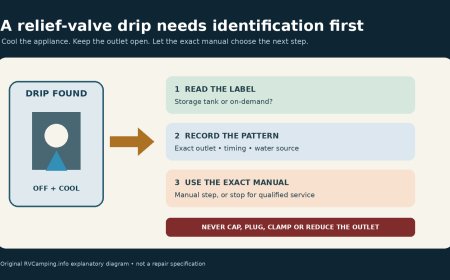
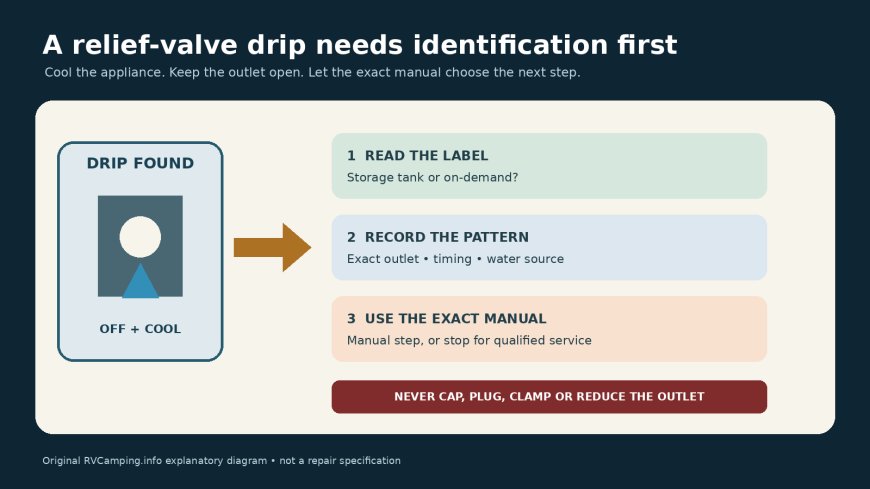
A relief-valve drip is not a cue to plug the outlet. Identify tank versus on-demand equipment, cool it down, record the pattern, and follow the exact manual.

An RV water-heater relief valve is dripping. What should you do?
A few drops beneath an RV water heater can tempt you into the wrong repair. Do not cap the outlet, tighten a plug into it, or assume every drip means the valve has failed. First identify the heater, cool it down, and separate a storage-tank expansion symptom from an on-demand drain or freeze-protection issue.
That model check matters. Dometic's tank-heater manual describes an internal air space and a specific procedure for restoring it. Suburban's IW60/IW60RL guide describes an on-demand system with different cold-weather behavior. Borrowing the tank procedure for the on-demand unit would solve the wrong problem.[1][2]
Start with a cold, powered-down appliance
Water leaving a relief valve can be scalding. Switch the heater off. If the manual calls for disconnecting AC or DC power, follow it. Shut down the applicable fuel source before inspection. Keep people away from the discharge path and wait for the stored water to cool.
If water is very hot, discharge is forceful or continuous, the heater appears to be overheating, or the burner does not shut down, stop using the appliance. Dometic directs owners to shut off the appliance's manual gas control or the LP supply if overheating occurs or gas fails to shut off.[1] Treat that as a service problem, not an invitation to cycle the switch and watch it happen again.
Do not remove, block, clamp, reduce, or redirect the valve outlet as an improvised cure. Dometic identifies the pressure-temperature relief valve as a safety component and warns against a valve, plug, or reducing coupling at its outlet. Suburban also says not to plug its relief valve.[1][2]
Photograph the label before choosing a procedure
Open the exterior access door only after the heater is off and cool enough to approach. Photograph the rating label and record:
- manufacturer, model, and serial number;
- storage-tank or on-demand design;
- gas-only, electric, or combination configuration;
- the title, revision, and page of the matching manual;
- exactly where the water appears: valve outlet, drain line, threaded joint, tank seam, plumbing fitting, or access-door edge;
- whether the discharge occurs only while heating, only in cold weather, continuously, or after connecting to city water.
Water can run along a fitting or pan before it drips to the ground. A wet relief-valve outlet is useful evidence. A puddle under the access door is not proof of its source.
Use the RV maker's component list, the heater's data plate, or the manufacturer's official manual library. Do not choose instructions by appearance alone. Similar exterior doors can hide different heater generations.
For a storage tank, heat-cycle dripping may be expansion
Dometic says intermittent dripping while its tank heater runs does not by itself prove the valve is defective. Heated water expands in the RV's closed plumbing system. The manual says an internal air gap helps accommodate that expansion, but the water can absorb the air over time.[1]
The timing pattern is the clue. Record whether the outlet is dry while the tank is cold, begins dripping during a heat cycle, and stops after heating ends or a faucet opens. Also note whether the symptom started after a tank refill, plumbing work, pump change, or a new city-water connection.
Do not turn that observation into a universal diagnosis. Corrosion, debris, a damaged seat, excessive system pressure, a control fault, or a leak from another component can produce a different pattern. If the model's manual does not describe expansion dripping, or if the symptom does not match its description, move directly to qualified service.
Dometic provides an air-gap restoration sequence for the covered tank models. It begins with the heater off, cool stored water, and the main water supply off. The manual then specifies the faucet and relief-valve steps and a final test.[1] Follow the current manual for the exact model rather than this article. If the valve does not reseat, keeps leaking, looks corroded, or cannot be operated as written, stop and arrange service. The manual says the valve itself is not serviceable.[1]
An on-demand drain can mean something else
The Suburban guide used here covers IW60 and IW60RL on-demand heaters. For the IW60RL, it describes cold-weather water entering the drain line as part of a freeze-protection context. If the dripping does not stop after the incoming-water temperature rises above the threshold stated in that manual, Suburban tells the owner to call a service center.[2]
The same passage says a named valve can disable mechanical freeze protection, then warns that the water system must be drained when the heater is not in use to avoid freeze damage.[2] That is exactly why a generic "close the valve" tip is poor advice. The action changes protection behavior and belongs only to the specified model and operating situation.
Suburban's guide also says periodic relief-valve discharge may come from thermal expansion in a closed water system, and it directs the owner to the water supplier or a local plumbing inspector for correction.[2] Do not copy pressure settings, components, or plumbing modifications from another heater manual. Have a qualified RV service technician or plumber familiar with the installed system resolve persistent pressure problems.
Use a six-box drip record
A short record gives a technician more than a description such as "it leaks sometimes."
| Field | What to record |
|---|---|
| Heater identity | Maker, exact model, serial number, manual revision |
| Appliance state | Off/cold, heating on gas, heating on electric, or recently shut down |
| Water source | Onboard pump or city connection; regulator model if installed |
| Weather | Air temperature and whether freezing conditions occurred |
| Discharge pattern | Drops, intermittent stream, or continuous flow; start and stop times |
| Exact origin | Relief outlet, drain line, threaded connection, tank seam, or uncertain |
Take one photo before wiping anything dry and another after the next controlled observation. Do not place a hand beneath the outlet. If you use a container to identify the source, position it only after the appliance is off and cool, and never obstruct the discharge path.
Stop conditions are simple
Leave the heater off and seek qualified service when you find any of the following:
- forceful or continuous discharge;
- water hot enough to present a scald risk;
- burner operation that continues when it should stop;
- soot, flame rollout, melted wiring, gas odor, or an alarm;
- corrosion, mineral buildup, damage, or seepage at the valve body or tank;
- a valve that will not close after the exact manual procedure;
- repeated dripping after the applicable manual-directed check;
- an unreadable label or no reliable way to identify the heater.
If you smell gas, leave the area and follow the RV and LP-system emergency instructions. Do not operate switches, start an engine or generator, or return the heater to service until the leak has been addressed.
The practical distinction is not "drip or no drip." It is storage tank or on-demand, expected pattern or abnormal pattern, and exact-manual procedure or qualified service. Keep the relief outlet open, keep your hands clear, and let the model number choose the next step.
Sources
What's Your Reaction?