























RV lug-nut torque after wheel service: use the number for your exact wheel
A wheel-specific method for finding the correct lug-nut torque, using a calibrated wrench, following the maker’s recheck schedule and recognizing no-drive conditions.


RV lug-nut torque after wheel service: use the number for your exact wheel
By Romana
Category: Tips and Trends
A wheel has been off your motorhome, tow vehicle, travel trailer, fifth-wheel or toad. Before that wheel goes back on the road, the useful question is not "What torque do RV lug nuts take?" It is: "Which current document covers this exact wheel, fastener and hub, and what installation and recheck procedure does it require?"
There is no safe universal RV torque number or universal mileage schedule. Record the exact specification, use a suitable calibrated torque wrench, and follow the named sequence and follow-up interval. If the specification is missing, the hardware is damaged, or the wheel will not seat cleanly, stop and have the assembly inspected by a qualified RV, tire, chassis or trailer technician.
Why the exact specification matters
Lug-nut torque is a way to create the clamping force that holds a wheel against its hub. The target can change with the chassis or axle, model year, wheel design, stud size, nut style, wheel material and the fastener condition assumed by the manual. Even the lubrication instruction can be component-specific.
The variation is visible inside one manufacturer’s documentation. Lippert’s trailer-axle chart assigns different staged targets to different combinations of wheel size, stud size and cone- or flange-nut design. Its procedure also calls for the nuts to be started by hand and tightened in stages using the illustrated sequence.[1] A Ford Super Duty manual, meanwhile, says its listed specification assumes threads free of dirt and rust, yet gives a narrow lubrication instruction for one particular two-piece nut design while telling owners not to oil the stud or nut threads.[2]
Those are examples, not numbers to borrow. A torque table for a different axle, an online answer based only on socket size, or the setting remembered from a previous RV cannot identify your wheel attachment.
Both too little and too much matter. A NHTSA recall report for certain Ford vehicles says insufficient tightening could allow the attachment to loosen and the wheel to detach.[5] An FCA recall filed with NHTSA documents the other direction: service performed to an incorrect, excessive specification could yield a stud, which might later break and permit wheel separation.[4] A torque check also cannot prove that a previously over-torqued stud is undamaged.
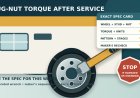
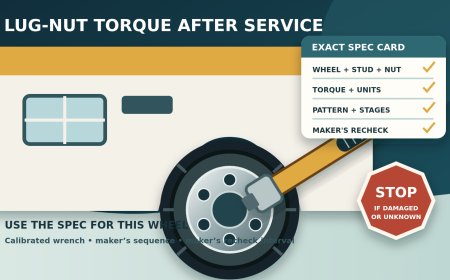
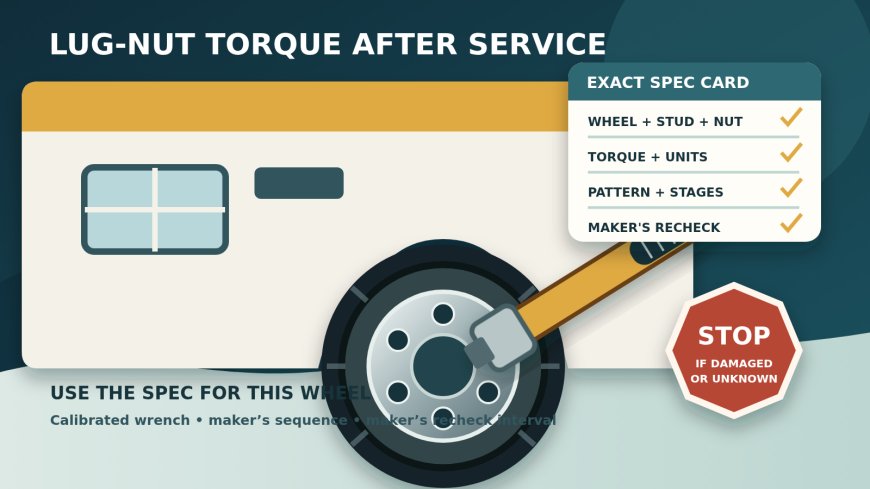
Build a wheel-specific specification card
Before accepting the RV after tire, brake, bearing or suspension work, identify every wheel that was disturbed. A Class C may involve a cutaway chassis manual; a trailer has its own frame, axle, hub and wheel documentation; a toad has another vehicle manual. Do not apply the trailer number to the tow vehicle or the motorhome number to an attached car.
For each affected wheel position, record:
- vehicle or trailer year, make, model and VIN;
- chassis or axle make, model and serial number when available;
- single- or dual-rear-wheel configuration;
- wheel size, material and part number if identified;
- stud diameter and thread specification;
- lug-nut type and seat shape;
- final torque value and units exactly as published;
- required tightening pattern and number of stages;
- whether the specification assumes clean dry threads or names a lubricant and location;
- the maker’s recheck trigger and interval; and
- the document title, revision or model year, page and retrieval date.
Start with the current owner’s or service manual for the exact completed vehicle or trailer. Then check the chassis, axle, hub and wheel instructions that apply to the installed parts. Look for current safety recalls and service updates by VIN. If two applicable sources disagree, do not average the values or choose the more familiar one. Ask the vehicle, trailer or component manufacturer, or an authorized service facility, to resolve the conflict in writing.
A shop work order can document what was done, but it does not replace the controlling specification. Ask the shop to write down the source, target, wrench ID or calibration status, tightening pattern, and which wheel positions were removed.
Inspect before applying a wrench
A torque wrench is not a repair tool for a damaged wheel attachment. Check the accessible parts in good light before a torque check. If a wheel must be removed for inspection, use the lifting points and support procedure in the exact vehicle or trailer manual; never rely on a leveling system or a jack alone. Lippert directs owners to lift a trailer by its frame and use appropriately rated stands, rather than supporting it by the axle or suspension.[1]
Confirm that:
- every specified lug nut is present and appears to be the correct type;
- each nut sits squarely in its seat;
- the wheel is flush against the hub, with no visible gap;
- mounting faces are free of loose rust, dirt, paint buildup and trapped debris;
- no stud is bent, visibly stretched, cracked, stripped or cross-threaded;
- no stud turns in the hub as the nut is moved;
- lug holes and seats are not cracked, elongated, gouged or pounded out; and
- the socket fits the fastener fully without rocking.
Ford warns that contamination between the wheel and hub can prevent proper metal contact and allow the nuts to loosen.[2] Cleaning does not mean grinding away material or coating the parts. Follow the manual’s preparation instructions. Do not add anti-seize, oil or thread locker unless the exact procedure calls for it, and then apply it only where directed.
Use the calibrated torque wrench as a measuring tool
Use a torque wrench whose working range includes the specified value. Check its calibration label or certificate against the tool maker’s interval. A wrench that has been dropped, overloaded, stored incorrectly, damaged or used beyond its calibration period is not ready for a safety check. Snap-on notes that a hard drop can compromise calibration and calls for inspection or recalibration on its stated cycle; your wrench maker’s instructions control your tool.[3]
Then follow this sequence unless the controlling wheel procedure says otherwise:
- Park on a firm, level surface away from traffic. Secure the rig according to its manual, including the parking brake and correctly placed chocks.
- Verify the specification card against the wheel position. Confirm the units before setting the wrench; confusing pound-feet, pound-inches and newton-meters can create a major error.
- Inspect the wrench, ratchet head and correctly sized socket. Do not use a cracked socket or an unapproved handle extension. Account for any adaptor only as the wrench maker instructs.
- If installing the wheel, start each nut by hand. A nut that will not run on normally by hand needs diagnosis, not more leverage.
- Snug and tighten in the exact crossing sequence shown for that lug count. Use the manufacturer’s stages rather than jumping straight to the final setting. Lippert expressly specifies hand starting, sequential tightening and staged torque for the trailer axles covered by its manual.[1]
- Make the final pass with the calibrated torque wrench. Hold the center of the designated grip, keep the load aligned with the tool and pull slowly. Stop as soon as the click, light, beep or target indication occurs; Snap-on cautions against jerking and continuing after the signal.[3]
- Mark the completed position on the work card, not with a paint mark that substitutes for measurement. A witness mark may reveal movement when the manufacturer permits one, but it does not establish torque.
An impact wrench can remove hardware or perform preliminary work when the service procedure allows it. It should not be treated as proof of final torque. Do not use the torque wrench as a breaker bar.
A "recheck" also needs a defined method. Follow the vehicle or component maker’s procedure for checking fasteners already in service. Do not loosen every nut merely to see it move unless the procedure explicitly requires loosening and retorquing. A click at the set value only shows that the fastener resisted that applied torque at that moment; it does not reveal excessive prior torque, hidden stud damage or correct clamping force.
Recheck only on the schedule for that assembly
Write the required recheck into the trip plan as soon as service is complete. Do not turn examples from one manual into a house rule for every RV.
Lippert’s current 2K–7K trailer-axle manual calls for a torque check before first road use and after wheel removal, followed by checks at three named early-mileage points.[1] Ford’s cited Super Duty manual uses a different scheme: it distinguishes single rear wheels from dual rear wheels and gives the dual configuration an additional later check.[2]
The lesson is the difference, not either schedule. Use only the intervals in the current documentation for your exact chassis, trailer, axle, hub and wheel combination. If the manual says "after any wheel disturbance," treat tire rotation, flat-tire replacement, brake service and any other listed event as a new trigger. If no interval can be verified, contact the manufacturer or a qualified service facility before travel instead of inventing one.
Plan each required stop at a level lot large enough for the whole rig, away from moving traffic. Carry the specification card, correct socket and in-calibration wrench where they remain accessible with slides in and the toad attached. Record the date, odometer or trailer mileage, wheel position, result and who performed the check.
Stop conditions: do not solve damage with more torque
Stop before departure and arrange professional inspection if:
- the exact applicable specification, units, fastener condition or sequence cannot be confirmed;
- current manuals, labels, service information or recall instructions conflict;
- a lug nut is missing, wrong, cross-threaded, seized or will not start normally by hand;
- a stud spins, bends, shows damaged threads or is suspected of having been over-torqued;
- a wheel, lug hole, seat, hub or mounting face is cracked, distorted or otherwise damaged;
- the wheel does not sit flush after the mounting surfaces are prepared as directed;
- a fastener keeps turning, moves an unexpected amount during a check, or fails to reach the specified indication;
- the wrench is out of range, overdue for calibration, damaged or recently dropped; or
- the required safe work area, lifting equipment or qualified help is unavailable.
If vibration, wobble, new clunking or wheel-area noise appears while driving after service, reduce speed smoothly, avoid abrupt steering or braking, and pull off at the first safe place. Ford’s NHTSA recall filing identifies vibration and noise as possible warnings of loose wheel nuts; affected owners in that recall were told not to drive until torque was verified and the wheel hardware was inspected.[5] Treat visible wheel movement, a missing nut, metal debris or smoke as a no-drive condition. Arrange roadside assistance, a mobile technician or towing rather than trying to "tighten it enough" on the shoulder.
The inspection matters because the correct next step may be replacement, not retorque. The FCA recall required measurement of potentially yielded studs and replacement of those that failed inspection.[4] Damaged studs, nuts, wheels or hubs need a qualified diagnosis using the correct parts and procedures.
The service handoff in six questions
Before leaving a tire or RV shop, ask:
- Which wheels were removed or loosened?
- Which exact document and revision supplied the torque value, pattern and fastener condition?
- Was the final pass made with a torque wrench in calibration?
- Were the studs, nuts, wheel seats and mounting faces inspected, and was any damage found?
- What manufacturer-specified recheck trigger and interval applies to each wheel position?
- Will the shop put those details on the invoice?
Save the answers with the RV records and set the stop reminders before rolling out. The right number is not a generic RV number. It is the current number, procedure and follow-up schedule for the parts actually holding that wheel on.
Sources
- [1] Lippert: Trailer Axle (2K–7K) Owner’s Manual, rev. September 16, 2025 (accessed September 17, 2026).
- [2] Ford: 2014 Super Duty Owner’s Manual, Wheel Lug Nut Torque Specifications, current online edition (accessed September 17, 2026).
- [3] Snap-on: Proper Torque Wrench Use and Maintenance (accessed September 17, 2026).
- [4] NHTSA Recall 21V-398: FCA Wheel Studs dealer instructions, revision 3, January 2022 (accessed September 17, 2026).
- [5] NHTSA Recall 23V-283: Ford loose wheel lug nuts Part 573 report, April 20, 2023 (accessed September 17, 2026).
What's Your Reaction?