





























Stop RV condensation in cold weather: a source-to-surface control plan
A cold-weather RV condensation plan that separates indoor moisture, ventilation, safe heat, cold-surface control, mold prevention and CO safety.


Stop RV condensation in cold weather: a source-to-surface control plan
By Romana
Category: Tips and Trends
A wet windshield at breakfast is not the whole condensation problem. It is the visible gauge. The same moist air may be reaching cold window frames, the wall behind a mattress, an exterior-corner cabinet and the underside of a dinette cushion.
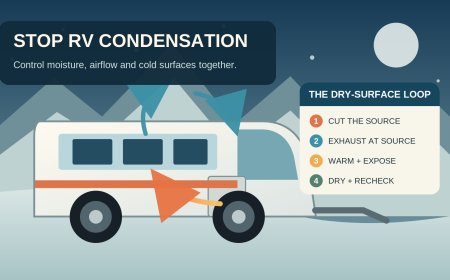
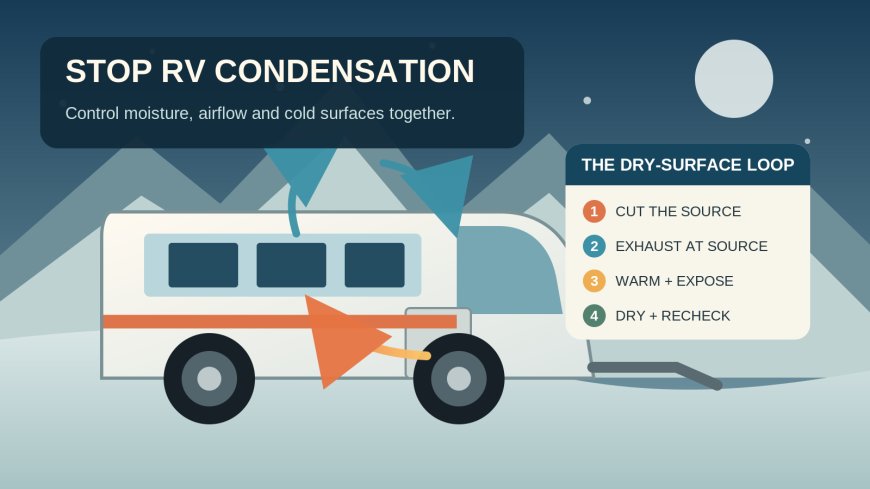
The useful response is not "seal the RV tighter" or "crack a window" in isolation. Run a five-part control loop: find the moisture load, exhaust it at the source, warm and expose cold surfaces, dry anything that got wet, then recheck with a humidity meter and a flashlight. Heating and insulation help, but neither removes water from the indoor air by itself.
Why a cold RV sweats
Condensation forms when moist indoor air meets a surface colder than that air's dew point. In cold weather, windows are often the first visible condensing surfaces; low-insulation areas in walls and roofs can also become cold enough to collect moisture.[1]
An RV makes the margin small. The living volume is compact, several cold surfaces are close to occupants, and ordinary camping puts water vapor into the air. The result can change within minutes after a shower or a pot of boiling water.
Use the window as an early warning, not as the diagnosis. Water only at the bottom of the glass after cooking points toward a short moisture spike. A damp mattress underside or musty cabinet with relatively clear windows points toward stagnant air at a cold surface. A stain that grows after rain, a wet spot below plumbing, or moisture in one fixed location may be a leak rather than indoor humidity.
Step 1: separate the moisture sources
Before buying a gadget, make a one-day moisture log. Record the indoor relative humidity, outdoor conditions, which vents are open, which heater is running and what happened in the previous hour. Check before breakfast, after cooking, after a shower, at bedtime and on waking.
Sort what you find into three buckets.
Moisture made inside
Breathing, cooking, showers, wet towels, damp coats, dishwashing and drying gear all add water to the small interior. Combustion appliances that are not vented outdoors also add water vapor; EPA guidance lists source exhaust, outdoor-air ventilation and dehumidification as ways to remove indoor vapor loads.[1]
Cut the load where it is easy:
- cover simmering pots and choose lower-steam meals on the coldest nights;
- run the range hood when it actually exhausts outdoors;
- use the bath fan during a shower and for a drying period afterward;
- hang wet gear outside, in a ventilated compartment designed for it, or in a campground dryer;
- wipe shower walls and the pan so less water has to evaporate; and
- empty and dry sink basins, wet mats and towels before bed.
A recirculating range hood catches some grease but does not send water vapor outside. Verify the discharge instead of assuming the fan is an exhaust fan.
Liquid water entering the RV
Rain leaks, failed sealant, plumbing drips, a loose exterior shower fitting and refrigerator or air-conditioner drainage faults need repair. Ventilation cannot solve a leak. Mark the edge of a stain, photograph it and check whether it changes with rain, tank-pump use or campground water pressure.
If a spot stays wet while the rest of the RV responds to ventilation, stop treating it as a humidity problem. Inspect the roof, windows, penetrations and plumbing according to the RV maker's maintenance schedule, or have an RV technician perform a moisture inspection.
Moisture trapped at a cold, still surface
A mattress tight against an exterior wall, gear packed against a cabinet back and closed wardrobes can block heat and airflow. Winnebago tells owners to keep humidity low, prevent condensation buildup, use windows and vents, repair leaks promptly, and inspect hidden corners, closets and cabinets.[2]
Pull bedding a few inches from exterior walls when practical. Leave a path for room air under the mattress and around stored gear. Open cabinet and closet doors briefly during the warm part of the day. Do not block a furnace return, heat register, required appliance opening or emergency exit.
Step 2: ventilate on purpose
Cold outdoor air often contains less total water than warm indoor air. A short, deliberate air exchange can therefore remove moisture even when the outdoor relative-humidity reading looks high. Relative humidity is temperature-dependent, so "90% outside" does not automatically mean that outside air carries more water than the cabin air.
Use source ventilation first. Start the bath fan before the shower. Start the range exhaust before the steam cloud spreads. Give the fan replacement air through the opening your RV manual recommends, often a small window opening away from the exhaust. Keep roof-vent lids and exterior outlets clear of frost, snow and campsite debris.
For the background setting, begin with a small roof-vent opening and a small low window opening, then watch the meter and the glass. If water appears, increase exhaust or shorten the interval between air exchanges. If the cabin becomes unreasonably cold without clearing the glass, reduce the moisture load and consider a dehumidifier that is rated for the temperature and available electrical service.
Do not chase a universal vent-gap measurement. Fan capacity, wind, temperature, occupancy and RV leakage differ. The result you want is measurable: the humidity trend turns down, the coldest exposed surface dries, and combustion equipment still has every opening the manufacturer requires.
Step 3: choose heat that does not create a new hazard
Heat raises interior surface temperatures and can move a window or wall above the dew point. EPA's building-science guidance treats condensation control as a system: lower the indoor dew point and keep vulnerable surfaces warm enough.[1] Turning up the thermostat may clear glass, but the water is still inside unless ventilation or dehumidification removes it.
Use the RV's installed, properly maintained heating system as its manual directs. A sealed-combustion RV furnace sends combustion gases outside, but its exterior intake and exhaust must remain clear. Electric heat adds no combustion moisture at the point of use, but it must stay within the RV's branch-circuit, shore-power and campground limits. Plug a portable electric heater directly into an appropriate outlet if its instructions require that, keep its clearances, and do not leave it operating unattended.
Do not use the cooktop or oven as a space heater. Do not bring an outdoor-only propane radiant heater into the RV. In a CPSC investigation of portable propane radiant heaters, 12 incidents in tents, campers, trailers and motor vehicles resulted in 18 carbon-monoxide deaths; the report warns that poorly ventilated enclosed spaces can turn these heaters into a CO hazard.[4]
A device advertised with an oxygen-depletion sensor is not a reason to override the heater label, the RV manual, campground rules or an RV manufacturer's prohibition. A CO alarm is a backstop, not permission to use a combustion appliance in a space for which it was not designed.
Step 4: treat insulation as surface control
Insulation does not absorb indoor moisture or replace ventilation. Its job here is to keep the room-side surface warmer. EPA notes that continuous insulation helps prevent cold-weather condensation and that gaps or low-insulation components can remain vulnerable.[1]
Start with reversible measures:
- use fitted insulated window coverings at night, but leave a small air path and inspect behind them each morning;
- place a breathable spacer or purpose-made ventilation mat under a mattress rather than laying bedding on a cold platform with no air gap;
- add removable skirting only when the RV and campground permit it, while keeping appliance vents, drains and required openings clear;
- protect exposed water systems according to the RV manual; and
- move stored items away from cold exterior corners.
Window film, foam inserts and reflective panels can warm the room-facing side, yet they can also hide water at the frame. Remove or open them for daily inspection until the setup proves it stays dry.
Do not drill, inject foam, cover weep holes or add an interior vapor barrier on a guess. RV walls combine thin framing, wiring, plumbing, adhesives and manufacturer-specific drainage paths. A modification that warms one surface may trap water somewhere inaccessible. Ask the manufacturer or a qualified RV repair facility before altering the wall, roof or floor assembly.
Step 5: prevent a wet night from becoming a mold problem
EPA recommends keeping indoor relative humidity below 60%, ideally 30% to 50% when possible, and drying damp materials within 24 to 48 hours.[3] In a cold RV, visible condensation may require a lower setting than the top of that range. Treat 30% to 50% as a starting band, then lower the moisture level if the coldest surface still gets wet.
Use two small hygrometers if possible: one in the main living area and one near the sleeping area, away from a vent outlet, kettle or exterior glass. Compare trends rather than arguing over a single percentage. If one reads much higher, swap positions to see whether the difference follows the meter or the location.
Every morning during cold camping:
- wipe windows, frames and sills;
- lift the mattress edge and feel the platform and exterior wall;
- check the backs of cushions and the floor beneath them;
- inspect exterior-wall cabinets, closets and corners;
- dry wet fabric in a place where the released moisture leaves the RV; and
- empty a dehumidifier tank before it can spill or freeze.
If material is wet, find and stop the source, then dry the area promptly. EPA says visible mold generally does not require sampling and warns that routine killing of mold without correcting moisture does not solve the problem.[3] Persistent odor, widespread growth, soft wallboard, delamination or an unknown wet cavity calls for professional inspection. People with asthma, allergies, immune compromise or significant symptoms should avoid disturbing suspect growth and seek appropriate medical or remediation guidance.
Carbon monoxide rules do not bend for condensation control
A warm, dry-looking cabin can still be unsafe. Winnebago's 2024 View manual identifies the furnace, range or oven, water heater, refrigerator, chassis engine and generator engine as possible combustion sources its alarm can detect. It instructs owners to test the alarm after storage, before each trip and at least weekly during use, and to replace it by the date printed on the unit.[2]
Build the cold-night routine around that safety layer:
- use an alarm listed for RV application and install, test and replace it exactly as the RV and alarm manuals direct;
- never silence an alarm to finish a night in the campsite;
- keep furnace and water-heater combustion openings clear of snow, ice, covers and stored gear;
- inspect exhaust systems after damage or any change in sound;
- never idle a motorhome in an enclosed or partly enclosed space; and
- position generator exhaust so it cannot enter your RV, a neighboring campsite, a window, door or air intake, following the generator and RV manuals.
If the CO alarm sounds, get everyone into fresh air, call emergency services and do not re-enter until responders say it is safe. Do not assume condensation, a low battery or a "sensitive detector" caused the alarm.
A practical cold-night setup
Two hours before bed, dry the shower and sink, move wet gear out of the living space, and inspect the mattress platform and cold corners. Set a small background ventilation path. Use the installed heating system according to its manual, and confirm exterior appliance openings are clear.
At bedtime, note both humidity readings and look behind window coverings. If the glass is already wet, remove the water and increase source control or air exchange before everyone goes to sleep. Do not solve it with a fuel-burning heater that is not approved for indoor RV use.
In the morning, log the humidity, check the hidden surfaces and change one variable for the next night. More bath-fan time, less indoor drying, a wider air path under the mattress or a lower humidity target is useful. Changing everything at once hides the cause.
The best condensation plan is the one that keeps the coldest hidden surface dry without defeating the RV's ventilation or combustion-safety design. The meter provides the trend. The window provides the warning. The mattress edge and cabinet corners tell you whether the plan is working.
Sources
- [1] Moisture Control Guidance for Building Design, Construction and Maintenance (December 2013; accessed September 17, 2026).
- [2] 2024 View Operator Manual (model-specific manufacturer manual; accessed September 17, 2026).
- [3] A Brief Guide to Mold, Moisture and Your Home (updated February 18, 2026; accessed September 17, 2026).
- [4] CO Emissions from Portable Propane Radiant Heaters (December 2002; accessed September 17, 2026).
What's Your Reaction?