





Keep RV cooler food at 40°F or below: a thermometer-led camp routine
Use a thermometer-led routine to keep RV cooler food at 40°F or below while managing ice water, raw-food separation and clean handling.

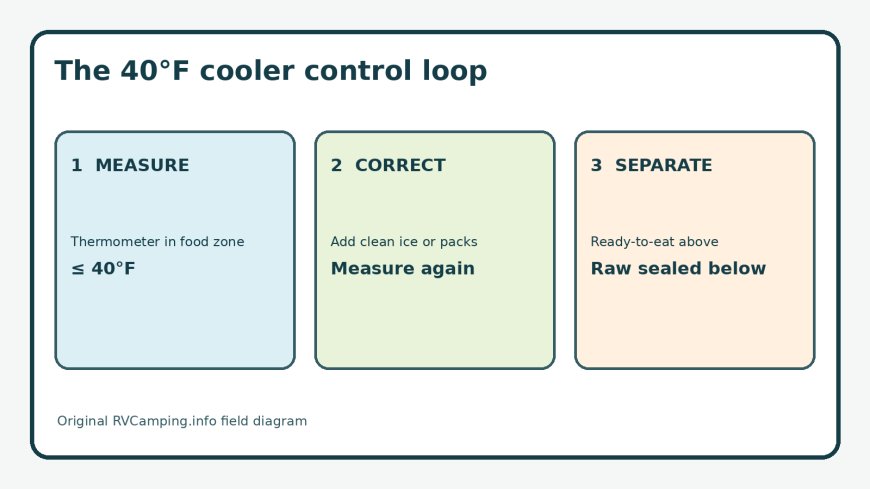
Keep RV cooler food at 40°F or below: a thermometer-led camp routine
By Romana | October 16, 2026 | Cooking
A cooler full of ice can still have a warm corner, a leaking raw-meat package or a lid that has been opened all afternoon. The useful question is not whether the cooler looks cold. It is whether the perishable-food zone is holding at 40°F or below and whether clean food remains protected from raw juices and meltwater.
Quick answer: Pre-chill the food and cooler, load enough ice or frozen packs around the food, and place an appliance thermometer in the food-storage zone. Keep the cooler shaded and closed. Check the reading at planned stops and after heavy use. Add a clean cold source before the food zone rises above 40°F. Store food in watertight containers; keep raw meat securely wrapped and below ready-to-eat food. Treat ice water as cooler coolant, not potable water.[1][2][3]

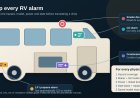
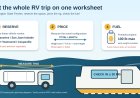
Temperature is the control; visible ice is a prompt to measure. Original RVCamping.info diagram.
Give the thermometer one job
Use an appliance thermometer for the cooler compartment. This is different from the probe thermometer used to test cooked food. FDA recommends an appliance thermometer because a built-in refrigerator control does not show the temperature where food sits; cold storage should remain at 40°F or below.[2]
Put the thermometer in the food zone where it can be read during a short opening. Do not tape it directly to a frozen pack or bury it in loose ice. Either placement can show the temperature of the cold source rather than the area around the food. In a long cooler, a second thermometer at the end farthest from the main ice block can expose a warm pocket.
Read it before departure, at arrival, before meal preparation and whenever the cooler has been opened repeatedly. A single reading proves only that place and moment. The practical value comes from a small log: time, temperature, ice condition and action taken.
Start cold instead of asking ice to do all the work
USDA tells campers to refrigerate or freeze food before leaving and to pack cold or frozen food with ice, blocks or frozen gel packs.[1] That matters in an RV because a cooler may begin the day in a hot storage bay or sun-warmed tow vehicle.
The night before travel, chill drinks and perishables in the refrigerator. Freeze whatever is appropriate to freeze. Pre-chill the cooler with sacrificial ice or cold packs, then remove warm meltwater and load the trip supply. Fill empty spaces with additional cold sources or already-cold items. A nearly empty cooler gains heat each time warm air enters.
Use a separate beverage cooler when possible. Drinks are opened more often, so separating them protects the food cooler from repeated lid cycles. USDA specifically recommends this two-cooler arrangement for outdoor use.[1]
Pack for both temperature and contamination control
Cold does not cancel cross-contamination. USDA advises a separate cooler for raw meat and poultry when practical. In one shared cooler, raw packages should be below ready-to-eat food, securely wrapped or bagged, while all food stays in watertight containers away from melting ice water.[1]
Build the cooler from the bottom up:
- Put a cold layer on the floor.
- Add raw meat, poultry or seafood in sealed packages inside a rigid lidded bin.
- Place more cold sources around that bin without forcing its lid open.
- Add sealed cooked food, dairy and other ingredients above the raw zone.
- Keep sandwiches, washed produce, cheese and condiments in closed upper containers.
- Finish with a top cold layer and a visible thermometer.
The rigid raw bin is an RVCamping.info field control, not a federal product rule. It gives a second barrier if a store tray leaks and keeps hands from brushing raw packages during snack stops.
Hands matter too. FoodSafety.gov directs people to wash with soap and water before, during and after food preparation and after handling raw meat, poultry, seafood or eggs.[3] Pack potable handwashing water and soap if the site supply is uncertain. Hand sanitizer is useful when soap and water are unavailable, but it does not turn a raw-juice spill into a clean surface.
Manage ice water without confusing it with evidence
Melting ice is normal. It also creates three separate questions:
- Is the food zone still at 40°F or below?
- Are all food containers watertight?
- Could raw juices have entered the water?
Answer those questions before pulling a drain plug. Ordinary meltwater can help maintain cold contact around sealed containers. It can also soak paper packaging, spread a leak and add enough weight to make the cooler hard to move. Drain only when necessary to protect packaging, make room for replacement ice or reduce handling weight. Follow the campground's wastewater rules and keep drainage away from potable-water equipment, food surfaces and storm drains.
Never use cooler meltwater for drinking, ice, produce washing or dishwashing. USDA's guidance is explicit that food should be held in watertight containers so it does not contact melting ice water.[1] If raw juice reaches the water, stop normal service. Discard exposed ready-to-eat food and compromised packages, move intact sealed items to clean cold storage, and clean the cooler before reloading it.
Adding fresh ice may restore temperature, but it cannot undo contamination. Temperature failure and contamination failure need different responses.
Use an ice-water check as a system check
When replacing ice, look at the whole system rather than treating the new bag as an automatic reset.
- Read and record the thermometer before opening the cooler for long.
- Inspect the outside of the raw-food bin and all vulnerable packages.
- Remove only the containers needed to reach the cold-source area.
- Drain excess water through a controlled route if space is needed.
- Add clean ice, block ice or frozen packs around and above the food.
- Close the lid and allow the compartment to settle.
- Recheck the thermometer. If the food zone cannot return to and hold 40°F or below, move the food to reliable refrigeration or discard perishables whose safe history cannot be established.
Do not wash bagged ice in campground water or assume ice from an unknown source is suitable for drinks. Keep drinking ice in its own clean bag or container. Cooler ice stays on the cooling side of the operation.
Know when the clock replaces the cooler
A warm reading requires a time decision. Federal guidance says perishable food should not remain outside refrigeration for more than two hours, shortened to one hour when exposed to temperatures above 90°F.[3] The limit applies to cumulative exposure, not merely the last stretch before someone noticed.
If a thermometer shows above 40°F, ask when the cooler was last verified, how warm the surroundings were, whether the lid was open, and whether the food itself has another reliable cold-history record. When the start of warming is unknown, do not invent a safe timeline from the current reading. Smell and appearance cannot establish safety.
A useful correction plan has three levels:
- Cold and stable: leave the load closed and continue the schedule.
- Cold but losing capacity: add a cold source now, reduce openings and plan an early resupply.
- Above the limit or unknown history: move food to verified cold storage only if its time history remains within the applicable window; otherwise discard it.
The sight of a few ice cubes is not enough. USDA notes that campsite leftovers are safe only while the cooler still has ice, but the thermometer supplies the more useful measurement for a controlled RV routine.[1]
A two-minute cooler card
Tape this near the lid:
- Read: food-zone thermometer at 40°F or below.
- Look: no damaged packages, raw leaks or wet paper food containers.
- Separate: raw bin closed and below ready-to-eat food.
- Correct: enough clean ice or frozen packs around the food.
- Close: lid shut, cooler shaded and secured against tipping.
- Record: time, reading and any ice added or food discarded.
This article develops the thermometer log, ice-water decision and correction levels as an RV operating routine. The temperature, outdoor time limits, pre-chilling, cold-source, handwashing and separation rules come from the federal sources below.
Sources
- USDA FSIS: Food Safety While Hiking, Camping & Boating — outdoor cold-source, packing, separation and meltwater guidance (archived source text reviewed October 16, 2026).
- FDA: Refrigerator Thermometers — Cold Facts about Food Safety — appliance-thermometer and 40°F cold-storage guidance (retrieved October 16, 2026).
- FoodSafety.gov: 4 Steps to Food Safety — clean, separate and chill guidance, including outdoor time limits (archived source text reviewed October 16, 2026).
What's Your Reaction?