


























Before the RV moves: a visibility check for glass, wipers, mirrors and cameras
Check the RV windshield, wipers, washer, mirrors and camera views before travel, with safe-cleaning limits and clear park-until-corrected decisions.

Tips and Trends
Before the RV moves: a visibility check for glass, wipers, mirrors and cameras
Check the RV windshield, wipers, washer, mirrors and camera views before travel, with safe-cleaning limits and clear park-until-corrected decisions.
By Romana 
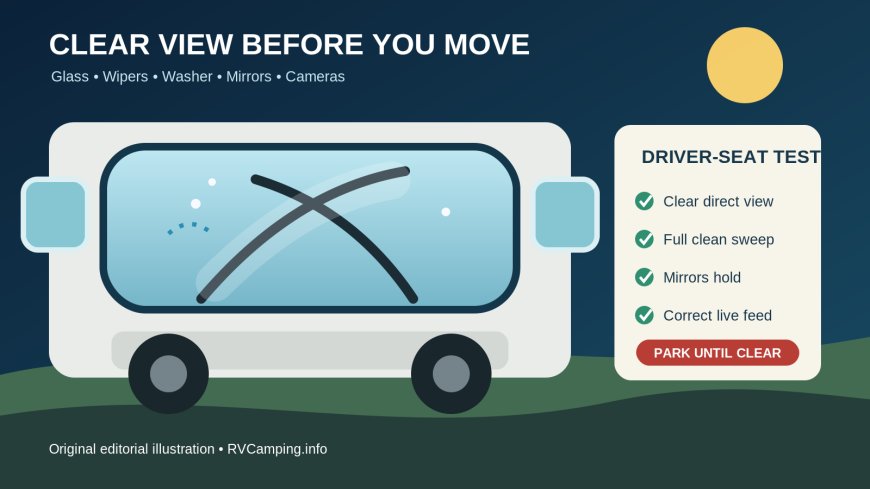
A windshield can look clean from the campsite and turn milky the moment low sun hits it. A wiper can move without clearing. A rear camera can power up while showing little more than a water-spotted blur. Those are different failures, so a useful travel-day check tests the whole view from the driver's seat before the RV moves.
This is a visibility check, not a generic departure walkaround. Use the manuals for the exact chassis, coach and camera system. They control the approved fluid, blade service method, mirror controls, camera operation and cleaning limits. There is no universal replacement interval in this guide.
Set up the check without creating a fall hazard
Park on firm, level ground, set the parking brake and keep the transmission in Park or Neutral as the chassis manual directs. Switch the engine off for hands-on cleaning. Let hot glass cool before applying cleaner, and do not lean a ladder against the windshield or coach body.
A tall Class A windshield changes the job. If the center cannot be reached with both feet on stable ground, use a suitable long-reach cleaning tool or have the work done where safe access is available. Do not stand on a tire, bumper, folding chair or wet step. The stop-work decision here is simple: if reaching the surface requires balancing, the cleaning waits.
Gather clean microfiber cloths, a soft sponge or vehicle-glass tool, the products allowed by the manuals, and enough light to inspect both sides of the glass. Keep gritty towels away from lenses and painted camera housings. A quick wipe with the rag used on wheels can trade one visibility problem for scratches.
Inspect the windshield from two directions
Start outside. Look across the glass at a shallow angle rather than straight through it. That view exposes chips, long scratches, wiper arcs, dried insects, mineral spots and greasy film. Check the area swept by each blade and the edges where dirt accumulates. Remove loose grit gently before wiping so it is not dragged across the surface.
Then sit in the normal driving position. Check through the windshield toward a light and dark background. Move any temporary navigation unit, phone holder, dash ornament or hanging item that cuts into the road view. Virginia's inspection rule is a useful defect checklist: it calls out cloudiness, distortion, vision-blocking objects and certain damage in the driver's view.[5] It is one state's inspection standard, not a nationwide pass/fail rule. Windshield damage and equipment-mounting laws vary, so repair questions belong with the applicable jurisdiction, glass professional and vehicle manual.
Clean the inside as well as the outside. Interior haze often comes from fingerprints, dust and films that are easy to miss in shade. Apply cleaner to the cloth when the product or equipment instructions call for it; this gives better control around the dash, sensors, trim and electronics. Avoid flooding edges or spraying nearby camera and sensor openings. If a label warns against a chemical, abrasive or coating, follow it.
Stop before departure if a crack, chip, scratch, haze, delamination or obstruction interferes with the driver's useful view. Do not decide that a camera makes damaged forward glass acceptable.
Check blade condition before running the wipers
Lift or service the arms only as the chassis manual permits. Some systems have a service position; forcing an arm against a hood edge can damage the vehicle. Keep fingers clear of linkage and do not let a raised arm snap onto the glass.
Look for torn rubber, hard or brittle edges, missing pieces, separation from the frame and a blade that is loose on its arm. Ford's Transit manual tells owners to feel the blade edge for roughness and clean it with washer fluid or water on a soft sponge or cloth.[1] That is a sound example of why the exact manual matters: use its access method, approved blade and cleaning direction rather than copying a technique from another chassis.
Virginia's inspection procedure rejects front blades with brittle, worn, torn or ripped rubber, metal touching glass, an insecure attachment or wipers that do not operate freely.[3] Again, those are Virginia criteria, but they make a practical owner screen. Exposed metal, a loose blade or restricted movement is a park-and-correct finding, not something to monitor from the highway.
Test the washer and the full sweep
Check the reservoir by the method in the chassis or coach manual. Use only a compatible fluid for the expected temperature. Winnebago's Journey manual recommends commercially available premixed washer solution and warns against water in freezing temperatures because the pump can be damaged.[2] Treat that as model-specific guidance and confirm what your own RV requires.
With the windshield already free of heavy grit and ice, run the washer and wipers from the driver's seat. Watch both spray and sweep:
- Fluid should reach the intended cleaning area rather than dribble below it, shoot over the roof or miss one side.
- Each blade should travel smoothly through its full designed path and park normally.
- The return stroke should clear the film rather than leave broad unwiped bands, chatter marks or a smeared veil.
- Washer fluid should not leak into the cabin or pour from a visible hose connection.
Do not hold the washer control in an attempt to revive an empty system, and do not probe a nozzle with an improvised object unless the manual gives that procedure. If fluid is low, identify the specified product and inspect for an obvious leak before refilling. If the pump sounds but the glass stays dry, or if the system repeatedly loses fluid, diagnose the cause before relying on it.
Stop the travel-day check if a blade contacts the glass with metal, detaches, stalls, interferes with the other blade, or leaves a large part of the driver's field uncleared. Also stop if freezing conditions can turn the chosen fluid into slush or ice. A forecast for dry weather does not make a failed washer harmless; road spray can erase a clear view within seconds.
Set the mirrors from the actual driving position
Clean mirror glass with a product and cloth allowed by the vehicle maker. Inspect the surface and housing for cracks, clouding, peeling, looseness and distortion. Virginia's heavy-vehicle inspection rules flag a reflecting surface that is cracked, pitted, clouded, tarnished, distorted or insecure, along with a mirror that will not hold its adjustment.[4] These details are useful beyond an inspection lane because vibration can turn a slightly loose mirror into a useless image at road speed.
Adjust the seat first, then the mirrors. Winnebago tells Journey drivers to sit squarely in the properly adjusted seat and set the mirrors for maximum rear visibility before driving.[2] Check every powered direction and any mirror heat or fold function that the day's conditions require. After adjustment, lightly close and reopen the door if the mirror is door-mounted, then confirm the view has not shifted.
Do not use a familiar campsite landmark as the only test. Ask a helper to stand well clear at several positions along each side and behind the RV while the driver remains stationary. The exercise identifies where a person, pedestal or small vehicle disappears from mirrors. The helper must never stand where the RV could move toward them.
A mirror that is loose, badly damaged, unable to adjust or unable to hold its setting is a stop-work item. A towel may remove dirt; it cannot repair a distorted reflecting surface or failing mount.
Clean and prove every camera view
Find all fitted lenses before wiping: rear, side-view or turn-signal cameras, and any forward camera that the owner documentation identifies as owner-cleanable. Use the camera maker's instructions. A soft, clean cloth may be appropriate for one lens while another system limits solvents, pressure or hand contact. Do not polish an unknown lens with an abrasive compound, point a pressure washer at a camera seal, or disturb calibration hardware.
The cited Journey manual says its rear monitor changes to the rear view in Reverse and its side cameras replace that view when the corresponding turn signal is active.[2] Test the functions fitted to your RV while it remains stationary, the parking brake is set and a helper stays clear. Confirm that:
- the correct view appears when selected or triggered;
- the image is current, stable and bright enough to interpret;
- mud, water spots, glare or condensation do not hide the useful area;
- any left/right labels or guidelines match the manual and the real scene; and
- the screen returns to its expected mode after the trigger ends.
A lit screen is not a complete pass. Black frames, frozen images, intermittent video, heavy blur or the wrong camera feed require correction. Never reach outside to clean or adjust a camera while the RV is moving.
Cameras add viewpoints; they do not remove the need to look through clean glass, use properly adjusted mirrors and check the area around the stationary RV. If the manual describes a camera as required for a maneuver and that view is unavailable, keep the RV parked until the fault is resolved or obtain qualified guidance for a safe alternative.
The final driver-seat decision
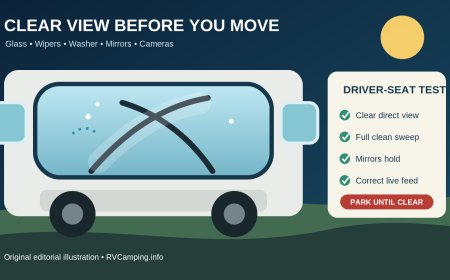
Return every cleaning tool, close the hood or service door, sit in the adjusted seat and scan in one loop: forward glass, left mirror, instrument area, right mirror, monitor, then forward glass again. Run one short washer/wiper cycle if conditions allow. Check the view in the light you will actually depart into, not only under a porch lamp.
The RV stays parked when any of these remain:
- forward glass damage, contamination or an object materially blocks the driving view;
- a blade is damaged, loose, restricted or cannot clear its intended area;
- the washer cannot deliver suitable fluid for the conditions;
- a required mirror is loose, distorted, badly obscured or will not hold adjustment;
- a fitted camera view needed for the planned maneuver is missing, frozen or too obscured to interpret; or
- safe cleaning or inspection requires climbing or work beyond the owner's manual.
Correct the problem, use a qualified glass, chassis, RV or camera technician when needed, and repeat the affected test. The check is finished when the driver has a clear direct view and each fitted aid produces a usable, correctly oriented view, not when every control merely turns on.Sources
What's Your Reaction?