


















RV wheel-lug-nut torque checks: use the manual, sequence, and recheck limit
A manual-first wheel-lug torque guide for RVs and trailers covering exact values, crossing sequences, staged tightening, re-torque limits and technician stop rules.

By Romana | September 24, 2026
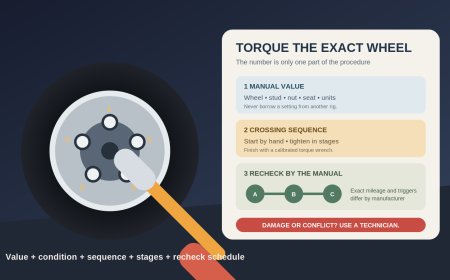
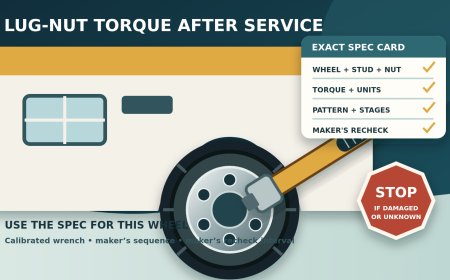
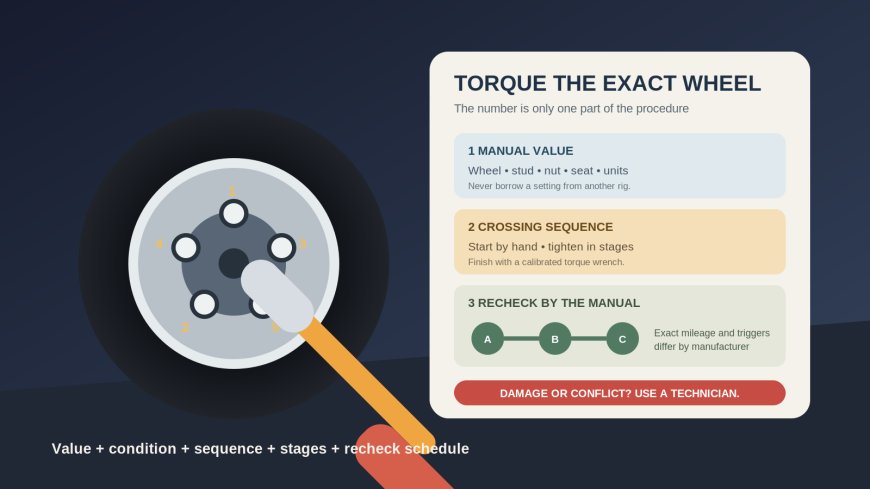
There is no universal lug-nut torque value or universal re-torque mileage for RVs and trailers. The correct job uses the value, fastener condition, tightening sequence, stages and follow-up schedule for the exact chassis, axle, hub and wheel. If any one of those details is unknown, the safe next step is documentation or a technician, not a number borrowed from another rig.
This matters after a new-RV delivery, tire change, brake or bearing work, wheel replacement, seasonal storage, or any service that disturbed a wheel. A torque wrench can confirm resistance at its setting. It cannot prove that a stud was never over-torqued, that the wheel is correctly seated, or that damaged hardware is safe.
Find the controlling value before touching a wrench
Build a wheel record for each affected axle. Include:
- RV or vehicle year, make, model and VIN;
- chassis and axle manufacturer, model and serial number;
- wheel size, material and part number when available;
- stud diameter and thread;
- lug-nut design and seat type;
- single- or dual-wheel position;
- final torque value and units;
- required fastener condition, such as clean and dry or a named lubricant at a named location;
- tightening pattern and stages;
- re-torque triggers and mileage limits; and
- manual title, revision, page and retrieval date.
Start with the completed RV or trailer manual. Then check the chassis, axle, hub and wheel documents that apply to the installed parts. A motorhome may defer to its chassis manual. A trailer number does not apply to the tow vehicle, and neither applies to a towed car.
Do not identify torque by socket size alone. Do not average two conflicting values. Ask the RV, chassis, axle or wheel manufacturer, or an authorized service facility, to resolve the conflict in writing.
Why a chart is not a universal answer
Dexter's light-duty service manual shows how much the attachment details matter. Its table changes final torque by wheel size, stud size and fastener design, with listed examples ranging from 60 to 75 pound-feet for some 12- and 13-inch wheel combinations to much higher values for specific 17.5-inch hub-piloted assemblies.[1] Those entries apply only when the row matches the installed Dexter equipment.
Grand Design's September 2025 Imagine manual uses a different table organized by wheel size, wheel material, stud size and coned-nut design. It specifies ranges rather than one RV-wide value and directs the owner to use the wheel manufacturer's specification.[3]
Winnebago's model-year 2025 towables manual gives 115 pound-feet, plus or minus 2 pound-feet, for the lug-nut procedure shown in that manual.[2] It is a Winnebago towable value, not permission to use 115 pound-feet on another trailer or on a motorhome chassis.
The thread and mounting-surface instructions matter just as much as the target. Winnebago tells owners of the covered towables to clean the mounting surfaces, nuts and studs, and not to lubricate the joint unless the owner manual specifically directs it.[2] Dexter's table contains a greased-thread note for one particular hub-piloted configuration.[1] That narrow exception is exactly why generic advice to oil or never oil every lug joint is unsafe.
Inspect before applying torque
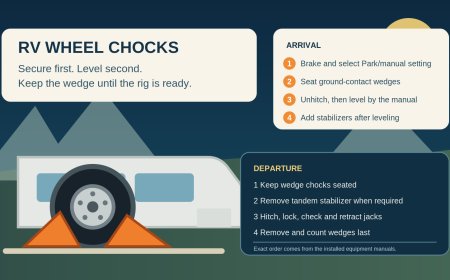
Park on a firm, level surface away from traffic. Secure the RV by its manual. If wheel removal or lifting is needed, use the specified lift points, rated stands and chocks. Never work under a rig supported only by a jack or leveling system.
Stop before torqueing if you find:
- a missing or obviously wrong nut;
- a nut that will not start normally by hand;
- damaged, stretched, bent, stripped or cross-threaded studs;
- a stud that turns in the hub;
- cracked, elongated or battered lug holes;
- a cracked or distorted wheel;
- a gap between wheel and hub;
- heavy rust, paint buildup or debris on mounting faces;
- the wrong seat shape for the wheel; or
- heat damage, metal debris or evidence that the wheel moved.
A torque check is not a repair for any of those conditions. Have the wheel attachment inspected and damaged parts replaced under the correct service procedure.
Over-torque can leave hidden damage. A federal recall covering certain Ram trucks reported that an incorrect excessive service specification could yield wheel studs; the remedy required inspection and replacement of studs that failed, not simply resetting the nuts to a new number.[4]
Use the exact crossing sequence and stages
Use a calibrated torque wrench whose working range includes the specified value, plus the correct fully seated socket. If the wrench has been dropped, overloaded, damaged or is outside its calibration interval, remove it from service until it is checked under the tool maker's instructions.
Unless the controlling manual says otherwise, the basic workflow is:
- Confirm the wheel record and units for that exact position.
- Prepare the threads, seats and mounting surfaces exactly as the manual directs.
- Start every nut by hand. Stop if a nut binds or will not run on normally.
- Snug the nuts in the crossing sequence shown for that lug count.
- Tighten in the manual's stages, repeating the same crossing pattern at each stage.
- Make the final pass with the calibrated torque wrench. Pull smoothly and stop at its indication.
- Record the wheel position, value, units, date, mileage and wrench used.
Dexter directs users of the covered running gear to start nuts by hand, follow the illustrated sequence and tighten in stages.[1] Grand Design's Imagine procedure uses three stages: an initial 20 to 25 pound-feet, then 50% of the final specification, then the final value selected from its exact wheel table.[3] That staging method belongs to the covered Imagine wheel combinations. Do not transfer it to a chassis manual that specifies another method.
An impact wrench is not proof of final torque. It may be used for removal or preliminary installation only when the service procedure allows it. Do not keep pulling after a click, beep or target indication, and do not use the torque wrench as a breaker bar.
Re-torque limits differ by manual
Plan the rechecks before leaving the shop or campsite. The interval can be short enough that the first safe stopping place must be selected in advance.
Dexter's light-duty manual calls for a check ahead of initial road use and whenever a wheel has been removed. It then specifies follow-ups at 10, 25 and 50 miles, with periodic checks after that.[1]
Winnebago's 2025 towables manual contains two instructions owners need to reconcile for their exact trailer. Its installation text calls for new and remounted wheels to be checked before the first tow and after 50 and 250 miles. A separate first-trip notice names departure plus the 10-, 25- and 50-mile marks, followed by checks before each trip, after excessive braking and after winter storage.[2] Do not silently choose one list. Confirm with Winnebago or the servicing dealer which instruction applies to the wheel event and record the answer.
Grand Design's current Imagine manual says to check every wheel before departure. Its maintenance checklist also calls for a re-torque after 50 to 100 miles before the first trip and another check within the first 200 miles.[3]
These schedules are examples of real differences, not a combined checklist. Use the schedule for the exact vehicle and event. If a manual says to check after wheel removal, a tire replacement or brake service starts that clock again.
A "periodic" instruction still needs a documented plan. Ask the manufacturer what interval applies if the manual does not define it. Do not invent a monthly or annual rule.
Know what a recheck can and cannot show
Follow the maker's procedure for fasteners already in service. Do not loosen every nut first unless the manual expressly says to do so. A wrench that clicks at the setting shows only that the nut resisted that torque at that moment. It does not measure clamp load directly and cannot reveal every damaged stud, distorted seat or previously excessive torque event.
If a nut moves an unexpected amount, keeps turning, will not reach the target, or repeatedly loses torque, stop driving. More torque is not diagnosis. The wheel, hub, studs, nuts and mounting faces need inspection.
Use a technician when the boundary is unclear
Arrange service from a qualified tire, chassis, trailer or RV technician when:
- the exact value, units, pattern, stages or fastener condition cannot be verified;
- applicable manuals or service information conflict;
- a wheel has unknown aftermarket parts;
- dual rear wheels, specialty fasteners or hub-piloted assemblies are unfamiliar;
- any stud, nut, seat, wheel or mounting face is damaged;
- a stud is suspected of prior over-torque;
- the wheel will not sit flush;
- safe lifting and support equipment is unavailable;
- the torque wrench is unsuitable or out of calibration; or
- torque does not remain stable through the required rechecks.
If vibration, wobble, clunking, smoke, metal debris or visible wheel movement appears after service, reduce speed smoothly and stop at the first safe location. Do not attempt a shoulder-side correction in traffic. Arrange roadside assistance or towing and have the complete attachment inspected.
Before accepting shop work, ask which wheels were disturbed, which document supplied the value and sequence, whether final torque was applied with an in-calibration wrench, what inspection was performed, and exactly when each wheel must be checked again. Put those answers on the invoice.
The useful number is never "RV lug torque." It is the documented value and complete procedure for the parts holding one specific wheel to one specific hub.
Source note: This RVCamping.info guide compares current manufacturer manuals and a federal recall record. Every numerical value is identified as a product-specific example; none is presented as a universal RV specification.
Sources
- Dexter Light Duty 600-8K Complete Service Manual Dexter Group
- Winnebago Towables Owner’s Manual, Model Year 2025 Winnebago Industries
- Grand Design Imagine Travel Trailer Owner’s Manual, Rev. 09/2025 Grand Design RV
- NHTSA Safety Recall 21V-398: FCA Wheel Studs National Highway Traffic Safety Administration / FCA
What's Your Reaction?