






Check your RV smoke alarm before the wheels move
Run an RV smoke-alarm pre-trip check that covers the test button, exact replacement age, approved battery, cooking nuisance alarms, and crew response.

By Romana
Check your RV smoke alarm before the wheels move
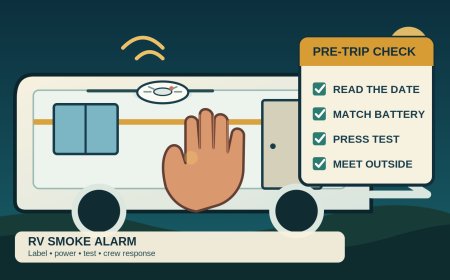
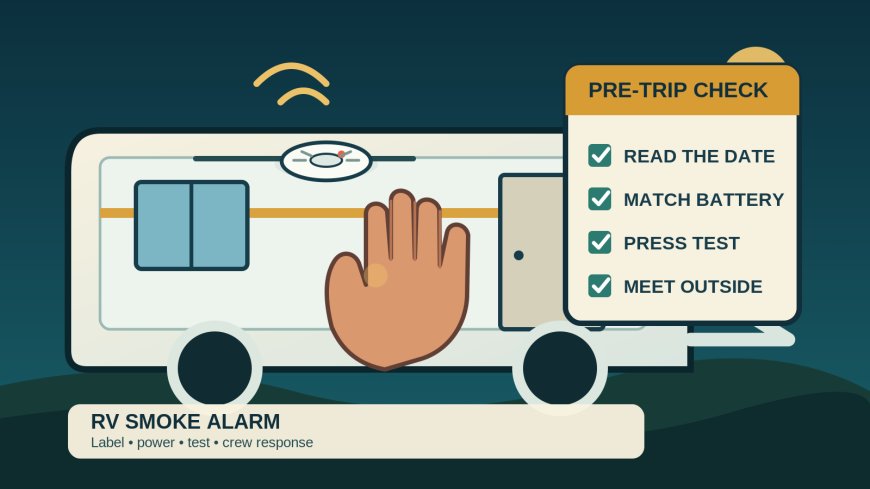
An RV smoke-alarm check belongs near the top of the pre-trip list, before packing hides the label and before anyone sleeps in the rig. Locate every smoke alarm, match each one to its manual, read its date and power label, test it with the button, and make sure every traveler recognizes the sound and knows where to meet outside.
Do not stop at a blinking light. Do not assume every round ceiling alarm uses the same battery or lasts 10 years. A 2026 Winnebago Solis manual calls for a test after storage, before every trip and at least weekly during use. It also sends owners to the alarm maker's information for the expiration rule.[4] That model-specific chain, RV manual plus installed-alarm label plus component manual, is the safe way to check any rig.
The seven-minute pre-trip check
Do this while the RV is parked, awake and quiet enough for everyone to hear the horn.
- Find every smoke alarm and combination smoke alarm. Do not confuse one with a separate carbon-monoxide or propane alarm.
- Photograph the front, back and battery-compartment labels, including the model, manufacture date and any replace-by date.
- Confirm that the installed unit and its mounting match the RV and alarm manuals. Keep vents clear of dust, paint, stickers, bedding and stored gear.
- Identify the power arrangement: replaceable battery, sealed long-life battery, hardwired power with backup, or another design documented for that exact unit.
- Check the age and replacement boundary. If the date cannot be read or the instructions cannot be matched to the alarm, resolve that before the trip.
- Warn everyone that the test will be loud, then operate the button for the time and sequence stated in the alarm instructions.
- From each sleeping position, confirm that occupants recognize the smoke signal and can start the agreed exit-and-meeting routine.
A passed button test is a readiness check, not a certificate that the sensor will respond to every possible fire.[5] Smoke must reach the alarm, and the Jayco manual warns that closed doors and other noise may keep people from hearing the horn.[5]
Start with the label, not a calendar rule
USFA and CPSC give a useful general ceiling: replace smoke alarms at 10 years, measured from the manufacture date, not the date you happened to notice the alarm.[1][3] That does not make 10 years the correct service life for every alarm installed in every RV.
The difference shows up in current RV manuals. Winnebago tells owners to use the smoke-alarm manufacturer's expiration information. Jayco's 2026 Class C manual says to replace its described RV-listed smoke alarm if it malfunctions, shows a problem, or reaches five years of use.[4][5] These instructions are not interchangeable. They are evidence that the installed product and coach documentation can set a shorter boundary than broad household guidance.
Use the earliest applicable stop point you can document:
- a printed replace-by or expiration date on the alarm;
- the service-life rule in the exact alarm manual;
- a shorter replacement instruction in the correct RV manual;
- immediate replacement when the unit fails its prescribed test or gives a documented trouble or end-of-life signal.
Do not estimate age from the RV's model year. An alarm may have been built earlier or replaced later. If a previous owner installed a different unit, identify that unit rather than applying the original manual blindly. Winnebago recommends the same model or another alarm listed for RV application when replacing the Solis alarm.[4] Treat RV listing, mounting location, compatibility and power requirements as selection criteria, not as details to sort out after purchase.
Know which battery you are looking at
The words "battery alarm" do not describe one universal setup. USFA distinguishes replaceable 9-volt alarms, nonreplaceable long-life battery alarms, and hardwired alarms with backup batteries.[1] The 2026 Solis example uses a 9-volt battery, but that fact applies to that documented installation, not to every motorhome or trailer.[4]
For a replaceable-battery unit, open the compartment only as the manual allows and compare the installed battery with the approved battery list. NFPA warns that alarm instructions may specify battery brand and model, and that another kind may not operate properly.[2] Jayco goes further for the unit described in its manual: use the alarm maker's recommended battery, avoid rechargeables, and keep the battery connected when silencing the alarm.[5]
For a sealed long-life unit, the battery is not a ten-year maintenance-free promise. NFPA says that if a nonreplaceable-battery alarm gives a low-battery chirp, replace the whole alarm right away.[2] Do not pry it open or try to fit a replacement cell.
For a hardwired or combination unit, identify both primary and backup power. Shore power, the coach battery disconnect and the chassis electrical system may not affect the alarm the way you expect. Test the unit by its own instructions instead of assuming that a powered RV means a powered alarm.
After any allowed battery change, close and remount the alarm fully, then repeat the prescribed button test. A spare battery in a drawer does not count as protection.
Test the alarm, not your tolerance for noise
USFA, NFPA and CPSC call for monthly smoke-alarm testing.[1][2][3] RV makers can require more. Both current Winnebago and Jayco manuals used here add checks when storage ends, ahead of every departure and no less than weekly during use.[4][5] Follow the most frequent schedule that applies to the installed alarm and RV.
Use the test button. Do not hold a match, lighter, candle or smoldering material under the alarm. Do not spray an unapproved aerosol into it. The test procedure, button hold time, expected sound, indicator behavior and reset steps come from the exact alarm manual.
If the alarm does not produce the documented result:
- recheck installation and power only through owner steps allowed by the manual;
- install an approved fresh battery if the unit has a replaceable battery and the manual calls for that response;
- replace a sealed unit when its instructions call for replacement;
- replace or service an expired, damaged, contaminated or still-failing alarm before anyone sleeps in the RV.
Do not open the alarm housing or attempt a sensor repair. Do not begin a trip with a promise to buy a battery at the next stop.
Nuisance alarms: fix the cause without disabling protection
Cooking steam and smoke can trigger a smoke alarm in an RV's compact interior. A nuisance alarm is frustrating, but removing the battery, covering the alarm, twisting it off its base, painting it or leaving it disabled after cooking creates a larger problem. USFA says never to remove the battery during cooking and recommends using the alarm's hush control, opening a door or window, and clearing the air.[1] CPSC likewise warns that disabling an alarm because of repeated cooking alarms can be fatal.[3]
First decide whether the event is truly a known cooking nuisance. Visible smoke, an unknown odor, a hot wall or appliance, or any doubt means everyone gets out and calls 911 from a safe location. Do not stand under a sounding alarm trying to classify the beeps while smoke increases.
For an obvious, attended cooking event with no sign of fire, follow the installed alarm's hush/reset instructions and ventilate with the range hood, door or window as the RV and appliance manuals allow. Stay with the cooking. Once the air is clear, confirm that the alarm returns to its documented normal state.
Repeated nuisance alarms need a proper correction. Clean the alarm only by its manual. Check whether grease, dust, insects, steam or a changed airflow path is involved. Do not relocate a factory-installed RV alarm using a household distance rule on your own. NFPA advises at least 10 feet from a cooking appliance in a home, but many RV interiors cannot provide that geometry; the RV maker and alarm manufacturer need to approve placement and the replacement must remain suitable for RV use.[2][4]
Replacement technology may help, but "photoelectric" or "nuisance resistant" on a retail box does not override RV listing, compatibility, location or the coach maker's instructions. Ask the RV manufacturer or an authorized dealer for a documented replacement when the original location produces persistent alarms.
Turn the horn test into a crew check
The alarm test is the right moment to coordinate the people, without repeating a full emergency-window drill. Tell everyone before pressing the button. Then ask each traveler to identify that sound as the smoke alarm, point toward the normal exit and named secondary route, and state the outside meeting point.
Run the listening check from real sleeping positions. Close or arrange interior partitions only as they would normally be used, and include expected nighttime noise such as a fan if it can be done safely. If someone cannot reliably hear the installed horn, do not assume another traveler will wake them. USFA notes that alarms with strobes or vibration are available for people who cannot hear standard alarms; select listed equipment that is compatible with the RV and the person's needs.[1]
Assign assistance for children, older adults, visitors and anyone with limited mobility or hearing. Choose one fixed meeting place far enough from the RV to keep people away from fire, smoke, traffic and propane equipment.[3] CPSC recommends practicing in daylight and at night, planning two ways out, helping people who may sleep through an alarm, and meeting at a specific outside location.[3]
When a smoke alarm sounds unexpectedly, the response is short: get everyone out, go to the meeting place, call 911, account for every person, and stay out.[3] The separate RV emergency-exit night check covers route and exit-hardware planning in detail. This check supplies the missing trigger: a smoke alarm that is present, in date, powered, tested and understood.
The card to keep with the trip checklist
Before departure:
- Alarm and RV manuals match the installed model.
- Manufacture or replace-by date is readable and within the shortest documented service-life limit.
- Correct approved battery is installed, or sealed/hardwired power is in normal status.
- Alarm is mounted, uncovered, clean and free of damage or trouble signals.
- Button test produces the documented sound and indicators.
- Every sleeper recognizes the smoke signal and can hear it from the sleeping position.
- Helpers and outside meeting place are named.
- Persistent cooking alarms, failed tests and unknown dates are resolved before sleeping in the RV.
Keep smoke-alarm work separate from the CO/propane check. A smoke alarm detects smoke that reaches its sensor; it does not replace a carbon-monoxide or propane alarm.[5] Combination units can use different patterns for smoke, CO, low battery and end of life, so keep the exact sound chart with the rig and teach the difference before the trip.
Sources
What's Your Reaction?