






Check your RV trailer lights before every departure
A safe connector-to-walkaround sequence for confirming tow-vehicle and RV trailer lights, interpreting common failure patterns, and knowing when the trip must wait.


Check your RV trailer lights before every departure
By Romana | Tips and Trends | September 23, 2026
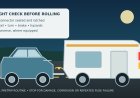
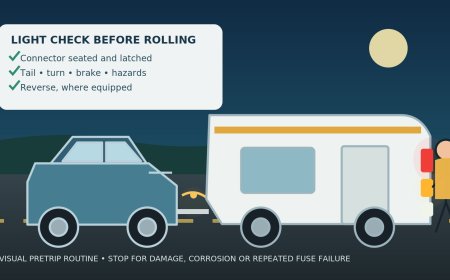
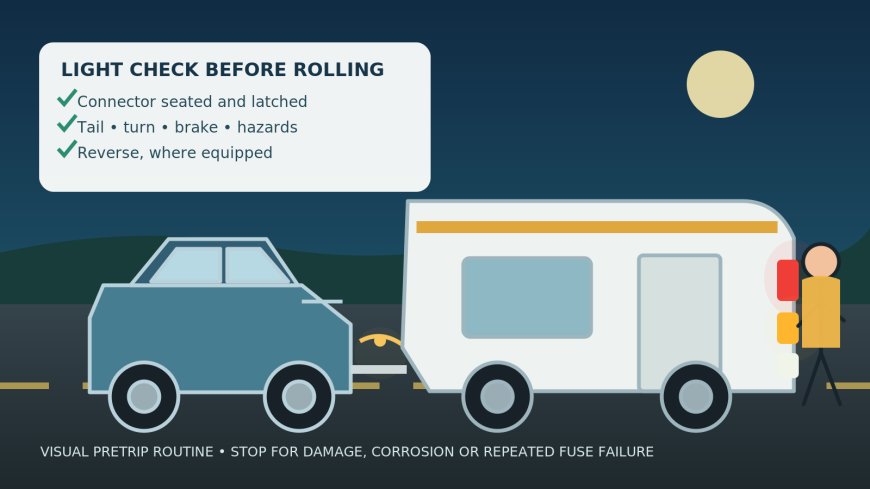
A light check belongs after the trailer is fully hitched and plugged in, but before anyone removes the last wheel chock. Seat the connector, inspect both ends for damage, then have one person operate the controls while another walks around the tow vehicle and trailer. Confirm tail and marker lights, left and right turns, brake lights, hazards, and reverse lights where the rig is equipped for them. If any required light fails, flickers, or behaves differently from the command, do not start the trip until the fault is resolved.
That sequence takes only a few minutes. It also tests the coupled system rather than assuming that a glowing lamp on the truck means the same circuit reached the trailer.
Start at the connector, not the light switch
Park on firm, level ground. Put the tow vehicle in Park, set its parking brake, and keep the trailer chocked. Finish the hitch, safety-chain, breakaway-cable, and electrical connections according to both owner manuals. Winnebago's 2026 towable manual places securing the 7-way connection and verifying lights or brake response before removing wheel chocks.[1]
Look at the tow-vehicle socket and trailer plug before joining them. The plug should be clean and dry, with no bent, pushed-back, loose, or missing contacts. The shell, lid, strain relief, and cable should have no cracks, crushed areas, exposed conductors, or fresh abrasion. Check for green or white deposits, moisture, heat discoloration, and a connection that will not latch or remain fully seated.
GM's trailer-lighting diagnostic bulletin tells technicians to inspect both sides of the connection for corrosion or visible damage and repair or replace the connector when either is present. It also identifies loose connections as a common cause of intermittent or dead trailer circuits.[3] That gives owners a useful boundary: a sound connector can be seated firmly and tested; corrosion, broken parts, pulled pins, exposed wire, or a plug that will not stay locked calls for repair, not roadside improvisation.
Do not probe terminals with loose wire, bridge contacts, stuff foil into a socket, twist bare conductors together, or tap directly into the tow vehicle's lamp wiring. Ford specifically warns that connecting trailer lamps to vehicle tail-lamp wiring can damage the electrical system and cause a fire; it directs owners to proper trailer-tow wiring assistance instead.[4]
Use a helper and call every command
The cleanest check uses two adults and a spoken sequence. The driver stays at the controls. The helper remains visible in a mirror, stays clear of traffic, wheels, the hitch pinch zone, and the path of either vehicle, and never goes under the RV. If the helper disappears from view, the driver stops the test.
- Turn on the parking or headlamps. The helper starts at the front of the tow vehicle and walks one full loop, looking for the tow vehicle's lamps plus the trailer's tail, side-marker, clearance, identification, and license-plate lamps where fitted.
- Switch everything off, then call "left turn." Check the front, side repeaters if fitted, tow-vehicle rear lamp, and every left-side trailer turn lamp.
- Repeat for the right turn.
- Call "brake." The helper confirms the tow vehicle and trailer stop lamps illuminate steadily. A helper is better than wedging the pedal or guessing from reflections.
- Call "hazards." Check the full combination again. Hazards and brake lights can share lamp elements on some rigs, so test hazards as their own command rather than treating the turn-signal checks as a substitute. Ford's towing guidance calls out running, brake, turn, and hazard lights as separate items to verify.[4]
- Check reverse lamps only if the tow vehicle and trailer are equipped and wired for them. The helper must stand off to the side, never behind the combination. With the service brake held, the driver follows the vehicle manual for selecting Reverse, confirms the lamps, then immediately returns to Park and resets the parking brake. Skip this step if either manual, the site, or the transmission procedure makes it unsafe.
After the commands, the helper makes one final walkaround with the lamps off. Look for a lens that is cracked, missing, clouded with water, hanging loose, or obscured by mud, snow, a bike rack, or cargo. California DMV's RV handbook says lights must be clean and working, and it puts responsibility on the operator to make sure trailer lights operate correctly.[2]
A built-in trailer-light test can replace some back-and-forth at the controls, but not the walkaround. GM describes systems that cycle trailer lamps for visual inspection and warns that monitoring may not detect every partial outage.[3] Watch every lamp turn on and off. A dashboard "connected" message is not proof that each lamp works.
Read the pattern before checking a fuse
The failure pattern helps you stop guessing:
- One dead lamp with others on the same command working points to that lamp assembly, its connector, or a local section of harness.
- A whole function missing on both trailer sides can involve the tow vehicle's dedicated trailer circuit, connector, module, or fuse.
- Several dim lamps, cross-feeding functions, or lights that change when another command is added can indicate a connection or ground fault.
- Flickering when the plug is touched suggests a poor connection. Stop moving the plug and arrange a proper repair.
These are triage clues, not wiring instructions. GM notes that corroded or weakened ground connections can produce faulty illumination and that a blown trailer-lighting fuse may point to an electrical fault on the trailer.[3]
If a function is out, turn the vehicle off and consult the exact tow-vehicle owner's manual. Locate only the fuse or relay identified for that model, model year, and trailer-light function. Check it by the manual's procedure and use only the specified type and amperage. Never install a larger fuse, bypass it, or borrow power from another circuit. If the correct replacement blows again, stop replacing fuses: the circuit needs diagnosis.
Also read any cluster alert literally and follow the manual. A trailer-disconnected message can have a different meaning from a lighting fault, brake-controller fault, or short-circuit warning. Ford's manual directs owners to an authorized dealer for trailer-brake-module faults and to trailer or vehicle service based on when a wiring-fault message appears.[4]
When the trip should wait
Do not leave with an inoperative required lamp, an intermittent connection, damaged connector, exposed conductor, overheated socket, repeated fuse failure, warning that remains active, or unexplained interaction between lighting functions. Arrange professional service from a qualified RV, trailer, or vehicle technician when the repair requires opening a sealed lamp, replacing a connector, tracing a harness or ground, diagnosing a module, or confirming compatibility between aftermarket equipment and the tow vehicle.
Check the VIN for open recalls, too. NHTSA campaign 26V104 covers specified Ford and Lincoln vehicles whose integrated trailer module may lose communication, with possible loss of trailer brake and turn-signal lights or brake function; the listed remedy is a free software update.[5] A successful driveway test does not close an open recall.
The NHTSA notice states the practical reason for treating failed trailer lights as a stop condition: lost lights or brakes can reduce trailer control and make the trailer less visible to other road users.[5]
Keep the check repeatable
Save the command order in the tow vehicle or add it to the departure checklist. Run it after every hookup, after a plug has been disturbed, and again after service that involved the hitch, bumper, lamps, wiring, or battery. Recheck at the first safe stop if the dash reports a fault or another driver signals a problem.
Record a failure with the command used, which lamps responded, any dashboard message, and whether touching the connector changed the symptom. A short video can help a technician see an intermittent fault. Do not keep cycling a hot connector or repeatedly feeding a circuit that blows its fuse.
This guide is a visual pretrip check, not a substitute for the tow-vehicle and trailer manuals or electrical diagnosis. It does not claim a hands-on inspection of any reader's rig. Equipment and lamp requirements vary by vehicle, trailer, and jurisdiction; the manuals and applicable law control.
Sources
- [1] 2026 Winnebago Towables Owner's Manual (accessed September 23, 2026).
- [2] California DMV Recreational Vehicles and Trailers Handbook (accessed September 23, 2026).
- [3] General Motors Bulletin 22-NA-111: Diagnostic Tips for Trailer Lighting (accessed September 23, 2026).
- [4] Ford Owner's Manual: Essential Towing Checks (accessed September 23, 2026).
- [5] NHTSA Recall 26V104: Trailer Lighting and Brakes May Not Function (accessed September 23, 2026).
What's Your Reaction?