






Pack an RV road-day lunch so the cold surrounds it
Pack a perishable RV road lunch between two frozen sources, then place and handle the bag so the cold chain survives the drive.

Pack an RV road-day lunch so the cold surrounds it
By Romana | October 22, 2026 | Cooking
A lunch can leave the RV refrigerator cold and still warm up long before the next pullout. The weak point is usually not the sandwich recipe. It is the hours between packing and eating: a soft bag on a sunny dinette, one small pack under several containers, or repeated opening for drinks.
USDA's bag-lunch guidance calls for an insulated bag and at least two cold sources around perishable food.[1] For an RV travel day, treat the lunch as its own small cold-storage system. Pack it once, place it away from heat, and keep it closed until the meal stop.

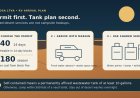
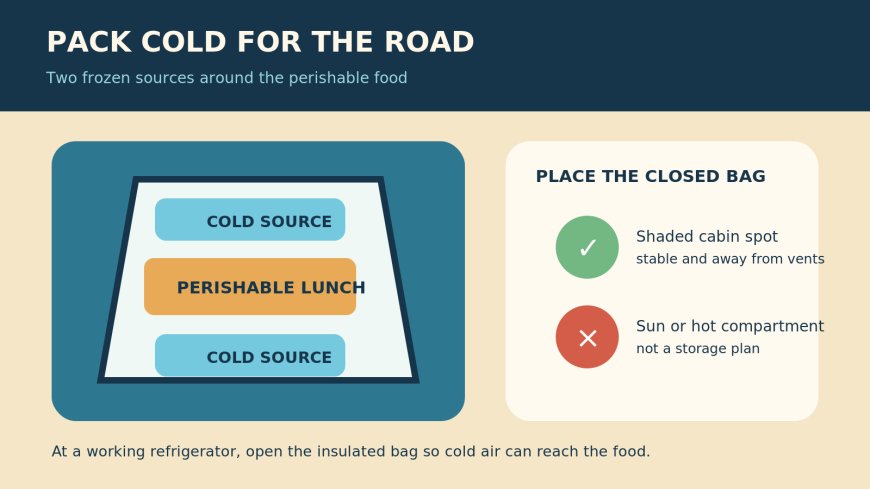
Cold source above, cold source below, lunch bag out of the sun. Original RVCamping.info diagram.
Start cold, not merely assembled
Prepare cooked fillings and other perishables early enough to chill fully in a refrigerator at 40°F or below. USDA says cooked lunch food should remain refrigerated until departure.[1] CDC also sets 40°F as the refrigerator target. Its prompt-refrigeration examples cover animal proteins, dairy products, prepared food and cut produce.[2]
Packing the night before is fine if the food and bag stay refrigerated. Add the frozen cold sources immediately before leaving. A warm container of freshly made pasta salad should not be expected to cool inside a lunch bag; it spends the bag's cooling capacity before the trip begins.
Wash hands before packing and use clean containers. CDC recommends at least 20 seconds with soap and water, and it advises sealing raw meat, poultry and seafood so their juices cannot leak onto other food.[2] A road lunch should normally use fully cooked or ready-to-eat items. If raw food for dinner shares a larger travel cooler, keep it sealed and physically below the lunch.
Build a cold sandwich, not a cold pile
USDA gives a specific arrangement: use at least two cold sources and place them above and below the perishable items.[1] Suitable pairs include two frozen gel packs, or one gel pack plus a frozen bottle of water or juice box. The agency specifies gel packs no smaller than 5 by 3 inches in this guidance.[1]
Pack in layers:
- Put the first frozen source flat on the bottom of the insulated bag.
- Set the sealed perishable lunch directly above it, with as little unused space as practical.
- Put the second frozen source on top.
- Close the bag and leave it closed until lunch.
This arrangement matters because cold air settles but heat can enter from every side. A top-and-bottom pair gives the food two cold boundaries and avoids making one small pack carry the entire load.
If the lunch includes a drink, freezing a compatible water bottle can make it the second source. Do not count a merely refrigerated can or an ice cube loose in a thin zipper bag as equivalent to a frozen pack. Leaks can wet packaging and leave the lunch with less cold mass than planned.
Give the bag a travel seat
The safest practical position is the coolest stable spot in the occupied, climate-controlled part of the tow vehicle or motorhome, shaded from windows and separated from heater outlets. Secure it so a stop or turn cannot tip the containers. Do not leave it on a sunny dashboard, beside the engine cover, on an exposed dinette, or in a warm exterior compartment.
That placement is an RV-specific application, not wording taken from USDA. The federal target still governs the result: perishable food needs to remain cold, and CDC uses 40°F or below as the refrigeration benchmark.[1][2]
Keep the lunch bag separate from the trip's drink cooler if people will open the drink lid at every stop. Fewer openings preserve the small cold space. If the route includes a long parked interval, take the lunch with you rather than leaving it in a sun-heated vehicle.
A small refrigerator thermometer can be tucked beside the food when conditions are uncertain. Read it quickly. If the bag is not maintaining 40°F or below, move the food to working refrigeration or another properly iced cooler instead of trusting that the packs “still feel cold.”
At a refrigerator, open the lunch bag
If a reliable refrigerator is available at the destination, put the perishables inside on arrival. USDA advises leaving the insulated bag open when it is placed in a refrigerator so cold air can circulate around the food.[1] A zipped insulated bag resists room heat on the road, but that same insulation slows refrigerator air from reaching its contents.
Do not store the lunch in an office or campground refrigerator that is visibly warm, overpacked or switched off. Check for a thermometer reading of 40°F or below when one is available.[2]
Handle the meal stop as part of the cold chain
Wash or sanitize hands before eating. Put only the food being eaten on the table and keep the second portion in the closed bag. USDA recommends packing only the amount of perishable food that will be eaten at lunch, which avoids an uncertain leftover ride through the afternoon.[1]
If cold control fails, the general exposure clock applies. CDC says perishable food should not remain unrefrigerated for more than two hours, shortened to one hour when it is exposed above 90°F, such as in a hot car or at a picnic.[2] Time before and during the meal belongs to the same exposure history; moving the container back into the bag does not erase it.
When that history is unknown, discard the perishable portion. Smell, texture and a cool outer container cannot establish how long the center stayed within the safe range.
A shelf-stable branch simplifies hot days
There is no requirement that every road lunch contain a refrigerated item. USDA's no-cold-source examples include uncut produce, firm cheese, unopened canned protein, bread or crackers, peanut butter and several condiments.[1]
Choose that branch when the RV refrigerator is struggling, the day includes several hot stops, or frozen packs cannot be restored overnight. It removes the cold-chain problem instead of pretending a decorative ice pack solves it.
For a perishable lunch, the field check fits on one line: food cold at packing, one frozen source below, one above, insulated bag closed in a shaded cabin position, then refrigeration or a measured cold bag until the meal.[1][2]
Evidence note: USDA FSIS supplies the two-source arrangement and destination-refrigerator handling. CDC supplies handwashing, separation, 40°F storage and time-out-of-control limits. Vehicle placement is RVCamping.info's RV-specific application of those controls.
Sources
- USDA FSIS: Keeping “Bag” Lunches Safe — insulated-bag, two-source, top-and-bottom and refrigerator-arrival guidance (official page reviewed October 22, 2026).
- CDC: Preventing Food Poisoning — clean, separate and chill practices, 40°F refrigeration and two-hour/one-hour limits (official page reviewed October 22, 2026).
What's Your Reaction?