








Pack it hot, check it once: an RV travel-day food-jar plan
A measured cook-preheat-load-check workflow for carrying one hot lunch in a vacuum-insulated food jar during an RV travel day.

Pack it hot, check it once: an RV travel-day food-jar plan
By Romana Category: Cooking
A vacuum-insulated food jar can move lunch off the RV dashboard and out of the next fuel-stop line. It cannot make an undercooked meal safe, and the word "insulated" is not proof that lunch stayed hot. Treat the jar as a passive holding tool: fully cook or reheat the food, preheat the clean jar, load it immediately, keep it closed and make one planned temperature decision before eating.
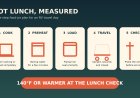
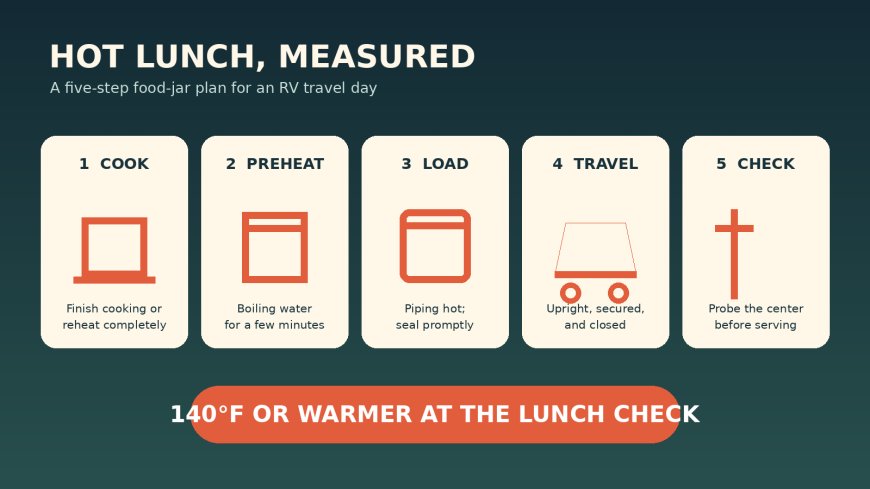
The short answer: Preheat a clean food jar with boiling water for a few minutes. Empty it, add fully cooked piping-hot food, verify the food is at least 140°F, seal promptly and keep the jar closed. At lunch, check the center with a clean food thermometer. A reading of 140°F or warmer confirms hot holding at that moment. If it is cooler, use the elapsed-time rule below; never guess how long it has been below 140°F.[1][2][3]

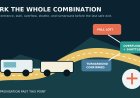
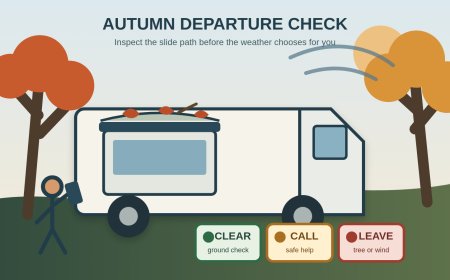
The jar is one link in the chain, not the cook. Original RVCamping.info illustration.
Choose a lunch that fits the jar
This workflow is about a single travel-day portion, not a stockpot, campground buffet or batch of leftovers waiting to cool. Pick a meal that can be spooned into the jar while genuinely hot and eaten from it without extra preparation. Thick rice-and-bean dishes, pasta, oatmeal, curry and chopped casseroles can work if the jar is intended for food and its opening accommodates both filling and cleaning. Large pieces waste space and make accurate center readings harder.
Capacity matters. A nearly empty jar contains more air and less hot food, so it may not perform like a full one. Do not improvise with a beverage bottle whose maker does not approve thick food, and do not force a swollen, damaged or cross-threaded lid. Follow the instructions for the exact jar for fill limits, gasket placement, venting and dishwasher use. Product directions explain operation; federal guidance sets the food-safety decisions.
Run a rehearsal before depending on a jar for a four- or five-hour driving leg. Use the same jar, preheat method, food type, portion and planned lunch interval. Measure at loading and again at the planned meal time. A rehearsal does not certify every future lunch, but it can reveal that a small portion, loose lid or long route is a poor match. If the food is not at least 140°F at the planned check, shorten the interval or switch to a lunch carried cold at 40°F or below.[1][3]
Cook first; the jar does not finish the job
Do not load raw meat, partly cooked poultry, dry beans or a cold casserole and expect stored heat to cook it during the drive. FoodSafety.gov tells consumers to use a thermometer and lists different minimums for different foods: 165°F for poultry, casseroles and leftovers; 160°F for ground meat and sausage; and 145°F plus a three-minute rest for whole cuts of beef, pork, veal, goat and lamb.[2] Use the endpoint that applies to the ingredients before they enter the jar.
For a meal cooked that morning, probe the thickest or coolest part and meet its applicable cooking endpoint. For refrigerated leftovers, reheat the entire portion to 165°F before packing.[2] Stir a dense dish, then check more than one place. A steaming surface does not prove that the middle is ready.
Keep the food covered on the stove while the jar preheats. Finish cooking or reheating close to departure so the meal does not sit on the counter while the RV is loaded. Start with clean hands, a clean jar, a clean lid and a clean thermometer probe.
Preheat, drain and load without a long handoff
USDA FSIS gives a simple method for hot packed lunches: fill the insulated container with boiling water, let it stand for a few minutes, empty it, add piping-hot food and keep the container closed until lunch so the food remains at 140°F or above.[1]
Set the open jar on a stable counter where it cannot tip toward a person. Add boiling water within the jar maker's limits, fit the lid as directed and wait the specified few minutes. Keep children and loose items away from the work area. Drain the water completely just before filling; leftover water can dilute the meal and create splash risk.
Move the hot food straight into the warm jar. Avoid a slow assembly line of toppings and garnishes. Leave only the headspace required by the jar instructions, wipe the sealing surface with a clean towel and close the lid correctly. Check the food itself immediately before sealing. It must already be at least 140°F to enter a hot-holding plan; a hotter, piping-hot load gives the insulation more heat to retain.[1][3]
Write two times on a piece of tape: sealed and planned check. The sealed time becomes the conservative start of the unverified interval if the lunch reading later falls below 140°F. That is stricter than trying to reconstruct an unknown threshold crossing after hours on the road.
Keep the jar closed and secured during travel
Opening the lid at a viewpoint or fuel stop releases heat and breaks the planned hold. Pack condiments, crackers and a clean spoon separately. Put the sealed jar upright in a bin or cup holder that can restrain it during braking; do not leave it loose on a counter, bed or dinette. Keep it away from feet, pets and direct sun.
A warm RV cabin, insulated tote or sunny dashboard does not replace a thermometer reading. Sun can heat the outside without proving anything about the food in the center. Likewise, a jar that feels warm may contain food below the 140°F hot-holding level. Keep the jar closed until the scheduled check rather than sampling it repeatedly.
If the route stretches past the rehearsed interval because of weather, traffic or a breakdown, change the meal plan. Stop while the conservative time window still permits a safe decision, or leave the jar sealed and discard the contents later. A delayed lunch does not gain more safe time because the lid remained closed.
Make one temperature decision at lunch
Park safely before handling hot food. Wash hands when possible; if running water is unavailable, use the hand-cleaning supplies in the travel kit. Open the jar on a level surface, mix the contents using a clean spoon, then place a clean food thermometer in the center without touching the metal wall or bottom. Check another area if the dish is thick.
Use the result this way:
- 140°F or warmer: The reading confirms hot holding at the check. Serve promptly. Keep the jar stable, beware of steam and do not return a used spoon to a shared portion.[1][3]
- Below 140°F, but still inside the conservative limit: Count from the sealed time, because the actual time that the food crossed below 140°F is unknown. If fewer than two hours have passed, or fewer than one hour when the food has been exposed to conditions above 90°F, eat it immediately or move it promptly into verified refrigeration at 40°F or below.[1][3]
- Below 140°F after that limit, or time unknown: Discard it. Do not taste it to decide, and do not reheat it as a rescue. FDA tells consumers to discard perishables left without hot or cold control for more than two hours, with a one-hour limit above 90°F.[3]
This conservative clock avoids a false claim: a single cool reading cannot reveal when the food left safe hot holding. If a jar reads 132°F after four hours, nobody can infer that it crossed 140°F only a few minutes ago. The sealed time is known; the crossing time is not.
Serve once, then choose discard or refrigeration
Pack the amount one person will eat. USDA's bag-lunch guidance advises packing only the perishable food that can be eaten at lunch and discarding leftovers afterward.[1] That is the cleanest plan for a jar eaten on the road, especially after a used spoon has gone back into it.
If an untouched portion is intentionally saved, it still needs a real cold chain. Transfer it with clean utensils into a clean shallow container and refrigerate promptly at 40°F or below, within the same two-hour limit or one-hour hot-weather limit.[3] Do not screw the lid back on and leave the jar in the cab until the campground. A food jar is built to slow temperature change, which works against rapid cooling.
Do not put the closed hot jar into the RV refrigerator as a cooling method. The insulation blocks the fast heat transfer that safe cooling needs. Move the food into a shallow container instead. If you cannot verify refrigerator temperature and meet the clock, discard the remainder.
The departure card
Tape this compact record to the lid or keep it with the route notes:
- Meal endpoint: applicable cooking temperature, or 165°F for reheated leftovers.[2]
- Preheat complete: boiling water emptied after a few minutes.[1]
- Load reading and sealed time: food at least 140°F before closure.[1][3]
- Planned check: based on a prior rehearsal with this jar and portion.
- Lunch decision: 140°F or warmer means serve; below 140°F means apply the conservative sealed-time clock; beyond the limit or unknown means discard.[1][3]
The record is deliberately short. On a travel day, the useful system is the one that survives a fuel stop, a route change and a hungry passenger without turning an insulated jar into a guessing game.
Evidence note: USDA FSIS, FoodSafety.gov and FDA supply the cooking, preheating, hot-holding, refrigeration and discard thresholds. The rehearsal, sealed-time clock and five-line departure card are original RVCamping.info planning tools. No food jar was tested, and no firsthand performance claim is made.
Sources
What's Your Reaction?