



Valterra S2000 Slunky review: the campsite slope still decides
Research-based Valterra S2000 review with exact ASIN verification and a 2.5-inch slope-budget check for real campsite terrain.
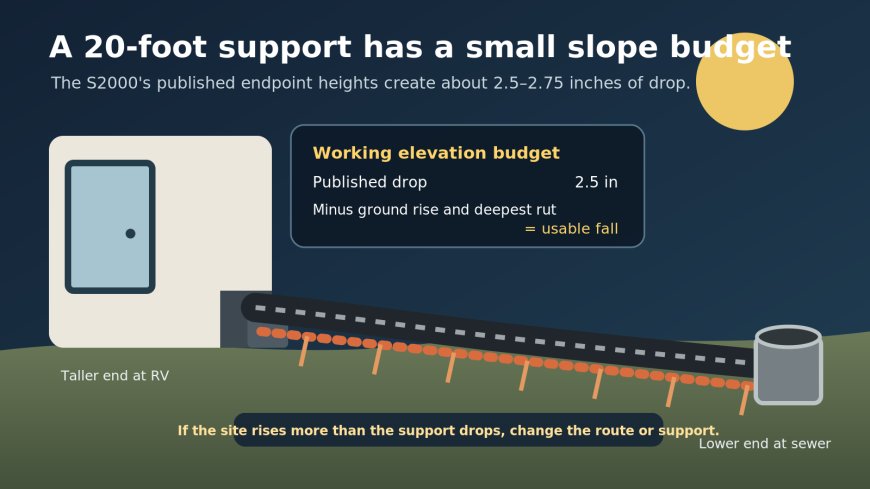
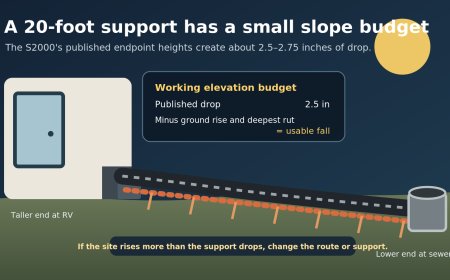
The Valterra S2000 Slunky is a 20-foot sewer-hose support for level or gently sloping full-hookup sites.[1][5] Its accordion shape bends around obstacles, six ties help keep the hose seated, and it packs down far smaller than a rigid 20-foot trough.[1][5] The catch is easy to miss: the published endpoint heights provide only about 2.5 to 2.75 inches of drop over its full length.[1][5] If the ground rises more than that toward the sewer inlet, the built-in taper cannot produce a continuous downhill run.
That makes the S2000 a good buy for campers who want a compact, flexible support and usually stay on cooperative pads. It is a poor fit for sites with curbs, deep ruts, raised sewer risers or ground that slopes back toward the RV. Those conditions call for independently adjustable sections or another setup that can create more elevation.
This is a research-based review. RVCamping.info did not buy or physically test this unit. Product identity and dimensions were checked against manufacturer, retailer and Amazon listing evidence.
Affiliate disclosure: As an Amazon Associate, RVCamping.info earns from qualifying purchases. If you check the Valterra S2000 on Amazon, we may earn a commission at no extra cost to you.
The useful part is the compact, curved run
Valterra's current product page identifies the black 20-foot model as S2000.[1] It lists metal hinges, a ridged base, six tie-down straps, a self-fastening storage strap and a weight of 5.125 pounds.[1] Dyers RV lists the same model, UPC 019079820006, six ties and a storage strap.[5] Amazon's indexed listing connects that exact model and UPC to ASIN B00C5TAJKA.[2]
Those details point to the S2000's strongest use case: a standard gravity sewer hose that must cross a moderate distance and bend around a pedestal, tire or other campsite obstacle. The linked accordion stays in one piece, and Valterra says the metal hinges add strength and service life.[1] The supplied ties help keep the hose in its cradles.[1]
The 20-foot label describes the supported hose length in the current manufacturer and retailer records.[1][5] It is not a command to stretch the support fully at every site. Use only the length the route needs.
A two-number check tells you whether it will drain
The manufacturer says the support is 7 inches high at the RV end and 4.5 inches at the sewer end.[1] Dyers lists 7.25 and 4.5 inches.[5] That unresolved quarter-inch conflict is small, but it should not be silently averaged away.
Using Valterra's figures, the built-in drop is:
7.0 - 4.5 = 2.5 inchesacross 20 feet2.5 ÷ 20 = 0.125 inch per foot, about a 1.04% grade
Using the retailer's 7.25-inch figure raises the drop to 2.75 inches, or about 0.138 inch per foot. Either way, the campsite can overwhelm it.
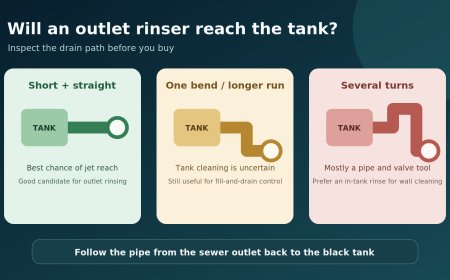
Before connecting the hose, compare the ground under the high and low ends. A pad that rises 1 inch toward the sewer leaves roughly 1.5 to 1.75 inches of net fall. A 3-inch rise erases the S2000's entire built-in drop and can leave the hose level or running backward. A dip anywhere along the route can still make a liquid trap even when the endpoints look right.
This is the S2000 drop-budget card:
- Start with 2.5 inches of advertised drop; use 2.75 only if your actual unit measures 7.25 inches at the high end.
- Subtract any ground rise toward the sewer.
- Subtract the depth of the worst rut or soft spot beneath the support.
- If the result is near zero or negative, change the route or use a height-adjustable support.
The card is intentionally conservative. It does not claim a universal plumbing grade for a temporary RV hose. It simply checks whether this fixed-taper product can maintain visible fall at the campsite in front of you.
Setup is short, but sanitation still matters
Connect the hose securely at both ends before opening a waste valve. Stretch the support only as far as needed, put its taller end at the RV, and follow the full hose route by eye. Every segment should descend toward the sewer with no belly between supports. Seat the hose in the cradles and use the supplied ties where movement or wind could pull it out.
A hose support does not fix a leaking connector or make a poor sewer seal acceptable. Virginia's campground rule, for example, requires the hose to be watertight, flexible, noncollapsible and weather resistant.[3] The same rule requires the lower end to be secured into the riser with a suitable gasket.[3] Local requirements differ, and some campground policies specifically require a support.[4]
Keep the black-tank valve closed during normal full-hookup camping, then dump in controlled batches according to your RV's sanitation instructions. Leaving the valve open can let liquid run ahead while solids remain in the tank. After dumping, close the valves, disconnect without twisting the support against the fittings, rinse the support away from potable-water equipment, let it dry and store it separately from fresh-water gear.
If the hose itself is the weak link, our Camco RhinoFLEX 39741 review covers modular reach and storage fit. For sites where gravity routing is impractical, the Flojet 18555000A macerator review explains the separate power, hose-length and heat limits of a pumped system.
Who should buy it, and who should skip it
Buy the S2000 if your full-hookup stays usually have level pads, your gravity hose route is no longer than 20 feet, and compact storage matters more than adjustable height. It is especially useful when the route needs a gentle curve that a rigid trough cannot follow.
Skip it if you regularly encounter a raised sewer inlet, a curb, deeply uneven ground or a pad that climbs toward the drain. Also skip it if you need a support to create a substantial grade on its own. The S2000 follows the ground while adding only a modest fixed taper; it cannot bridge every campsite contour.
For a level pad, the S2000's compact 20-foot accordion is an easy way to keep a gravity hose supported. On a difficult pad, measure first. Treat 2.5 inches as the working elevation budget until the actual support and route show that you have more.
Sources
What's Your Reaction?