







RV exterior lights and reflectors: a function-by-function departure check
Inspect RV road lights, side markers, clearance lamps and reflex reflectors by function, then diagnose connector, power or hardware faults without redesigning the certified system.


RV exterior lights and reflectors: a function-by-function departure check
By Romana
Category: Tips and Trends (ID 6)
An illuminated red lens does not prove that an RV’s rear lighting system is ready. The same housing may perform tail, stop and turn functions at different intensities. A trailer connector can power one circuit while another has a weak ground. A clean lens can sit beside a reflector hidden by a bicycle cover. A useful departure check therefore tests each road function and inspects passive devices separately.
This is an owner-level inspection, not a design specification. Federal Motor Vehicle Safety Standard No. 108 is detailed and vehicle-specific. The required count, color, location and visibility depend on whether the vehicle is a motorhome or trailer and on dimensions such as overall width and length. Preserve the certified configuration and use the exact RV, chassis and lamp instructions for replacement work.
Separate road equipment from campsite lighting
Start by mapping the devices. Road equipment includes headlamps on a motorhome or tow vehicle; front and rear turn signals; stop lamps; taillamps; hazard-warning lamps; backup lamps; license-plate illumination; and the side-marker, clearance, identification and reflex-reflector equipment applicable to the vehicle.
Porch, awning, scare, docking and decorative accent lights are not substitutes for those functions. Switching on every exterior LED strip can actually make the check harder by adding glare.
FMVSS 108 applies to lamps, reflective devices and associated equipment on the listed vehicle types, including trailers, and also covers replacement equipment for like devices. Its tables and sections specify required equipment by vehicle type and size.[1] The NHTSA test procedure explains the standard’s safety purpose: illuminate the road and make vehicles and their signals perceivable and understandable in daylight, darkness and reduced visibility.[2]
That purpose suggests a better checklist: ask what another road user can see and understand, not merely whether electricity reaches a lens.
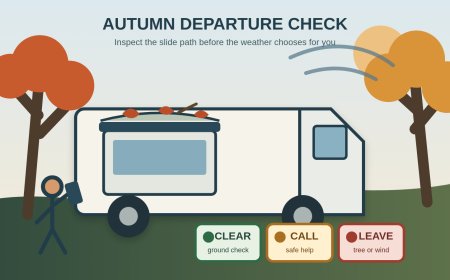
Inspect first in daylight
Walk around the uncoupled or parked combination with the ignition off and parking brake set. Clean lenses and reflectors using products allowed by the manufacturer. Look for cracks, missing pieces, condensation or water accumulation, severe fading, loose housings, corrosion, exposed conductors and repairs that obscure markings.
Confirm every device has an unobstructed view. Bike racks, cargo trays, spare-tire covers, ladders, temporary signs and mud can hide lamps or reflectors. FMVSS 108 requires covered devices to be mounted so applicable visibility and photometric requirements are met with obstructions considered.[1] An owner cannot certify photometry by eye, but an obvious obstruction is a reason to stop and correct the load arrangement or seek qualified advice.
Inspect reflex reflectors with a flashlight held close to your viewing line. Compare left and right response rather than declaring a precise pass/fail brightness. Remember that a passive reflector does not light electrically. If a combined lamp-and-reflector housing has a failed bulb but returns the flashlight strongly, only the reflector portion has demonstrated anything.
Do not add red-and-white conspicuity tape simply because it appears on commercial trailers. The federal standard has a specific conspicuity provision and an exception affecting trailers designed exclusively for living or office use.[1] State requirements, older-vehicle rules and commercial use can add another layer. Preserve the factory design or get competent guidance before changing type, color or location.
Test one function at a time
Use two people when possible. One stays in the driver’s position; the observer stands where visible to the driver and never behind a vehicle that may move. Keep the transmission in Park or Neutral as specified by the chassis manual, set the parking brake and chock as appropriate.
Call and test these functions individually:
- parking and taillamps;
- low- and high-beam headlamps on the powered vehicle;
- left turn, then right turn;
- four-way hazards;
- service brakes, held long enough to compare all stop lamps;
- backup lamps, using the chassis manual’s stationary procedure;
- license-plate lamp;
- clearance, identification and side-marker lamps fitted to the RV.
The observer should report function, side and symptom: “left trailer turn dark,” “right stop dimmer than left,” or “all rear trailer lamps flicker.” “Lights good” is too vague to diagnose later.
Forest River’s motorized owner manual includes taillights, brake lights, headlights and turn signals in its outside pre-travel walk-around.[3] Use that as a minimum prompt, then add the equipment shown in the exact vehicle manual and on the RV itself.
For a towable, isolate connector faults carefully
Connect only after inspecting the plug, socket and cable for bent contacts, contamination, damaged strain relief and a cable path clear of the road, hitch articulation and exhaust. Secure the combination and test with the engine state specified by the tow-vehicle manual.
A fault pattern helps without authorizing electrical improvisation:
- One dark function on one side may point toward a lamp, contact or circuit issue.
- Several dim or interacting functions may suggest a ground or connector problem.
- All trailer road lights dark may involve connection, tow-vehicle protection or trailer power distribution.
- Fast flashing may be a fault indication, but behavior varies with flasher and tow package.
These are diagnostic clues only. Consult wiring diagrams for the exact RV and tow vehicle. Do not bypass a fuse with a larger rating, backfeed circuits, pierce sealed wiring or assume internet wire colors match the installed harness. If a test light, meter or repair procedure is outside your competence, use a qualified RV or automotive technician.
Replacement is not just “same shape”
A lamp that fits the opening may have the wrong function, color, output, connector or approval. FMVSS 108 includes requirements for replacement lamps and permits DOT markings as certification in specified contexts.[1] Match the original part information or a manufacturer-approved equivalent. Keep invoices and photograph markings before installation.
LED conversions can also change load behavior, warning indications and lens optics. A brighter-looking source behind an old housing is not automatically compliant. Do not cover a failed required lamp with a portable magnetic light unless the manufacturer and applicable law provide a valid arrangement for that vehicle.
After any replacement, repeat the complete function test. Aim-sensitive equipment such as headlamps may need a proper service procedure rather than a garage-door guess.
Include recalls and body-builder information
Search the 17-character VIN at NHTSA and check both the RV manufacturer and chassis manufacturer. NHTSA notes that its VIN result can show certain unrepaired recalls but may omit completed recalls, some recent campaigns and some small-manufacturer records.[4] Search the year/make/model and equipment records too, then verify applicability with the manufacturer.
A motorhome can involve chassis-supplied front lighting and body-builder rear or marker systems. Record both identities. For a trailer, record the trailer VIN plus lamp or harness part numbers. Follow recall remedies rather than treating a successful driveway test as proof that a recalled defect is resolved.
The departure card
- [ ] Lenses, housings, wiring and connectors visually intact
- [ ] Lamps and reflectors clean and not blocked by cargo or accessories
- [ ] Tail/parking lamps tested
- [ ] Headlamp low and high beams tested where applicable
- [ ] Left and right turns tested separately
- [ ] Hazards tested
- [ ] All stop lamps tested with pedal held
- [ ] Backup and license-plate lamps tested
- [ ] Side markers, clearance and identification lamps checked as equipped
- [ ] Passive reflectors checked separately
- [ ] Connector cable routed for turns without dragging or pinching
- [ ] Chassis, coach/trailer and equipment recall checks current
- [ ] Any failed required function repaired before road travel
Repeat the quick function check after hitching, after a lamp repair and whenever a connector has been disturbed. On a long trip, add it to fuel-stop walk-arounds. The goal is not to memorize a federal table beside the campground gate. It is to preserve the system built for this RV, catch a failed function before traffic does, and refuse departure when another driver would receive an incomplete or misleading signal.
Sources
- [1] eCFR: 49 CFR 571.108, FMVSS No. 108 (accessed October 4, 2026).
- [2] NHTSA Laboratory Test Procedure TP-108-13 (accessed October 4, 2026).
- [3] Forest River Motorized RV Owner’s Manual (accessed October 4, 2026).
- [4] NHTSA: Check for Recalls (accessed October 4, 2026).
What's Your Reaction?