
















Quote the RV, not the car: an agency-by-agency toll budget audit
A practical workflow for turning an RV's connected axle count, agency-defined height class, transponder record and official toll-calculator results into an auditable trip budget.

Quote the RV, not the car: an agency-by-agency toll budget audit
By Romana | October 7, 2026 | RV Camping
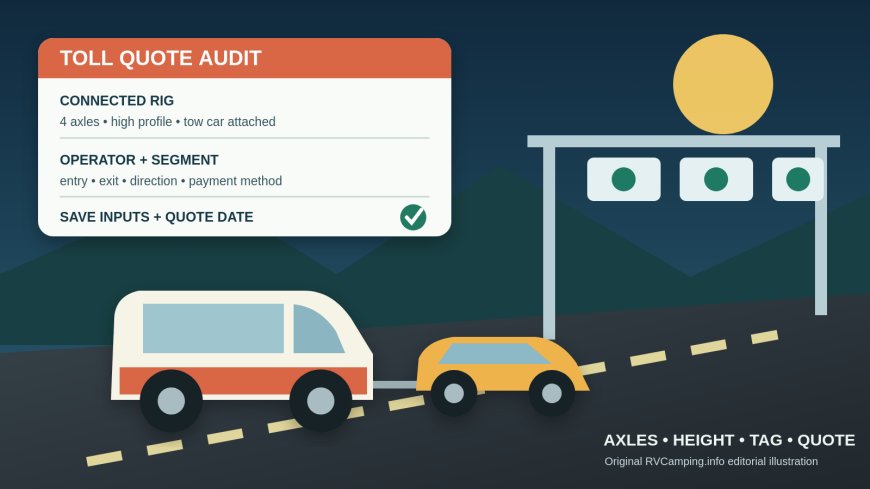
A car-route estimate is a poor toll budget for a motorhome or a pickup towing a travel trailer. The number can change when a toll system sees more axles, a taller profile, a different payment method, or a transponder assigned to the wrong vehicle type. There is no useful universal shortcut such as “double the car rate.” Build the estimate one toll agency at a time, using the RV exactly as it will cross each gantry.
RVCamping.info has already covered transponder coverage and basic axle counting. This guide tackles a different job: producing a defensible trip budget from official toll calculators, recording each calculator’s assumptions, and checking the result again after the trip.
Start with the connected travel configuration
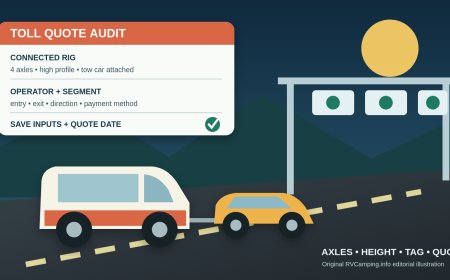
Make one record for every configuration you may drive on toll roads. A Class A towing a two-axle car is one configuration. The same motorhome after the car is disconnected is another. A pickup alone, a pickup with a two-axle travel trailer, and that combination with an extra tag axle all need separate lines.
For each line, record:
- tow vehicle or motorhome license plate and issuing state;
- trailer or towed-vehicle plate and issuing state;
- total axles touching the road;
- travel height, plus the measurement method and date;
- transponder number and the account vehicle or class assigned to it;
- route date and expected direction of travel.
Count the connected combination, not the object that holds the transponder. New York’s Thruway Authority classifies a vehicle from its height above axle one and axle two, together with every axle in the connected combination, including a trailer or towed vehicle.[1] That is a confirmed New York rule, not proof that every toll authority classifies vehicles the same way.
Height also needs a label. “RV height” may mean overall clearance to the highest fixed point in route planning, but a toll agency may define its profile measurement differently. Keep the overall travel height for bridge clearance. In a separate field, record the height definition requested by the toll calculator or class table.
Assign every tolled segment to its operator
Break the route at agency boundaries and at individual tolled bridges, tunnels or express lanes. A state name is not precise enough. One itinerary can cross a turnpike, a separately operated bridge and a managed lane with different price and classification rules.
Build a route table with these columns:
entry or gantry | exit | road, bridge or lane | toll operator | direction | connected configuration | payment method | quote date | quoted amount
Use the operator named on the official roadway page or calculator. Do not assume that a transponder accepted at one facility makes the account’s home-agency discount available everywhere. Acceptance, vehicle classification and discount eligibility are separate questions.
This segment-first approach also catches a common itinerary error: quoting the long turnpike section but missing a bridge or tunnel charge near the campground. Review both directions. A facility can price by direction or collect only one way, and the return route may use a different crossing.
Translate the RV into each agency’s class
Open the official class guide before the calculator. Write down the inputs the agency requests rather than trying to carry one class number across the entire trip.
New York’s published Thruway guide divides vehicles by axle count and by height over the first two axles. It identifies vehicles under 7 feet 6 inches as low and vehicles 7 feet 6 inches or higher as high.[1] Pennsylvania’s Turnpike class page also presents axle-height classes, but it says the main I-76/276 system and several extensions use that method while listed barrier points use an axle-only system.[2] Pennsylvania labels 7 feet 6 inches or lower as low profile and more than 7 feet 6 inches as high profile.[2]
Those two official pages expose why a generic “four-axle RV” note is incomplete. The agency may need:
- an axle count for the entire connected combination;
- a profile choice based on that agency’s stated height rule;
- a road or toll-point choice that selects the applicable class system;
- a payment method or account type.
Do not round a height near a threshold or infer the profile from a registration label. If the wording leaves your exact rig uncertain, send the authority the configuration, axle count and measured height and ask which calculator selection applies. Save the response with the trip worksheet.
Run the official calculator as a controlled quote
Enter one segment at a time. Pennsylvania’s calculator states that tolls are calculated from distance traveled, vehicle type and payment method.[3] Those are three separate fields to preserve in your record.
For every result, save:
- the official calculator URL;
- entry, exit and direction;
- axle and height/profile selections;
- connected configuration;
- transponder, invoice, plate or other payment choice;
- result and currency;
- date and time checked;
- a screenshot or PDF of the result page.
A screenshot without the inputs is weak evidence. Capture the selected entry, exit, class and payment method in the same file when possible. If the calculator provides only the amount after submission, name the file from the assumptions, such as `PA-I76-4H-EZPass-westbound-2026-10-07.pdf`, and keep the worksheet beside it.
Repeat the quote with the next plausible class when a measurement or agency answer remains unresolved. Use the higher result as a planning reserve, but label it as an RVCamping.info budgeting choice, not the authority’s determination of your class. Resolve the class before travel whenever possible.
Verify the transponder record, not just the logo
Interoperability does not fix an account configured for the wrong vehicle. Virginia E-ZPass says a transponder can move between vehicles of the same classification or type, but towing a trailer or boat changes the type and requires a transponder programmed with the correct classification.[4] The FAQ also tells customers to keep their account’s vehicle details current.[4]
That is Virginia’s account instruction. Its registration checklist calls for the plate plus identifying details about the vehicle that will use the pass.[4] Your home agency may handle trailers, motorhomes, temporary vehicles or extra transponders differently. Before departure, ask the agency that issued the transponder:
- Is this transponder assigned to the motorhome or tow vehicle shown on the worksheet?
- Must the trailer or towed vehicle be listed on the account?
- Does this connected configuration require a different vehicle class, plan or transponder?
- Are all plates current and spelled exactly as registered?
- Is the payment method valid, and is automatic replenishment working?
Record the date, channel and answer. Do not tape a passenger-car transponder into an RV and treat a successful beep as proof of correct billing.
Add a reserve without inventing precision
Once every segment has a quote, total the same-direction itinerary and then the return. Add a labeled reserve for unresolved class questions, route changes and rate changes before departure. The reserve is a household budgeting decision, not a published toll.
Avoid giving the worksheet false precision. A quote checked weeks before travel can become stale. Construction detours can move the rig to another tolled facility. A missed exit can change distance-based tolls. Managed-lane prices may depend on conditions or time. Put the quote date beside every amount and schedule a recheck close to departure.
The useful total has three lines:
- confirmed quotes: official calculator results with resolved inputs;
- provisional quotes: official results run with a documented assumption;
- planning reserve: money held for route or billing variance.
Do not blend those into one unexplained figure.
Recheck before the trip and at the last safe stop
Seven to three days before departure, reopen every official calculator. Confirm rates, road names, class selections and payment choices. Check the transponder account balance and vehicle records. If the route changed, rebuild the segment table rather than editing only the total.
On travel day, check traffic and closures through the relevant agency or 511 system before committing to a toll facility. Do not try to read a class table or manage the transponder account while driving. Resolve the work at the campground, a rest area or another legal parking place.
Carry the saved worksheet offline. It should show the expected operator, segment, class and payment method, plus the customer-service contact for the account issuer. The purpose is not to argue with a roadside device. It is to preserve what you selected and why.
Reconcile the trip after the last gantry
Within a few days, compare posted transactions with the route table. Match date, facility, direction and connected configuration. Flag a charge when the class, payment method or facility differs from the worksheet, or when an expected transaction never appears.
Keep the trip record intact while a charge is pending. Some transactions do not post immediately. If a mismatch remains, contact the account issuer or toll operator through its official dispute channel and provide the transaction details, plate, transponder number and saved quote inputs. A calculator result may not guarantee the final toll, but it documents the route and class used for the budget.
Then update the configuration record. If the agency corrected the class, note the confirmed class and source of the answer for the next trip. Do not turn one corrected transaction into a nationwide rule.
The compact workflow
- List every connected RV configuration.
- Count all road axles and record the relevant height measurements.
- Split the itinerary by toll operator and direction.
- Read each operator’s current class guide.
- Confirm the transponder account assignment and plate records.
- Run each official calculator with saved inputs.
- Separate confirmed quotes, provisional quotes and reserve.
- Recheck shortly before departure.
- Reconcile transactions after travel.
The axle count is the start of the toll budget, not the budget itself. The reliable number comes from pairing the exact rig with the exact facility, class rule and payment method, then keeping enough evidence to audit the charge later.
Source note: Confirmed classification and account facts in this article are attributed to the named toll agencies. The worksheet, reserve method, screenshot practice and reconciliation sequence are RVCamping.info planning recommendations. Rates and account rules can change; verify the current official source for every trip. This article does not claim a test trip or guarantee a quoted toll.
Sources
- Vehicle Classification Information | New York State Thruway Authority — Official height and axle classification definitions, including towed vehicles and trailers; accessed October 7, 2026.
- Toll and Vehicle Details | Pennsylvania Turnpike — Official road-specific axle-height and axle-only classification tables; accessed October 7, 2026.
- Toll Calculator | Pennsylvania Turnpike — Official calculator and stated distance, vehicle-type and payment-method inputs; accessed October 7, 2026.
- E-ZPass FAQ | Virginia E-ZPass — Official trailer, vehicle-type, registration and account-maintenance guidance; accessed October 7, 2026.
What's Your Reaction?