











After hail hits your RV: inspect, document, then escalate
A safety-first post-hail RV inspection plan for roof covers, seals, vents and solar, with documentation steps and clear professional repair triggers.


After hail hits your RV: inspect, document, then escalate
By Romana*
Category: Tips and Trends*
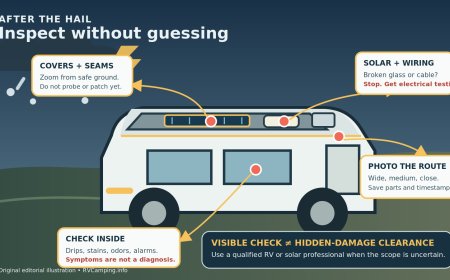
A calm-looking RV after a hailstorm is not proof that it escaped damage. A walkaround can find broken covers, punctures, displaced hardware, loose sealant, and new water entry. It cannot clear the roof structure, wall cavities, electrical wiring, or solar cells that still look normal. Treat the first look as triage: make the area safe, record what changed, prevent additional exposure without erasing evidence, and put uncertain findings in front of the right professional.
Wait until the storm is truly over
Stay sheltered while hail, lightning, or a warning remains active. The National Weather Service says to assess property only after the severe-weather threat has ended and to keep monitoring for more storms.[1] Its lightning guidance adds a useful minimum: remain in safe shelter for at least 30 minutes after the last thunder.[2]
Once it is safe to step outside, scan the campsite before approaching the RV. Do not touch downed wires or anything resting on them; NWS says to contact local authorities about downed power lines.[1] Avoid standing water near electrical hookups. Watch for broken glass, sharp plastic, hanging branches, unstable trees, flooded ground, and damaged campground structures. NWS post-storm guidance specifically calls for sturdy shoes and protective clothing while walking through damaged areas.[1]
If you smell propane, hear hissing, see arcing or smoke, find a sagging roof section, or see water entering electrical equipment, keep people away and call campground management, emergency services, the utility, or a qualified RV technician as the situation requires. Do not energize a wet or visibly damaged system to "see if it works."
Start with a ground-level evidence lap
Before moving the RV or touching damaged parts, photograph all four sides, the front and rear caps, the roofline, windows, awning, slide toppers, lights, mirrors, antennas, and anything on the ground. Take wide shots that establish location, then medium and close views. Include a ruler or coin beside dents only when you can do so without climbing or disturbing the area.
Record:
- the date, approximate time, campground or storage location, and where the RV was parked;
- the storm warning, hail report, or weather screenshot you relied on, without treating an app estimate as proof of what struck the RV;
- make, model, model year, VIN, license plate, and current mileage;
- photo and video filenames, plus a short note describing each view;
- visible debris, broken pieces, and where each piece was found; and
- any new odor, alarm, leak, dampness, unusual sound, or equipment fault.
The National Association of Insurance Commissioners advises documenting losses with photos or video and a damage list before cleanup, saving damaged items when possible, and asking the insurer what the policy covers.[5] NAIC also notes that insurers commonly impose claim-reporting deadlines, which is a reason to contact the actual carrier promptly rather than rely on a generic timetable.[5] That is general claims guidance, not a promise that an RV policy covers a particular repair. Coverage, deductibles, reporting deadlines, inspection requirements, and authorization rules come from the actual policy and insurer.
NAIC's recommended order is useful here: document first, then make only the temporary repairs needed to limit further exposure.[5]
Do not throw away a shattered vent lid, trim piece, solar-panel fragment, or damaged cover until the owner, repair facility, and insurer agree it is no longer needed; NAIC advises saving damaged items for an insurer's inspection when possible.[5] Place loose pieces in a labeled container if they can be collected safely.
Check inside before anyone climbs
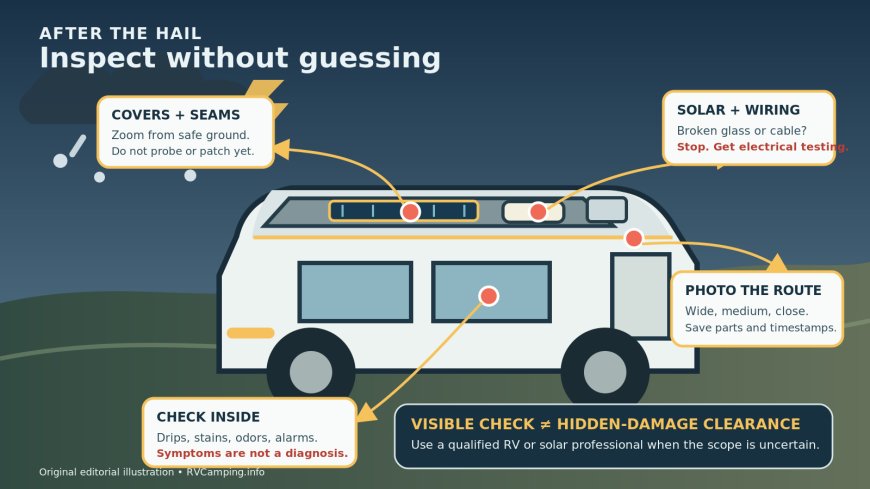
Walk through the RV with a flashlight. Look at the ceiling and upper cabinets beneath vents, skylights, air conditioners, antennas, solar cable entries, front and rear cap transitions, and roof-to-wall seams. Check around windows and doors. Photograph stains, drips, swollen trim, ripples, detached panels, and wet belongings.
Use touch and smell only where it is safe. A damp ceiling, musty cabinet, or soft interior finish is a reason to escalate, not a map of the leak path. Water can travel before it becomes visible. Likewise, a dry ceiling during the first hour does not prove that every layer above it is dry.
If active water is entering, move belongings out of its path and collect drips from below. Arrange safe temporary weather protection after documenting the opening. Do not screw a tarp through an undamaged roof, cover a combustion exhaust, trap water under plastic, or improvise around energized solar wiring. Ask the RV maker, repair facility, roadside provider, or insurer which temporary measure fits the exact construction and claim process. NAIC recommends making temporary protection only after documentation and asking the insurer what the policy covers.[5] Save receipts for authorized temporary work; NAIC guidance recommends records for temporary-repair costs.[5]
Use optics from the ground, not an improvised roof walk
Binoculars, a camera with optical zoom, or a camera pole can show roof edges and many fixtures. Work in daylight from firm, level ground. Never lean a ladder against cracked trim, a vent, an awning, or a panel that may have shifted.
Do not assume a factory ladder makes the roof walkable. The cited Winnebago EKKO manual labels its ladder as limited access, warns users to stay off the roof, and assigns roof work to qualified personnel equipped for a safe working environment.[3] Winnebago's warning is model-specific; owners must follow the manual and labels for their own RV rather than transfer that access rule to every roof.[3]
Stop the owner inspection if a useful view requires stepping onto the roof, reaching beyond ladder rails, working in wind or rain, moving a solar panel, lifting a vent flange, probing a membrane, or opening an electrical enclosure. Book a qualified RV inspection instead.
Give every roof zone a named photo
From a safe position, photograph the same route a technician will need to inspect:
- front cap and front roof termination;
- both roof-to-wall edges and awning rail;
- rear cap and rear termination;
- roof membrane or hard roof surface;
- vents, fans, skylights, plumbing caps, antennas, and air-conditioner shrouds;
- each sealant perimeter, exposed fastener, molding end, and cable-entry gland; and
- solar modules, frames, mounts, wiring, junction boxes, and charge-system status.
Visible reasons to stop using or moving the RV until it is assessed include a puncture or tear, an open seam, cracked vent or skylight plastic, displaced molding, a loose rooftop component, broken solar glass, exposed conductors, a dangling cable, or water entering the coach. Dents and scuffs still belong in the photo record, but their appearance alone does not establish whether they are cosmetic, functional, structural, old, or new.
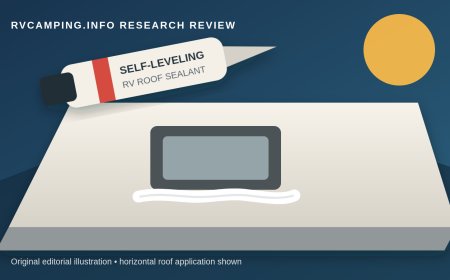
For sealants, photograph cracks, gaps, lifted edges, missing material, and loss of contact. Do not scrape, press, or add a generic tube of sealant during the evidence lap. Winnebago directs owners to the sealant callout for the exact model and says inspections must consider adhesion as well as appearance.[3] A compatible repair requires identification of the roof surface, existing material, joint, fixture, and current manufacturer instructions. Our separate RV roof-seam inspection guide explains that product-identification step in detail.
Treat vents, skylights, air conditioners, and solar as separate systems
Hail does not create one uniform damage pattern. A roof membrane may look unchanged while a brittle vent cover splits. An air-conditioner shroud can crack while the unit beneath it remains unknown. A solar module may have intact glass yet still require testing.
For vents and skylights, record broken or crazed plastic, a lid that no longer sits square, bent hinges, damaged operators, missing hardware, and disturbed sealant. Do not cycle a jammed lid or motor. A technician should inspect the flange and opening if the cover shifted or cracked.
For rooftop air conditioners, photograph the shroud, grille, fasteners, visible fins, and the ceiling assembly below. Do not straighten fins, remove the shroud, or run a unit that is wet, displaced, electrically damaged, or making a new noise. Functional testing belongs after the safety and electrical checks in the applicable service procedure.
For solar, photograph every module and mounting point from a safe distance, note any controller alerts, and save a screenshot of recent production if the system logs it. Do not touch broken glass, connectors, or exposed wiring. Solar modules can remain electrically active in daylight even when the RV's main disconnect is off.
The Department of Energy's hail guidance for photovoltaic systems is explicit that some damage may be visible and some may not.[4] It describes infrared, ultraviolet fluorescence, and electroluminescence testing for damage that a visual check can miss, including microcracks.[4] DOE also advises electrical inspection and fault testing before repowering a visibly damaged system.[4] That federal guidance is written for stationary PV systems, not as a do-it-yourself RV test procedure. The useful boundary carries over: an intact-looking module is not a clean bill of health. Ask the RV or solar-system maker, installer, or a qualified technician what electrical and imaging tests apply to the exact mobile installation.
Build a repair handoff, not a verdict
Send the repair facility a compact file before the appointment:
- RV and component identification, including serial numbers where accessible;
- storm date, location, warning information, and the time photos were taken;
- an exterior photo set organized by side and roof zone;
- interior photos matched to the fixture or seam above;
- controller alerts, alarm history, and equipment symptoms;
- previous roof, sealant, solar, vent, or air-conditioner work orders;
- pre-storm inspection photos, if available; and
- the insurer's claim number and authorization instructions, if a claim was opened.
Ask the facility to state the inspection scope in writing. A useful scope distinguishes a visual exterior inspection from moisture measurement, leak tracing, roof-substrate assessment, electrical testing, solar performance testing, and component removal. It should also identify which findings are confirmed, which remain suspected, and which areas could not be accessed.
Choose a facility with experience in the RV's construction and installed components. If warranty work may be involved, ask the RV and component manufacturers whether prior authorization or an authorized service center is required before disassembly. If an insurer is involved, ask what it wants documented before permanent repair. NAIC says the insurer's adjuster assesses and documents the loss for the carrier, so keep your own photo set and notes ready for that review.[5] Avoid signing a repair or benefits-assignment document you do not understand; NAIC warns consumers not to be pressured into quick contracts or upfront payment after a disaster.[5]
When can the RV move?
A ground walkaround cannot declare the RV roadworthy. Do not tow or drive if glass can fall, a roof component or awning is loose, a cover could detach, lights or mirrors are damaged, water has reached electrical equipment, tires or wheels were struck, a slide or door will not secure, or the roofline has changed shape. Use roadside assistance or arrange transport to a repair facility.
If no immediate hazard is visible, check the exact owner's manual and ask a qualified technician when uncertainty remains. A professional inspection is the right next step after large hail, widespread impacts, any roof breach, solar damage, active water entry, interior staining, or a change in how a door, slide, vent, air conditioner, or electrical system operates.
The first inspection has one job: create a safe, time-stamped record and prevent avoidable secondary exposure. It should never be sold as proof that hidden damage does or does not exist.
Editorial note: This research-based guide does not claim hands-on inspection, structural diagnosis, leak tracing, solar testing, insurance interpretation, or legal advice. Follow the manuals and labels for the exact RV and installed components. Ask the insurer about the actual policy and claim procedure. Sources were checked September 27, 2026.
Sources
- National Weather Service: What to Do After Severe Weather (accessed September 27, 2026).
- National Weather Service: Lightning Tips (accessed September 27, 2026).
- 2026 Winnebago EKKO Operator Manual (accessed September 27, 2026).
- U.S. Department of Energy: Hail Damage Mitigation for PV Systems (accessed September 27, 2026).
- NAIC: Navigating the Claims Process — Recover and Rebuild (accessed September 27, 2026).
What's Your Reaction?