





The five-zone RV campsite departure walkaround
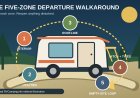
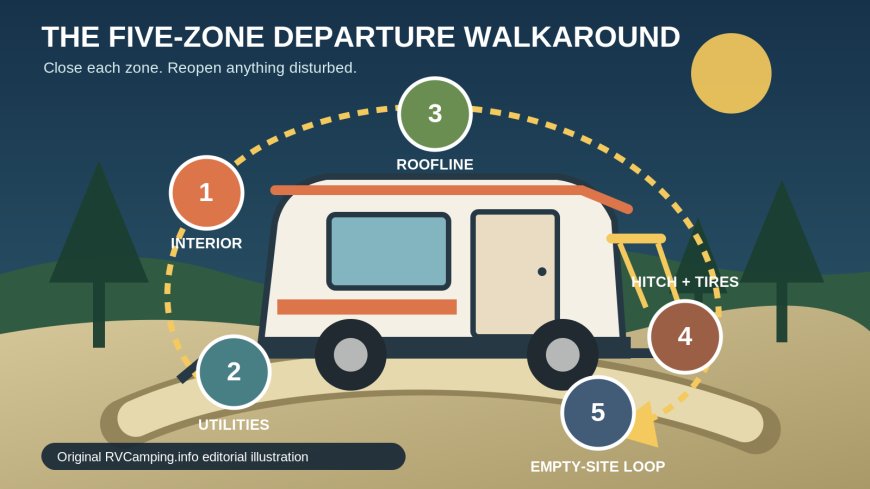
A five-zone RV departure walkaround that closes the interior, utilities, roofline and awnings, hitch and tires, then the empty campsite through explicit handoffs.

The five-zone RV campsite departure walkaround
By Romana
Category: RV Camping
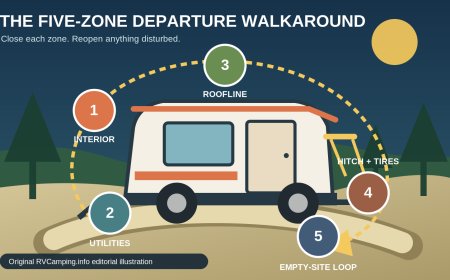
Breaking camp gets messy when packing, hookup teardown, and the road check blur into one long chore. Use five separate zones instead: interior, utilities, roofline and awnings, hitch and tires, then the empty campsite. Each zone gets a named owner, a finish call, and a stop gate. Nobody removes a chock, starts the engine, or pulls forward because the rig merely looks ready.
This is a handoff system rather than another all-purpose packing list. It works best for two people, but a solo camper can use the same sequence by moving a marker on a printed card. Replace every generic line with the exact sequence, limits, and travel positions in the manuals for the RV, chassis, tow vehicle, hitch, awning, slide, and appliances.
Set the handoffs before touching the rig
Choose a caller and a driver. The caller owns the card and says which zone is open. The driver owns the final movement decision. A person may do both jobs when traveling alone, but the two decisions should remain separate.
Use three status words:
- Open: work is still happening in the zone.
- Closed: the assigned person has touched or seen every listed condition.
- Reopened: somebody changed a closed item, so that item and its dependent checks must be repeated.
A closed compartment that gets opened for a forgotten jacket is reopened. A utility bay opened to stow one more fitting needs another latch check. If a hitch pin is removed for any reason, the coupling check starts again. This small bit of ceremony makes interruptions visible.
Post the departure time at the top of the card. Start the five zones early enough that a defect, stuck fitting, wet awning, or misplaced key does not become a reason to waive a safety check.
Zone 1: put the interior in travel condition
The interior owner makes one sweep from the far end of the RV toward the exit. Jayco's towable manual says loose items should be stored and secured before travel, with heavy objects kept low for stability.[2] The exact storage and appliance rules still come from the manuals for the unit in front of you.
During the sweep:
- account for every person and pet before operating slides or other moving equipment;
- clear slide paths and check both the floor and nearby furniture;
- secure countertop items, electronics, cookware, and anything stored high;
- latch cabinets, drawers, the refrigerator, shower door, room dividers, and interior doors;
- set windows, roof vents, shades, appliances, water pump, climate controls, and propane equipment to the travel condition specified by their makers; and
- verify that nothing can fall into the driver's controls, block a pedal, or become a projectile during braking.
Winnebago's takedown guide groups appliance shutdown, closed windows and vents, a secured interior, and careful slide retraction before the exterior hookup steps.[1] That is a useful order, but it is not permission to copy switch positions from one brand to another.
The interior owner then stands at the exit and calls, "Interior closed." The caller records it. From this point on, anyone who goes back inside announces the zone as reopened.
Interior stop gate
Do not operate a slide until its inside path and outside clearance have both been checked. Do not call the zone closed while a person or pet is unaccounted for. If a latch will not hold or an appliance will not enter its required travel mode, pause the departure and resolve it.
Zone 2: disconnect and stow utilities
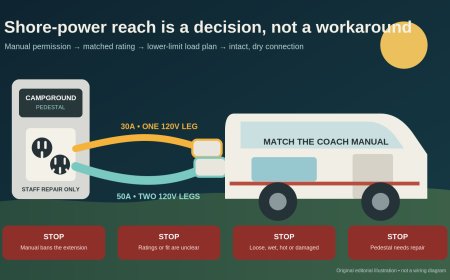
Open the utility zone only after water, electrical, sewer, and appliance conditions are known. Winnebago's takedown sequence directs campers to disconnect water, sewer, and electrical utilities before raising stabilizers and returning to hitch-up steps.[1] Your RV and campground may require a more specific order.
Work at one connection at a time:
- Confirm what must be switched off, depressurized, cooled, or drained under the applicable manuals.
- Disconnect the RV end and pedestal or spigot end in the prescribed order.
- Inspect the cord, hose, fitting, cap, and adapter before stowing it.
- Replace caps and covers on both the RV and campground equipment.
- Put the item in its assigned storage location, with potable-water gear separated from wastewater gear.
- Close and physically test the utility-bay latch.
Do not improvise around a hot plug, damaged pedestal, leaking valve, stuck sewer fitting, or unexplained fluid. Keep other campers away, photograph the condition if useful, and notify campground staff. The checkout clock does not turn damaged electrical or sanitation equipment into a normal teardown problem.
Before calling the zone closed, scan the pedestal, spigot, sewer connection, and ground. Look for a surge protector, pressure regulator, filter, hose support, cap, glove, or small adapter that never made it into storage.
Utility stop gate
Every campsite connection is detached, every RV inlet or outlet is capped as designed, nothing is leaking, and every utility compartment has passed a hands-on latch check. If anyone opens that bay later, reopen the zone.
Zone 3: verify the roofline, awnings, and movable exterior parts
Stay on the ground unless the RV maker provides a safe inspection method that requires something else. Start by stepping far enough away to see the upper edge of the rig. Walk one direction and keep your eyes high.
Check the visible roofline for an open vent, raised antenna, branch, debris, or anything out of its travel position. Look across slide roofs or toppers from a safe vantage point before retracting a room. Inspect the awning fabric and arms for water, debris, poor alignment, or an obstruction.
The Lippert Solera manual says to hold the retract control until that awning is completely retracted and warns that it must be fully retracted in high wind, heavy rain, or an extended absence.[3] That instruction applies to the covered Solera hardware, not automatically to every awning. Follow the installed awning's manual for pitch, locks, latches, manual override, and the definition of fully stowed.
Continue down the sidewalls:
- verify slides, awnings, toppers, antennas, dishes, and roof accessories are in their documented travel positions;
- confirm any required travel lock, latch, pin, or support-arm lock is engaged;
- close windows, entry doors, exterior kitchens, baggage doors, steps, handrails, and access panels; and
- remove campsite attachments such as lights, clotheslines, tie-outs, stakes, mats, tables, grills, and portable antennas.
Touch each exterior latch. A door that looks flush from ten feet away has not been checked. Then look low for stabilizers, leveling equipment, pads, blocks, and gear beneath the rig. Keep wheel chocks in place until the hitching or vehicle-securement sequence says to remove them.
Roofline and awning stop gate
Every movable exterior component shows its intended travel condition by alignment, latch, lock, pin, indicator, or the maker's specified test. A motor sound alone does not close the zone. Stop if the awning will not seat, a slide is obstructed, a jack will not retract, or the correct travel state cannot be confirmed.
Zone 4: inspect hitch, tires, lights, and running gear
This zone changes the rig from campsite-secured to road-ready. For a towable, the hitch owner follows the tow vehicle, trailer, hitch, and brake-system manuals as one matched set. For a motorhome, the driver uses the chassis and coach procedures, then treats any towed vehicle as its own connection system.
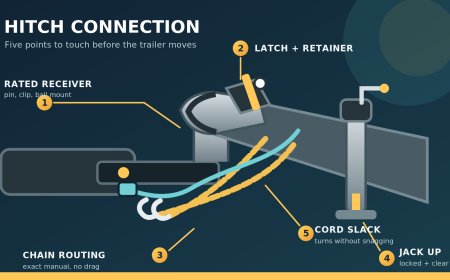
Oregon DOT's towing guide calls for checking tire inflation on both vehicles, wheel-fastener torque, the coupling hardware, cable clearance, signaling lamps, braking systems, and secured exterior equipment before towing.[4] Those categories are a useful cross-check; the values and procedures must come from the correct equipment documentation.
For a towable, verify as applicable:
- coupler or fifth-wheel engagement by the manufacturer's stated method;
- latch position, required pins, clips, locks, and handle position;
- safety chains or cables and their legal, model-specific routing;
- breakaway switch connection to the proper tow-vehicle point;
- electrical connector seating and enough cable clearance for turns without road contact;
- tongue jack or landing gear fully in its travel position; and
- brake-controller and trailer-brake operation under the manufacturers' procedures.
Jayco's 2025 towable instructions place the walkaround light check before removal of the wheel chocks.[2] Preserve the exact chock order specified for your setup rather than removing them simply because hitching appears finished.
For every RV, inspect each visible tire for low appearance, cuts, cracks, bulges, penetrations, or unusual wear. Check cold inflation by the RV, chassis, trailer, tire, load, and placard guidance that applies to the actual rig. Inspect visible wheels and fasteners without inventing an on-site retorque interval. Verify mirrors and cameras, look underneath for dangling wiring or fresh fluid, and confirm every required lamp operates, using a second person or a dependable viewing method.
Hitch and tire stop gate
A coupling, tire, brake, light, warning, or leak that cannot be verified is a stop, not a waived box. The driver alone calls, "Road check closed." Only then may the rig move far enough for the final site loop.
Zone 5: pull forward and walk the empty site
The final zone belongs to the campsite, not the RV. First walk the occupied site boundary. Check the utility area, picnic table, fire ring, vegetation edge, pet area, and every place covered by a mat, chair, vehicle, or storage bin.
The National Park Service advises campers to remove garbage, food scraps, and personal items, ensure the campfire is extinguished, and follow the park's disposal rules.[5] Local campground rules control checkout time, waste handling, fire disposal, gate cards, site tags, keys, and any required office stop.
After the road check passes, pull forward only to a legal, safe place that exposes the pad without blocking campground traffic. Set the brake. A helper walks the newly visible ground; a solo driver parks safely before walking back.
Search the tire shadows and the full former footprint for:
- the last wheel chock, leveling block, jack pad, or tool;
- a sewer cap, hose fitting, electrical adapter, pin, clip, or cable;
- pet gear, toys, stakes, twist ties, bottle caps, and food scraps;
- broken glass, damaged campground equipment, or a smoldering fire; and
- fresh fluid or wet ground that was hidden by the RV.
If you recover an item, stow it and repeat every check that action disturbed. Opening a compartment reopens its latch check. Finding a chock triggers a recount and a running-gear look. Discovering fresh fluid means identifying it before joining the road, not washing it into the site.
The departure is complete only when the driver has closed the road check and the caller has closed the empty-site loop.
The five-zone departure card
Copy this card and add the model-specific lines from your manuals.
1. Interior
- People and pets accounted for
- Slide paths and exterior clearances checked
- Loose cargo secured; doors, drawers, refrigerator, and cabinets latched
- Windows, vents, appliances, controls, and propane system set per manuals
- Interior owner called the zone closed
2. Utilities
- Electrical, water, sewer, and other connections shut down in the correct order
- Cords, hoses, caps, fittings, and adapters inspected and stowed
- Potable-water and wastewater gear separated
- Pedestal, spigot, sewer connection, and ground scanned
- Utility-bay latches touched and checked
3. Roofline and awnings
- Roofline, slide tops, toppers, vents, antennas, and branches checked from a safe position
- Awning and slides verified fully stowed by the installed equipment's method
- Doors, steps, handrails, panels, jacks, and stabilizers in travel position
- Outdoor gear, stakes, mats, and tie-outs collected
- Exterior latches touched and checked
4. Hitch and tires
- Coupling or towing system checked from the correct manuals
- Safety devices, wiring, jack or landing gear, and braking system verified
- Tires, visible wheels, underbody, and leaks inspected
- Running lights, brake lights, turn signals, and hazards tested
- Driver called the road check closed before movement
5. Empty-site loop
- Fire ring, table, utilities, pet area, vegetation edge, and site boundary checked
- RV pulled forward safely and brake set
- Entire former footprint scanned for gear, waste, damage, and fluid
- Recovered items stowed; disturbed checks repeated
- Local checkout step completed and site-loop owner called closed
Editorial note: This general sequencing and handoff framework cannot replace the manuals, labels, laws, or campground rules for a specific RV and campsite. RVCamping.info did not perform a field inspection for this article. Research was completed September 27, 2026.
Sources
What's Your Reaction?