











RV entry-step and handrail departure check: prove they are travel-ready
A model-specific departure check for powered and manual RV entry steps, fold-out assemblies and exterior handrails, with stop-work triggers and recall verification.


RV entry-step and handrail departure check: prove they are travel-ready
By Romana
Category: Tips and Trends (ID 6)
An RV step can look “mostly in” from the driver’s seat and still be a travel problem. A powered tread may have stopped against gravel. A folding assembly may not have crossed its latch. A large exterior grab handle may be lying against the wall without its travel retainer engaged. The right pre-departure check is not “glance at the door.” It is a short, model-specific proof that each moving entry component is in its intended travel position.
Powered underfloor steps, pull-out manual steps, doorway-folding steps and wall-mounted handrails do not share one operating sequence. Use this check as a framework, then insert the instructions for the equipment actually installed.
Identify the system before testing it
Photograph the step label, controller label, handrail model, RV certification label and VIN. Save the coach manual and exact component manuals offline. Lippert’s Kwikee support library separates manuals by series and generation and also publishes identification and control-operation documents.[1] That separation matters: an ignition-override behavior described for one controller is not evidence that every powered step will retract the same way.
For example, the Kwikee Revolution manual says it covers that series and not earlier electric-step versions. It describes a controller that senses increased motor current when travel ends or an obstruction stops the mechanism.[2] Current sensing is a protective feature, not permission to test the step with a foot, hand or object in its path.
Make a small equipment card with four fields: step make/model, normal travel position, travel-retention method, and the manual page that defines the departure check. Do the same for the handrail. If any field is unknown, resolve it with the manufacturer or an RV service provider before relying on the system.
Start with power and pinch-zone discipline
Park on level ground, set the parking brake, keep children and pets inside with another adult, and remove loose mats, blocks and campsite gear. Stand to the side of the mechanism. Never put a hand between linkage arms or beneath a powered tread. Do not crawl under an unsupported step assembly.
A powered step can move when the door, wall switch or ignition state changes. That means one person should control the door and switches while another observer stays visibly clear. Agree on “stop” before the test. If the mechanism jerks, binds, chatters, reverses unexpectedly or contacts the ground or bodywork, stop cycling it.
The Revolution manual’s controller responds to a high-current condition, including an obstruction or bent/binding frame.[2] Repeatedly driving a distorted mechanism into its stop can hide the cause behind apparently successful retraction. A fault deserves inspection, not more button presses.
Powered-step departure sequence
Use the exact manual to establish switch positions and ignition behavior, then perform the check:
- With the area clear, open the entry door and observe the complete extension from the side.
- Check that tread surfaces are intact and reasonably clean, visible fasteners are present, linkage is not visibly bent, and wiring is not hanging into the mechanism.
- Close the door and observe full retraction without touching the assembly.
- Verify the tread reaches the manual’s travel position and does not project beyond the expected body envelope.
- If the manual prescribes an ignition-override check, perform it exactly as written with the vehicle stationary and parking brake set. Do not invent a test from another controller family.
- After the final cycle, switch the vehicle off if the manual requires it, close and latch the door, then confirm the step remains fully retracted.
Winnebago’s 2024 View pre-travel checklist specifically says to assure the entrance-door step is retracted for travel and refers owners to the motorhome and chassis manuals for further precautions.[4] That is the outcome to verify, not a guarantee that automation achieved it.
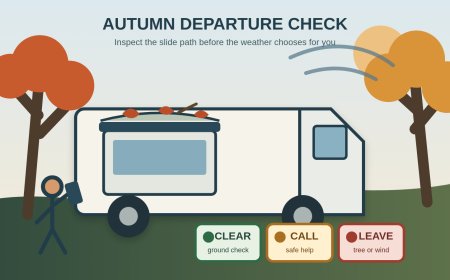
Stop and arrange service if a tread remains partly out, the motor runs without normal movement, the step sags, a door switch works intermittently, wiring insulation is damaged, the assembly contacts a tire or body panel, or travel depends on pushing it by hand. Do not secure a failed powered step with a casual cord or improvised fastener unless the equipment or coach manufacturer supplies a documented emergency procedure for that exact system.
Manual-step departure sequence
Manual assemblies may pull out from beneath the body or fold up into the doorway. Their stored positions and latches differ. Lippert’s manual-step instructions for the covered underbody assemblies describe lifting and folding the lower portion inward beneath the upper step.[3] A doorway-folding product may instead use latches, pins, adjustable legs and a threshold plate. Follow the correct design.
Clear mud, stones and ice before folding. Keep fingers away from hinges. Move the assembly through the prescribed path; do not kick it into place. Verify the positive latch, pin or retainer named in the manual—not just that the steps appear compact. Check that adjustable legs, feet and accessories are fully stored and cannot swing free.
If a campsite slope loaded or twisted the steps, inspect alignment before stowing. Stop for a bent side rail, cracked weld, loose threshold hardware, missing pin, torn anti-slip surface that can catch during folding, or latch that will not fully engage.
Give the handrail its own check
Handrails are often treated as part of the step, but some have a separate travel lock. Identify whether the rail folds against the wall, telescopes, removes, or stores with a doorway-folding assembly. Then check the manufacturer’s required travel position and retention hardware.
Look at mounting plates and the RV wall for movement, gaps, loose fasteners, cracked sealant or distortion. Test for abnormal looseness only as the manual permits. Stow or remove the rail, engage its latch, magnet, pin or bracket, and pull gently in the direction it could move in the wind. A magnetic retainer on one model does not justify adding magnets to another.
Make sure the stored rail does not block the door latch, rub an awning arm, cover a required lamp or reflector, or protrude beyond the body. For removable rails, secure the rail and every clevis pin inside a compartment so they cannot become projectiles.
Check recalls by VIN and equipment identity
Before the season and after buying a used RV, search the VIN on NHTSA’s recall site. NHTSA explains that VIN results can show certain unrepaired recalls, while already-completed recalls, some recent campaigns and some small-manufacturer records may not appear.[5] Also check the coach manufacturer and component maker using the model and serial numbers. A zero-result screen is useful evidence, but it is not a universal declaration that every component has no campaign.
If a recall or service campaign applies, follow the remedy instructions and dealer guidance. Do not substitute this visual check for a required repair.
Final two-person walk-around
After everyone boards, one person remains outside for the final pass while another operates lights or door controls only on request. Confirm:
- [ ] Powered step fully retracted and no abnormal motion observed
- [ ] Manual step folded through the correct sequence and positively retained
- [ ] Adjustable legs, feet, pins and accessories secured
- [ ] Handrail in its specified travel position with retainer engaged
- [ ] Entry door closed, locked and unobstructed
- [ ] No part projects into tire, road or adjacent-hardware clearance
- [ ] Relevant recall checks documented
- [ ] Any defect assigned a repair decision—not a reminder to “watch it”
The driver should receive a clear verbal “step and rail secure,” then check any dashboard or camera indication without using it as the sole proof. If the outside observer cannot establish the travel position, the RV does not depart. Five extra minutes at the campsite is cheaper than letting a partially deployed assembly meet a curb, fuel island or passing vehicle.
Sources
- [1] Lippert Customer Care: Kwikee Steps (accessed October 4, 2026).
- [2] Lippert Kwikee Revolution Step Series Owner’s Manual (accessed October 4, 2026).
- [3] Lippert Manual Step Assemblies Owner’s Manual (accessed October 4, 2026).
- [4] Winnebago 2024 View Operator Manual (accessed October 4, 2026).
- [5] NHTSA: Check for Recalls (accessed October 4, 2026).
What's Your Reaction?