









One Pot, Two Zones: A Safer RV Galley Workflow
Use a five-checkpoint RV galley workflow to separate raw meat, hit thermometer targets, hold dinner hot and cool leftovers safely with one pot and little sink space.

By Romana
One-pot cooking saves fuel, dishes and counter space. It does not remove the need to separate raw food from food that is ready to eat. In an RV galley, the safest plan is a sequence: finish the clean tasks first, contain the raw-meat work, cook to the correct temperature, then decide whether dinner will be served, held hot or chilled.
The short answer: Set up a clean zone and a raw zone before opening meat. Chop garnishes and other ready-to-eat items first and put them away. Handle raw meat last, wash the board, knife, hands and touched surfaces, then cook to the highest minimum temperature required by the raw ingredients. Keep cooked food at 140°F (60°C) or hotter if it must wait. Refrigerate leftovers in shallow containers within two hours, or within one hour when the air is hotter than 90°F (32°C).[1][2][4]
This is a process guide, not a recipe collection. Use it with a chicken-and-rice pot, ground-beef skillet, fish stew, lentil curry or another meal that fits your equipment. The ingredients can change; the handoffs should not.

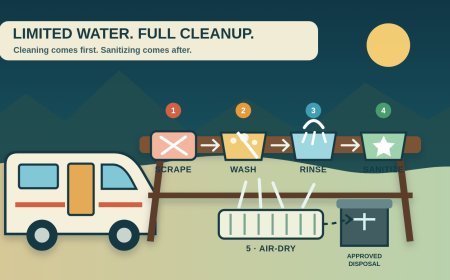
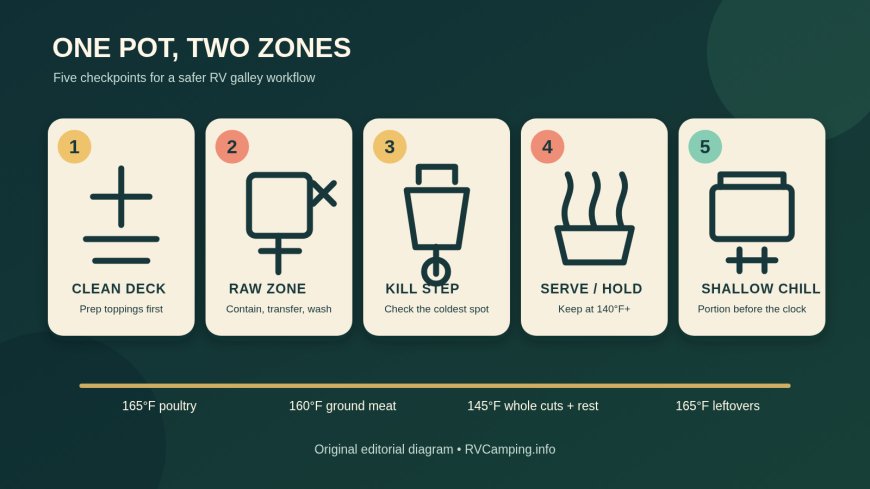
The workflow keeps raw prep on one side of the thermometer check and clean serving on the other. Original diagram by RVCamping.info.
Start with a meal that works in one vessel
The easiest one-pot meals have a clear kill step: all raw animal food enters the vessel before the final temperature check, and everything that touched it can be treated as dirty until washed. Meals become harder to manage when raw chicken goes in late, cooked food comes back out for chopping, or the same spoon moves between the pot and a cold topping bowl.
Before cooking, sort ingredients into three groups:
- Ready now: bread, grated cheese, herbs, sliced fruit, salad, sauces and other items that will not receive more heat.
- Cook-through: raw meat, poultry, seafood, eggs and any vegetables or grains that will stay in the pot through the kill step.
- Add after the check: shelf-stable seasoning or a ready-to-eat finishing ingredient that can be poured straight from its package without touching raw tools.
If the meal requires repeated raw-to-cooked handling, it is a poor fit for a cramped galley. Change the method before changing the hygiene rules. Pre-cut vegetables at home, choose a packaged garnish or skip the garnish.
Build two zones before the package opens
Counter space can be only a stove cover and a few inches beside the sink. Mark the boundary anyway. The clean zone holds ready-to-eat food, clean utensils and serving bowls. The raw zone holds the meat package, its board or plate, and nothing else. Put a lined trash container and a wash tub within reach so packaging and dirty tools do not travel through the RV.
FoodSafety.gov advises separate boards and plates for raw animal food and foods that will not be cooked. It also calls for hot, soapy washing after utensils and boards touch raw meat, seafood or eggs.[1] USDA warns that rinsing raw meat or poultry can spread bacteria around the kitchen rather than make the food safe.[3]
A compact setup can be simple:
- one small board or rimmed plate reserved for raw work;
- one clean plate or container for toppings;
- one knife, with all clean cutting finished before it touches meat;
- a bus tub or dishpan for contaminated tools;
- paper towels for immediate drips;
- soap and a supply of safe running water for handwashing and cleanup.
Do not wash raw meat or poultry. It adds splashing without making the food safer; cooking is the kill step.[3] Open the package inside the raw zone, transfer the food to the pot, bag the wrapper and stop touching cabinet pulls, spice jars and the refrigerator handle.
Use a clean-first, raw-last prep order
Limited water is a reason to reduce handoffs, not a reason to skip washing. This order keeps the raw phase short:
- Wash hands and clear the counter.
- Prepare produce and any cold toppings on the clean board.
- Put ready-to-eat food in a closed container inside the clean zone.
- Measure seasonings into one clean cup or open containers before raw handling begins.
- Move the board or plate to the raw zone and handle the meat.
- Transfer the meat directly to the pot. Put the knife and board in the wash tub.
- Wash hands before touching stove controls, clean utensils or serving food.
- Wash and rinse the raw-contact equipment before it returns to service.
Hand sanitizer is a backup for hands, not a degreaser and not a dishwashing method. CDC says to use a sanitizer containing at least 60% alcohol when soap and water are unavailable, but it also warns that sanitizer works less well on visibly dirty or greasy hands. If a handwashing station exists, use soap and water instead.[5] A jug with a tap, catch basin, soap and paper towels can provide a handwashing station when the built-in sink is unavailable. Dispose of gray water under campground rules; do not drain it onto the site.
Treat the thermometer reading as a checkpoint
Color, simmering liquid and cooking time cannot answer whether the coldest piece reached its target. Insert a clean food thermometer into the thickest or coolest part without touching the pot. In a chunky meal, test more than one piece. Stirring can even out a soup or skillet, but stir first, pause, then check rather than measuring a hot pocket beside the burner.
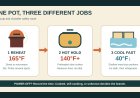
FoodSafety.gov lists these minimums for common one-pot ingredients:[2]
| Raw ingredient or finished food | Minimum internal temperature |
|---|---|
| Poultry, including ground poultry | 165°F (74°C) |
| Ground beef, pork, lamb or veal; sausage | 160°F (71°C) |
| Whole cuts of beef, pork, lamb or veal | 145°F (63°C), then rest 3 minutes |
| Fin fish | 145°F (63°C), or opaque flesh that separates easily |
| Egg dishes without meat or poultry | 160°F (71°C) |
| Casseroles and leftovers | 165°F (74°C) |
For a mixed pot, use the highest applicable target. A chicken-and-rice pot therefore needs the poultry reading of 165°F, even if another ingredient has a lower minimum. This is an RVCamping.info workflow rule derived from the federal temperature table, not a separate government category.
Check the food, clean the thermometer stem according to its instructions, and only then move into serving mode. Replace any spoon that touched raw meat before the kill step, or wash it fully. Do not set the cooked meal on the board or plate used for raw prep.[1]
Serve now or hold above 140°F
Once the pot is cooked, choose one path. Serve it promptly, or keep the food at 140°F (60°C) or above with a reliable heat source. FoodSafety.gov identifies 40°F to 140°F as the range where germs grow quickly and sets 140°F as the hot-holding floor.[1] USDA gives the same holding minimum.[4]
A low burner setting is not a temperature reading. Wind can weaken an outdoor flame, and an RV stove can create hot edges with a cooler center. Keep the lid on when practical, stir occasionally and check the center with the thermometer. Never leave an open flame unattended, and follow the appliance maker's ventilation and clearance instructions.
If steady hot holding is awkward, do not nurse the pot over barely warm heat. Serve dinner and start the time limit. Perishable food should be refrigerated within two hours; when the surrounding temperature is above 90°F, the limit is one hour.[1][4] The clock includes eating, conversation and cleanup.
Use a clean ladle and individual bowls. A diner who wants seconds should not return a used utensil to the pot. Keep cold toppings in their clean container and use a separate spoon. These small boundaries prevent the cooked pot from becoming a meeting point for raw tools, used forks and picnic-table dust.
Divide leftovers before washing the pot
The pot is the wrong storage container. A deep mass of food sheds heat slowly, occupies too much refrigerator space and may tempt someone to leave it out until it feels cool. USDA calls for shallow containers so leftovers cool quickly and says they should reach refrigeration within the time limit.[4]
Set aside shallow, lidded containers before dinner. When everyone has finished:
- Note when the pot left active hot holding.
- Discard food that has exceeded the two-hour limit, or the one-hour limit above 90°F.
- Portion safe leftovers into shallow containers rather than stacking hot food deeply.
- Refrigerate at 40°F (4°C) or below. Leave enough room around the containers for cold air to circulate.
- Label the meal and date.
- Reheat leftovers to 165°F (74°C), checking the center with a thermometer.[2][4]
Do not combine a fresh batch with older leftovers. Do not pour tonight's clean leftovers into a container that still holds yesterday's portion. If refrigerator space is too tight for shallow containers, cook less or plan to serve the whole batch. Food safety cannot be solved by snapping a lid onto a warm stockpot.
A low-water kit that earns its storage space
Pack the pieces together so setup does not depend on memory:
- instant-read food thermometer;
- small raw-only board or rimmed tray;
- washable bus tub;
- liquid soap and paper towels;
- potable-water container with a controllable spout;
- catch basin for wash water;
- food-safe storage containers in shallow sizes;
- trash bags and a few spare zip-top bags;
- alcohol hand sanitizer for situations when hands are not dirty or greasy and soap and water truly are unavailable.[5]
Two towels are not interchangeable. Keep a clean drying towel away from the raw zone, or use paper towels during raw prep. A damp cloth that wipes meat juice and then circles the counter only spreads the problem.
The five-checkpoint card
Tape this version inside a cabinet:
- Clean deck: toppings cut, seasonings measured, clean items covered.
- Raw zone: package contained, meat transferred, wrapper bagged, hands and tools washed.
- Kill step: coldest pieces meet the highest temperature required by the ingredients.
- Serve or hold: serve promptly or verify the pot stays at least 140°F.
- Shallow chill: portion within two hours, or one hour above 90°F; refrigerate at 40°F or below.
One-pot cooking is genuinely useful in an RV because it cuts clutter. The safety gain comes from running fewer, cleaner handoffs in the right order. Finish the cold toppings, close the clean zone, handle the raw ingredient once, verify the pot, and make a firm decision about holding or chilling.
Source note: RVCamping.info developed this original RV-galley workflow from FoodSafety.gov, USDA FSIS and CDC primary guidance. No feed article or third-party recipe was used as a discovery source, and no recipe was reproduced.
Sources
- 4 Steps to Food Safety | FoodSafety.gov (archived 2026-09-05)
- Cook to a Safe Minimum Internal Temperature | FoodSafety.gov (archived 2026-09-04)
- Washing Food: Does it Promote Food Safety? | USDA FSIS (archived 2026-09-04)
- Danger Zone 40°F–140°F | USDA FSIS (archived 2026-08-27)
- Hand Sanitizer Guidelines and Recommendations | CDC
What's Your Reaction?