
























Maxxair MaxxFan Deluxe 6200K review: rain-ready, roof-space hungry
Research-based Maxxair 6200K review covering roof fit, 12V wiring, rain use, noise, controls and whether this manual-lift fan suits your RV.

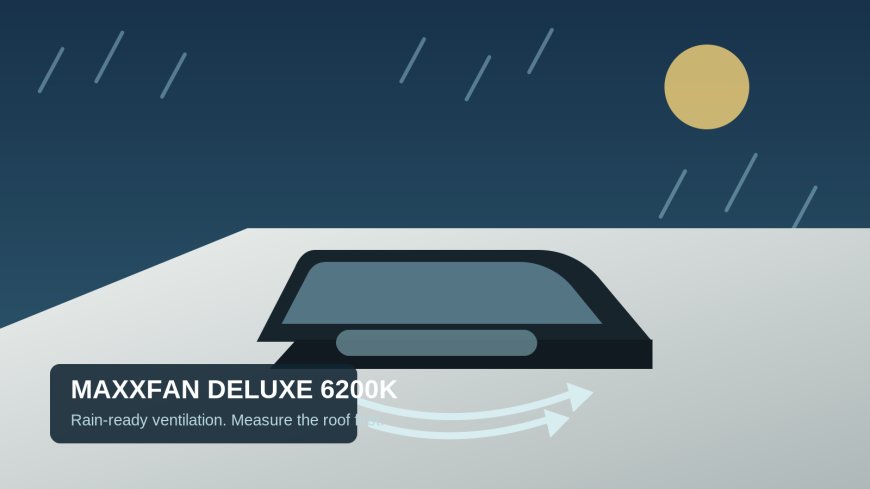
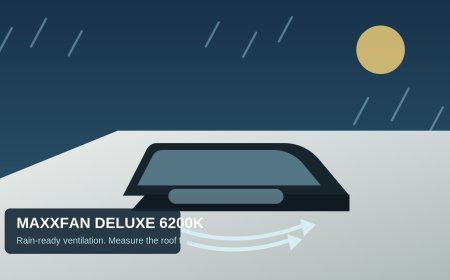
The Maxxair MaxxFan Deluxe 6200K is a strong fit for RV owners who want ten-speed intake and exhaust ventilation in rain without adding a separate vent cover. Skip it if the roof cannot spare eight clear inches behind the opening, the fan is hard to reach from the floor, or you expect air-conditioning. The central tradeoff is weather-tolerant ventilation in a low-profile package versus a large rear rain hood and controls that stay on the ceiling.[1][2]
This is a research-based review. RVCamping.info did not purchase, install, or physically test this fan.
The exact model and Amazon listing
This review covers the Maxxair MaxxFan Deluxe, part 00-06200K, commonly shortened to 6200K. It has a smoke lid, manual lift, ten fan speeds, reversible intake and exhaust, a thermostat, and ceiling controls. Maxxair lists no electric lid and no included remote for this version.[1]
The matched Amazon listing is ASIN B002OW5JG2 and identifies the same 00-06200K smoke-lid, manual-opening fan.[5]
As an Amazon Associate, RVCamping.info earns from qualifying purchases. If you buy through an Amazon link in this article, we may earn a commission at no additional cost to you.
Check the Maxxair MaxxFan Deluxe 6200K on Amazon
There is enough similar-looking MaxxFan inventory to make the part number matter. The white manual-lift counterpart is 00-05100K. The smoke 00-07500K adds electric lift and a remote, while 00-06401K is a four-speed, exhaust-only smoke model.[1] Confirm 00-06200K on the carton and unit rather than buying from a photo or a family-level title.
Verdict
The 6200K hits a useful middle ground. You get the Deluxe rain hood, thermostat, reversible airflow, and fine speed control without paying for a lift motor or handheld remote.[1] That is appealing when the fan sits over an aisle and the ceiling knob is easy to reach. It makes less sense over a bed, tall cabinet, or inaccessible bathroom ceiling.
A long-term reviewer who used the 6200K for more than two years in a Ram ProMaster reported useful low-speed airflow, objectionable noise at the highest setting, and no leaks or mechanical trouble in that individual installation.[3] Another RV owner, writing about the mechanically similar white 5100K, said removing the old roof vent was the hardest part of the replacement and valued the closed-lid circulation mode.[4] These are owner reports, not controlled durability or sound tests.
The fan can exchange hot, humid, smoky, or stale cabin air for outside air. It cannot chill incoming air below the outdoor temperature. On a hot campsite, the best use is often exhausting roof-level heat while a screened window on the shaded side supplies makeup air. Once the outside air becomes hotter than the cabin, close the RV and use shade or air-conditioning instead of expecting a roof fan to beat the weather.
Compatibility starts above the roof
A nominal 14-by-14-inch opening is only the first measurement. The installation guide also requires at least eight inches of clear roof behind the existing vent flange because the intake and exhaust louvers face rearward.[2] Check the air conditioner shroud, solar panels, antennas, roof rack, cargo box, awning hardware, and any future solar plan. Measure with every lid and accessory in its operating position.
The guide allows roof thickness from 1 1/8 to 6 1/2 inches. A thinner roof needs added structure around the opening, and the interior garnish must be trimmed to match the ceiling at each corner.[2] That work can be routine in a factory RV vent opening. A new opening in a van or molded roof is a different project because structure, hidden wiring, curvature, waterproofing, and interior finish all need a plan.
The built-in hood is the reason to buy the Deluxe, but it occupies more roof area than a plain lifting lid. The long-term ProMaster reviewer specifically noted that the oversized hood consumes extra space.[3] A tight roof may force a choice between this fan and a solar-panel layout.
Electrical fit: 12 volts, with a real five-amp circuit
Maxxair requires a 12-volt DC supply rated for at least five amps and instructs installers to use properly sized stranded wire.[2] Treat that as a circuit requirement, not a prediction that the fan always draws five amps. Verify wire gauge, fuse protection, polarity, voltage at the opening, and the loads already sharing the branch circuit.
Disconnect RV power before making the connection.[2] If the existing vent has no powered fan, do not assume useful wiring is waiting in the ceiling. Route and protect the new cable according to the RV maker's instructions and applicable electrical practice. If tracing structure or making a watertight roof opening is outside your experience, hire an RV technician.
A battery estimate should use measured current on the installed fan at the speeds you actually run. An owner test on one 6200K reported low power use at lower settings, but that rig-specific table is not a substitute for sizing the circuit or predicting another installation's battery life.[3]
Rain use does not make installation leaks impossible
Maxxair says the integrated hood allows the fan to operate in rain and while the RV is moving.[1] The hood removes the need to close a conventional lid at the first shower. It does not waterproof a poor flange seal.
The manual calls for removing old sealant around a replacement opening, using sealant compatible with both the plastic flange and the roof, sealing the screw heads and flange edge, and avoiding several solvent families that can damage the plastic.[2] Roof membranes and sealants vary. Follow the RV or roof manufacturer's compatibility instructions rather than copying another owner's adhesive choice.
One older owner installation report describes using acetone and a tape-based roof seal around a related MaxxFan.[4] That is evidence of what one person did, not a safe universal recipe. Maxxair's own instructions warn that acetone and similar solvents can damage fan components.[2] Keep aggressive cleaners away from the fan and flange, and resolve any conflict with the roof and sealant manufacturers before installation.
Inspect the seal after the first hard rain and again after travel. Add the fan flange to the RV's normal roof inspection schedule. Water showing inside the garnish can travel from another roof penetration, so find the entry point before simply adding more sealant.
Controls, thermostat, and the remote-control confusion
The 6200K uses a manual crank for the lid and a ceiling keypad for power, direction, speed, and thermostat settings.[1][2] In automatic mode, the manual says the fan starts and changes speed as cabin temperature rises. The initial thermostat set point is 78°F, and loss of 12-volt power resets it to that value.[2]
The lid does not open itself. Open and lock it before relying on thermostat mode. With the lid closed, the running fan recirculates cabin air in "ceiling fan" mode rather than exchanging air outdoors.[2]
Current product copy is internally awkward about accessories: a feature bullet mentions an optional remote, but the 00-06200K specification table says "Remote Control: No" and "Optional Wall Controls: No."[1] The operating guide assigns handheld remote operation to other model numbers, while also showing an older one-switch wall-control section for 6200K-family manual-lift units.[2] Do not order a remote or wall control based on family-level copy. Ask Maxxair to confirm the exact accessory and current circuit-board compatibility for the serial number you receive.
Airflow direction needs an open path
Exhaust mode is the default choice for cooking moisture, shower humidity, and heat accumulated near the ceiling. Crack a screened window or vent away from the fan so replacement air crosses the living area. Opening a window immediately beside the fan can short-circuit the airflow and leave the rest of the RV stale.
Intake mode can push cooler evening air inside, but it may also pull dust, smoke, or generator exhaust toward the cabin. Check what is outside the intake path first. A roof fan is not a substitute for a range hood rated and installed for the cooking appliance, and it does not remove the need for working smoke, carbon-monoxide, and propane alarms.
The insect screen comes out without tools, but the manual says to shut off the fan and disconnect its 12-volt power before removing it. It also says never to operate the fan without the screen and to clean components only with mild soap and water.[2]
Noise and nighttime use
Ten speeds give the 6200K more usable middle ground than a simple high-low fan. The independent ProMaster reviewer found settings below roughly four quiet enough for night use in that van, while the highest setting was too loud for sustained use.[3] Roof construction, the opening, installation tension, nearby cabinetry, and the listener's position can all change the result.
For sleep, run the lowest speed that controls humidity and temperature. A high setting may clear cooking steam quickly, but the extra noise and battery draw are poor trades after the cabin stabilizes. If the fan rattles, inspect the mounting and roof hardware rather than assuming every sound is normal.
Setup and inspection checklist
- Confirm the carton and data label say 00-06200K and match the smoke, manual-lift, ten-speed configuration.
- Measure the 14-by-14-inch opening, roof thickness, and eight-inch rear clearance before removing the old vent.[1][2]
- Check roof structure, wiring routes, solar panels, air conditioner clearance, and interior access to the crank and keypad.
- Verify a protected 12-volt DC circuit with at least five-amp capacity; disconnect power before wiring.[2]
- Use flange and roof sealants approved for the actual roof materials. Avoid incompatible solvents.[2]
- Center and orient the receiving flange as the manual shows, seal the fasteners, and use the specified mounting hardware.[2]
- Restore power, test all ten speeds, intake and exhaust, thermostat behavior, manual lid lock, and closed-lid circulation.
- Water-test carefully, then inspect after rain and the first trip. Recheck roof seals on the RV maker's maintenance schedule.
- Before travel, make the lid fully open or fully closed; the manual specifies those positions while the vehicle is moving.[2]
Who should buy it
The 6200K suits an RV owner who has a standard vent opening, adequate rear roof clearance, accessible ceiling controls, and a sound 12-volt circuit. It is especially useful in wet climates where being able to exhaust humidity during rain matters. Manual lift also removes one motor from the system.
Who should skip it
Choose another model or ventilation plan if the ceiling controls are hard to reach, the roof is crowded, the opening or roof thickness falls outside the documented range, or the project requires cutting structure without a reliable installation plan. The electric-lift 7500K may fit someone who needs remote access, but verify that model's own dimensions, controls, and current documentation before buying.[1]
Also skip the 6200K if the actual problem is cooling an RV in hot ambient air. This is a ventilation fan, not an air conditioner. In smoke, heavy dust, high humidity, or generator-exhaust conditions, exchanging outside air may make the cabin worse.
Bottom line
The Maxxair MaxxFan Deluxe 6200K is a sensible manual-lift roof fan when rainy-weather ventilation and low-speed control matter more than remote operation. Its fit is less universal than the 14-by-14-inch label suggests. The rear hood needs room, the ceiling controls need to be reachable, and the installation needs compatible sealant plus a properly protected 12-volt circuit.
Measure the roof before ordering, buy by the exact 00-06200K part number, and treat the current remote-control wording as something to verify rather than a promised feature.
Sources
What's Your Reaction?