











Check your food thermometer before campsite cooking
A pre-cook RV kitchen routine for checking thermometer accuracy, handling altitude, measuring thin food, cleaning the probe, and resolving battery or replacement problems.

Check your food thermometer before campsite cooking
By Romana
Category: Cooking
A food thermometer can ride in an RV drawer for months, get knocked behind the utensils, and arrive at camp with a weak battery or a reading nobody has checked. That is a bad time to discover trouble: the chicken is on the grill, the light is fading, and dinner is waiting.
The fix is a short pre-cook check. Confirm that the instrument powers on, identify where its sensing area is, compare it with a known temperature point, and set up a clean place for the probe. USDA calls the ice-water method the better choice for most food thermometers. Boiling water is another option, but altitude changes the expected boiling point and hot water adds a burn hazard.[1][4]

Start with the thermometer's own instructions
Find the model manual or the manufacturer's instructions before turning a calibration nut or putting the probe in water. USDA notes that the instructions should state the required insertion depth. They also determine whether the model can be adjusted, whether it may remain in food during cooking, how water-resistant it is, and which battery it takes.[1]
That distinction matters. Checking accuracy and adjusting calibration are not the same job. An ice bath can tell you that a thermometer is reading incorrectly, but some models cannot be adjusted by the user. USDA's comparison lists some digital probes as calibratable, some as model-dependent, and some thermometer types as non-calibratable.[1] Record the observed error only if the manufacturer tells you that applying an offset is acceptable. Otherwise follow the maker's correction or replacement instructions.
Do a basic power check before working with food:
- Turn the unit on and look for a complete, stable display rather than missing segments or an error message.
- Check the battery compartment for moisture or corrosion without touching leaked battery material.
- Install only the battery type and orientation specified by the manufacturer. Carry a spare of that exact type if the thermometer is central to the meal plan.
- After a battery change, repeat the accuracy check. A fresh battery is not proof that the sensor is accurate.
If the display remains erratic, the probe or cable is damaged, or the unit repeatedly fails the accuracy check and cannot be adjusted as directed, replace it. USDA specifically says a thermometer that does not allow manual calibration may need replacement when its boiling-water reading is off.[1]
Use the ice-water check for most campsite thermometers
Set this up on a level counter or picnic table, away from the grill flame.
- Fill a large glass with ice cubes.
- Add drinking water and stir well.
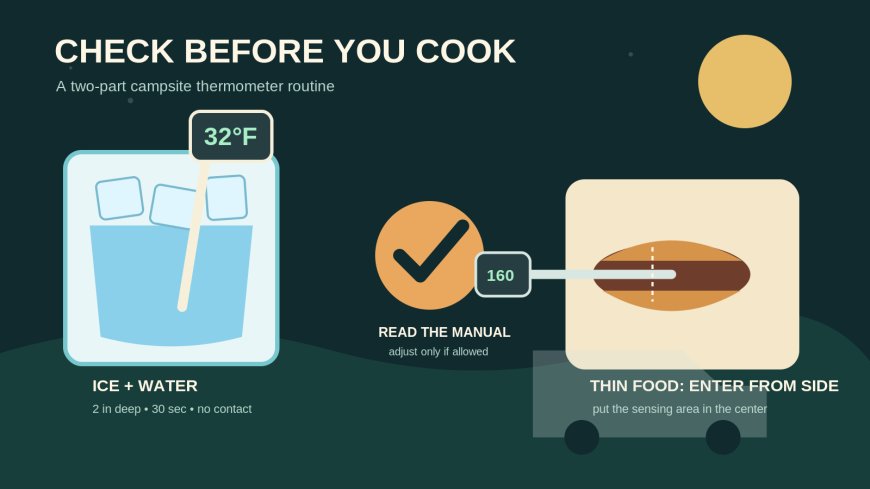
- Put at least two inches of the stem into the ice-water mixture. Keep it off the glass sides and bottom.
- Leave the stem in place for at least 30 seconds, then read the display without lifting it out.
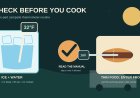
- The expected reading is 32°F. If it is not, adjust only as the manufacturer directs.[1]
This is an accuracy check at one temperature point, not a full laboratory certification across the thermometer's range. It is still useful before a trip because it can expose an obvious problem while there is time to change the battery, consult the manual, or pack another thermometer.
A narrow mug packed with solid ice is not the same setup. The probe needs a stirred ice-and-water mixture, with enough room to avoid contact with the container. Contact with the bottom or side can pull the reading toward the temperature of the vessel rather than the mixture.
Use boiling water carefully, and account for altitude
USDA presents boiling water as the higher-temperature method. Bring clean water to a boil, immerse at least two inches of the stem, keep the probe off the pot sides and bottom, wait at least 30 seconds, and allow the reading to stabilize while the stem stays in the water. At sea level, expect 212°F.[1]
There are two campsite caveats. First, USDA says distilled water is required for true accuracy in this method. Second, water boils below 212°F at elevation. USDA's high-altitude guide gives a concrete example: at 2,000 feet, it lists 208°F, four degrees below the sea-level value.[4] The thermometer did not necessarily fail because a mountain-camp pot stopped at a lower number.
Do not invent an altitude correction from the campground name or a dashboard reading. USDA advises checking with the local Cooperative Extension office or health department for the exact local boiling temperature.[1] If that reference is unavailable, use the ice-water method instead of forcing the instrument to 212°F. Never bend over a small RV saucepan while holding the display above steam; use a stable pot, protect your hand, and keep children clear.
Know where the thermometer senses temperature
Probe shape does not tell the whole story. USDA says digital thermistors generally sense near the tip and can measure thin as well as thick foods. A bimetal dial thermometer averages temperature along a sensing section that may extend two to three inches up the stem, so that full section has to sit in the food.[1][2]
Read the manual for the actual sensing location. On a dial stem, a dimple may mark one end of that zone. This is why pushing only the point of a long dial thermometer into the top of a burger gives a poor measurement even if the needle moves.
For a thin food such as a burger, sausage, pork chop, or thin chicken breast, take the food off the heat and place it on a clean spatula or plate. Insert the probe from the side until the entire sensing area reaches the center. USDA recommends this sideways approach both for correct placement and to reduce the chance of burning your fingers.[1] A thin-tip digital probe is easier to place, but its sensing tip still has to reach the coolest central area.
For thick food, aim for the thickest part and avoid bone, fat, and gristle. Check multiple places in a large or irregular item. USDA also advises checking each separate piece because pieces can reach the target at different times.[1]
Build a clean probe route in the RV galley
A temperature check can move raw juices if the probe travels from an undercooked piece to cooked food, a counter, or its storage sheath. Keep three small zones:
- a raw-side landing area for the first check;
- hot, soapy water and a clean towel or disposable towel for washing and drying the probe; and
- a clean plate for food that has reached its target.
USDA directs cooks to use heated water with soap, or the cleaning method specified by the manufacturer, and warns that most units should not be submerged. Wash by hand, concentrating on the food-contact probe without flooding the display, hinge, cable socket, or battery compartment.[1] USDA's camping guidance also says to clean the thermometer between uses.[2]
The clean plate matters. Do not return cooked meat to the tray that held it raw. If water is limited, reserve enough potable water for hand and utensil washing before starting the meal rather than treating a dirty probe as an afterthought.
When cooking several batches, wash the probe after each contact with food that has not yet reached its safe temperature and before checking another ready-to-eat item. Let it dry before sliding it into the sheath. Store the sharp probe covered so it cannot puncture a hand reaching into a crowded drawer.[1]
Measure the food, not the fire or pan
Take an instant-read thermometer off direct flame unless its manual explicitly permits that use. Do not let the tip touch a grill grate, skillet, bone, or the bottom of a pot. Those surfaces may be much hotter than the food. USDA also warns not to leave a thermometer in food during cooking unless the manufacturer says the model is designed to withstand that heat.[1]
Wait for the reading time specified for the thermometer. USDA's reference table shows why one universal count does not work: some thermocouples respond in two to five seconds, thermistors may take about 10 seconds, and instant-read bimetal models may need 15 to 20 seconds.[1] Hold the probe steady until the value settles.
Use the temperature required for the food, not a favorite all-purpose number. USDA's current chart calls for 145°F plus a three-minute rest for whole cuts of beef, pork, veal, and lamb; 160°F for ground meats and egg dishes; 145°F for fish and shellfish; and 165°F for poultry, leftovers, and casseroles.[3] Check the source chart when the menu or product instructions call for a category not listed here.
Pack a small thermometer kit
Keep the working thermometer, probe sheath, model instructions, correct spare battery, a zip bag for the instructions, and a small roll of tape together. Write the date and result of the last ice-water check on the tape. That note does not guarantee future accuracy, but it makes a dropped or rain-soaked thermometer easier to flag for another check.
Pack a second verified thermometer when the meal depends on temperature control and the nearest store is far away. Two thermometers that agree in food are reassuring, but agreement is not a substitute for checking each against a known point. Two damaged instruments can agree with each other and still be wrong.
The campsite routine is simple: test before raw food comes out, read the sensor instructions, measure in the right place, wash between uses, and stop relying on the instrument when power, damage, or repeatability is in doubt. That keeps the food check from becoming one more improvisation over a hot grill.
Evidence note: USDA provides the thermometer testing, placement, care, camping-use, altitude, and minimum-temperature guidance cited here. RVCamping.info created the battery preflight, three-zone probe route, and packing routine as practical RV-kitchen workflows. Always follow the instructions for the exact thermometer model.
Sources
- Food Thermometers — USDA Food Safety and Inspection Service — accuracy checks, calibration limits, placement, care, and thermometer types.
- Food Safety While Hiking, Camping & Boating — USDA Food Safety and Inspection Service — outdoor thermometer use, thin-food placement, and cleaning between uses.
- Safe Minimum Internal Temperature Chart — USDA Food Safety and Inspection Service — current minimum internal temperatures and rest time.
- High Altitude Cooking — USDA Food Safety and Inspection Service — boiling-point example and high-altitude cooking context.
What's Your Reaction?