





























Before a wet trip, rain-test the RV windows without sealing the drains
Use a controlled RV window rain test after storage: identify drain paths, check latches and seals, apply gentle water, and stop at the first interior leak.

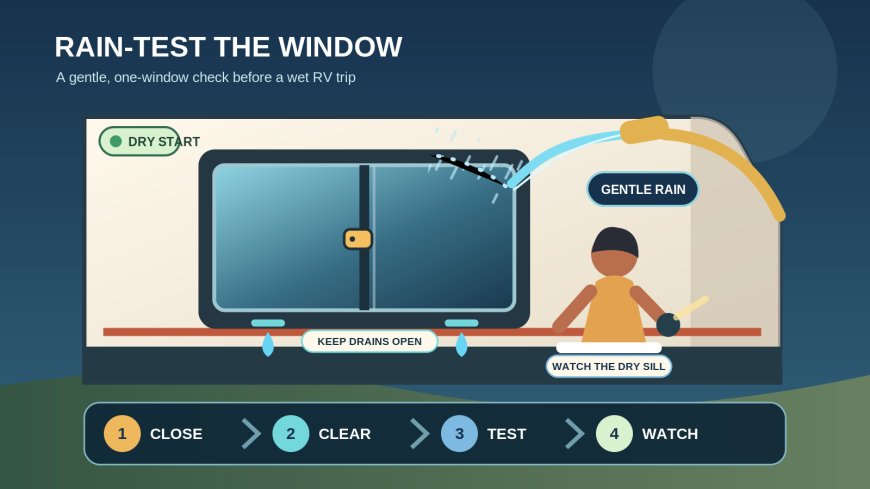
Before a wet trip, rain-test the RV windows without sealing the drains
By Romana
An RV can come out of storage looking dry and still have a window problem that appears in the first wind-driven rain. Dust can block a drain path. A latch can close without pulling the sash evenly against its seal. Old sealant can split at a corner. The useful pre-trip check is not a lap around the rig with a caulk gun. It is a controlled test that separates drainage, closure and perimeter-seal problems before weather makes the diagnosis messy.
This workflow uses current guidance from Lippert, Keystone and Winnebago. It applies to sidewall windows you can inspect safely from the ground. The manual for the exact RV and window still controls the sealant, cleaners, adjustments and repair method. Lippert's replacement-window test, for example, is product-specific guidance for its 8800 Series, not permission to copy every installation detail onto another window.[1]
First, identify what you are looking at
Make a window list before getting the hose. Number the windows on a simple sketch and note the style: horizontal slider, vertical slider, awning, fixed pane or emergency exit. Record the make or label if it is visible. Include the entry door, but treat doors, roof openings, slide seals and storage compartments as separate jobs. Mixing them into one broad spray test makes the source of water harder to locate.
Keystone recommends checking exterior seals around windows, doors and storage compartments as part of a top-to-bottom inspection, looking for voids, cracks, shrinkage and deterioration.[2] Winnebago's 2026 towables manual calls for door and window seal inspection every three months on the covered trailers.[4] Those intervals belong to those manufacturers. Use your own manual's schedule when it differs, and add an inspection after storage, body repair or any trip that produced a new stain or damp smell.
For each window, photograph four things while everything is dry:
- the full exterior frame and its upper corners;
- the lower frame, including every visible drain opening;
- the closed latch or latches inside;
- the interior wall, trim and sill directly below the opening.
A dry baseline matters. If water appears later, you can compare the first wet spot with the original condition instead of arguing with an old stain.
Do not turn a drain into a dam
Many RV windows manage water inside the frame and discharge it through weep holes. Lippert says debris can block those passages and advises checking the window seal, sliding-window latches and interlocking parts as separate possible causes.[3] Water leaving an exterior weep opening can therefore be evidence that the drain is working, not proof that the window is leaking into the wall.
Start with a flashlight and a dry, gentle cleaning. Remove loose dirt, spiderwebs and insect debris from the exposed track. Clear only the openings you can positively identify from the window documentation. Do not drill, enlarge or invent a passage. Do not push a sharp metal tool deep into a concealed channel. A soft nylon brush, wooden swab or flexible non-scratching cleaner gives you more control around painted aluminum and rubber.
Most important, do not bridge the lower drain openings with a fresh bead of sealant. Winnebago tells owners of its covered towables to leave the intentionally open drainage gaps along the lower window and door flanges unsealed.[4] The drain arrangement on another make may look different, which is why the manual and the existing factory pattern matter.
Inspect closure before perimeter sealant
Open and close one window at a time. Clean the contact surfaces with the product permitted by the window maker. Then check:
- Does the sash travel through its full range without grinding or jumping the track?
- Do all latches engage, or does one side remain loose?
- Is the weather seal continuous, seated and free of folds?
- Are interlocking rails aligned when a sliding window closes?
- Is the frame visibly distorted, loose or pulled away from the wall?
- Are there cracks, peeling sections or voids in the exterior perimeter sealant?
Do not compensate for a broken latch or distorted frame by adding exterior caulk. Sealant cannot pull a sash against its weather seal, correct a wrong clamp ring or square an opening. Lippert lists blocked drains, damaged latches, glazing gaps, clamp-ring fit and window-to-opening fit as distinct troubleshooting branches.[3]
If the window is an emergency exit, preserve its escape function. Do not tape it shut for the trip or apply a repair that prevents opening. A failed latch, loose frame, cracked pane or exit that does not operate belongs on the service list.
Run a one-window rain test
Choose a calm, dry period with enough daylight to inspect and dry the area. Close roof vents and nearby windows so stray water does not create a false result. Keep the test limited to the window; do not spray appliance vents, shore-power hardware or utility compartments. Work from the ground. If the window cannot be reached without a ladder, arrange professional inspection rather than balancing on wet rungs with a hose.
Use two people. One stays inside with a flashlight, dry white towels and the window map. The other controls a garden hose outside. Begin with the lowest window on a wall and move upward only after documenting each result. That order keeps runoff from an upper test from confusing an untested lower window.
For its 8800 Series replacement window, Lippert specifies a dry starting window, an observer inside, and water applied from above while the nozzle remains 5 to 10 feet away on a gentle shower or rain setting.[1] It says to continue for about two minutes and explicitly prohibits a pressure washer or high-powered nozzle because either can damage the window and cause intrusion.[1] If the manual for your installed window gives a different test, follow that method instead.
During the test, the inside observer should call out the first change, not wait for a puddle. Note the time and location of:
- a bead at a latch or sash corner;
- moisture under the interior trim;
- a darkening wall panel or damp sill;
- water entering from above the frame;
- exterior drainage from a lower weep opening.
Stop the water as soon as interior intrusion appears. Mark the first wet location with removable painter's tape, photograph it and dry the surface. Continuing to soak the wall does not improve the diagnosis.
Read the result before choosing a repair
A passing result has no interior water, no damp trim and normal exterior drainage. Lippert notes that water between panes that exits through the weep holes during its 8800 Series test is not a defect.[1] Record the pass, the date and the test conditions. The record gives you something useful to compare after the trip.
A failed result needs a narrow description. "Left rear slider: first bead at lower latch after 45 seconds" is more useful than "window leaks." Check the closure once more after drying. If the sash was not fully latched, repeat the same controlled test only after confirming normal operation. Do not keep cycling and soaking a window with a broken part.
Escalate rather than caulk by guesswork when any of these are present:
- water appears from behind interior trim or inside the wall rather than at the sash;
- the frame moves against the sidewall;
- the wall feels soft, swollen or delaminated;
- a pane, latch, clamp ring or emergency-exit mechanism is damaged;
- previous sealant forms several incompatible-looking layers;
- the correct sealant and surface preparation cannot be confirmed;
- water could have reached wiring or other electrical equipment.
Keystone's general guide shows why product identification comes first: its repair directions name silicone for the covered Keystone exterior-seal work, while Winnebago tells owners of the cited towables to consult an authorized dealer for the correct sealant.[2][4] "RV caulk" is not one universal material. Compatibility with the window frame, sidewall, existing sealant and warranty instructions matters more than the label on the tube.
Make the wet-trip decision
Pass a window only when it closes normally, drains through its designed path and stays dry inside during the applicable test. A cosmetic gap in rubber glazing, a sash leak and water emerging behind trim are not the same fault and should not receive the same repair.
If a leak remains, postpone the wet trip or obtain a documented repair and repeat the controlled test. Covering a suspect window for travel may hide the symptom while road airflow pushes water somewhere else, and tape can obstruct drainage or damage finishes. Keep the photos, window map, weather conditions and exact first-wet location for the service technician.
The point of this routine is restraint. Clear what is meant to drain, prove that the window closes, introduce water gently, watch from inside and stop at the first failure. That produces a repairable finding without turning a pre-trip check into a wall-saturation experiment.
Sources
What's Your Reaction?