








Before winterizing, identify your RV water heater's bypass and drain method
Identify the exact RV water heater and coach plumbing before winterizing. Tank and tankless appliances can use different bypass, drain and antifreeze paths.

Before winterizing, identify your RV water heater's bypass and drain method
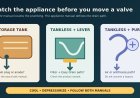
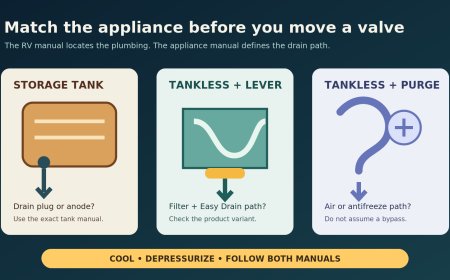
A water-heater bypass is not a generic three-valve puzzle, and a drain is not always a plug at the bottom of a tank. Before pumping antifreeze or connecting an air line, identify the appliance by model and match it to the RV builder's plumbing diagram. A storage-tank heater, a tankless heat exchanger and a hydronic appliance can require different valve positions and different ways to empty the appliance.
That model check prevents two expensive mistakes: sending antifreeze into a tank that its maker says to isolate, or bypassing a tankless unit whose maker expects the heat exchanger to be winterized with the rest of the water system.
The short answer
Find two documents before turning a valve:
- 1. the appliance manual for the exact water-heater model; and
- 2. the owner or plumbing manual for the exact RV model, floorplan and model year.
The appliance manual tells you what must be drained, removed or protected. The RV manual tells you where the coach builder hid the bypass, low-point drains and antifreeze siphon, and what each handle position means. If those documents conflict, stop and ask the RV manufacturer or an authorized appliance service center. Do not improvise a hybrid procedure.
First, make the heater cold and harmless
Do the identification work while the RV is connected and usable, not after the first freeze warning. Photograph labels and valves in daylight. Before opening a drain, shut off every energy source named in the manuals, turn off the water pump and city-water supply, let stored water cool, and relieve system pressure by the documented method.
This is not fussy wording. A tank can hold scalding water under pressure. Dometic's WH-6GA/WH-6GEA manual says to turn the heater off and let the water cool before removing the drain plug; its winterizing procedure then shuts off the water supply, opens the pressure/temperature relief valve and removes the drain plug.[2] Keep your face, hands and body out of the discharge path. If the relief valve will not operate normally, the plug or anode is seized, or hot water continues to discharge, stop and get service.
Never energize a drained storage-tank heater. Suburban warns that its tank must be full before operation and that power should not be restored until the tank and lines have been refilled and purged of air.[1]
Read the label before deciding whether you have a tank
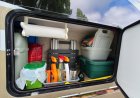
Open the exterior service door only as the owner manual permits. Look for the manufacturer, full model number and serial number. A replacement heater may not match the RV's original equipment list, so the physical label wins over a brochure.
Then classify the installed appliance:
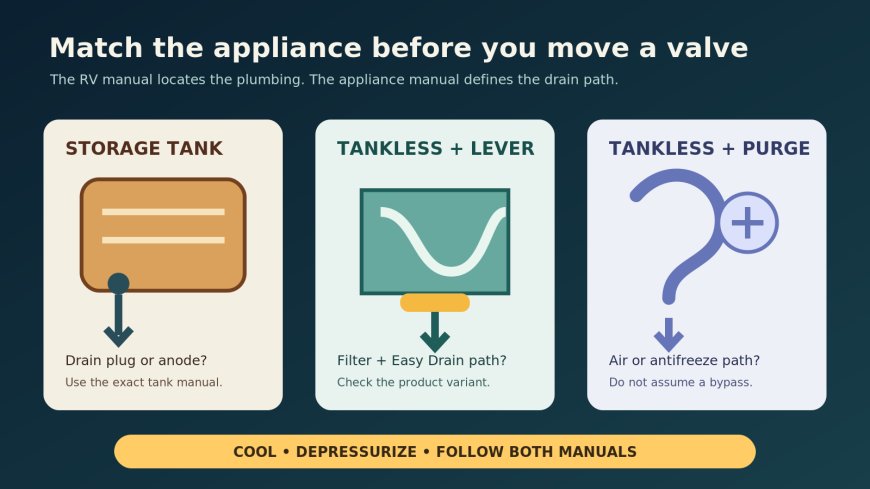
- A conventional storage-tank heater has a stated tank capacity and usually a drain plug or removable anode at the exterior service opening.
- A tankless heater has a heat exchanger rather than a six- or ten-gallon storage tank. It may use a filter cartridge, drain lever, purge procedure or antifreeze path.
- A hydronic or combination heating appliance may share plumbing with cabin heat. Use its own manual; this article does not supply a drain sequence for it.
Do not infer the type from the shape of the exterior door. Aftermarket replacements can occupy an old tank-heater cutout.
Four manuals, four different answers
The differences below are examples, not substitute instructions for an unlisted model.
Suburban tank models: the anode can be the drain
Suburban's 2023 tank-water-heater guide says to switch off electrical power and gas, stop the pressure pump, open hot and cold faucets, and remove the anode rod with a 1-1/16-inch socket. The guide identifies that anode opening as the tank drain.[1] If the RV has a bypass kit and antifreeze will be introduced, Suburban says to isolate the heater, drain it completely and leave it bypassed because antifreeze can attack the anode. A Suburban tank routine therefore cannot be copied onto a tankless heater.
Dometic WH-6GA/WH-6GEA: a drain plug and relief-valve step
For the covered Dometic six-gallon models, the manual calls for cooling the tank, shutting off the water source, lifting the pressure/temperature relief-valve handle and removing the drain plug.[2] It also says roughly two quarts remain below the drain opening and gives a model-specific flushing procedure. That remaining-water statement belongs to the covered Dometic tank design; it is not permission to leave water in another appliance.
Truma AquaGo: drain through the filter and Easy Drain Lever
The AquaGo manual covers Basic, Comfort and Comfort Plus variants. It directs the owner to drain the appliance by removing the water-inlet filter or heating cartridge and using the Easy Drain Lever. It says an RV equipped with a bypass should isolate the appliance, and its winterizing-fluid procedure requires an installed bypass kit.[3] The Comfort Plus also has an additional recirculation connection, so even variants within one product family do not share every valve step.
Girard GSWH-2: do not add a tank-style bypass assumption
The GSWH-2 owner manual says the small amount of water in its heat exchanger does not require installation of a bypass kit. It allows either a compressed-air purge or the RV manufacturer's nontoxic-antifreeze method.[4] Its automatic antifreeze device is for operation under stated conditions and requires propane, 12-volt power and the unit left on; the manual says it protects the heat exchanger, not the RV's complete plumbing system. That feature is not a storage winterization plan.
The bypass belongs to the RV plumbing design
The appliance maker may describe whether the heater should be isolated, but the coach builder decides where valves and lines are installed. One current Winnebago manual makes the point clearly. On the 2026 View, the water-heater bypass location changes by floorplan: a rear-closet panel for 24T, under the galley for 24R, and to the right of the refrigerator for 24D. The same manual says to leave its bypass in normal flow for draining and compressed-air blowout, and to use bypass only for the antifreeze-fill method.[5]
That is why valve-count folklore fails. Some RVs use one diverter valve and check valves; others use two or three manual valves. A recirculating tankless installation may add another drain valve. A handle parallel to a tube does not prove its purpose when the valve body, check valve or diagram is out of view.
Make a model-specific map before winterizing:
- 1. Photograph the appliance data plate.
- 2. Save the appliance manual and the RV manual offline.
- 3. Locate the heater's cold inlet and hot outlet without removing service-only covers.
- 4. Trace the bypass only where the RV manual grants owner access.
- 5. Label each owner-operated valve with its manual name: normal, bypass, siphon or line drain.
- 6. Record the exterior drain point and the required tool, cartridge or plug storage location.
- 7. Add the restoration position to the same card. A winterization note that omits spring startup is incomplete.
Run a no-antifreeze rehearsal
With the system cold and depressurized, rehearse access without removing the drain hardware. Confirm that the socket fits the Suburban anode, the Dometic drain plug is identifiable, or the Truma filter and lever match the illustrations for the exact model. Verify that you can reach the RV's bypass without dismantling cabinetry the owner manual does not designate as an access panel.
Do not loosen gas fittings, remove burner parts, probe wiring or force a stuck relief valve. Do not use automotive antifreeze. If the manual specifies compressed air, use the RV maker's pressure limit and regulator; a generic shop-compressor setting can damage plumbing.
Stop conditions
Hand the job to a qualified RV technician if:
- the appliance label is missing or the installed heater differs from the RV documentation;
- previous owners added unmarked valves or changed the heater type;
- the drain, anode, filter cartridge or Easy Drain Lever is seized or damaged;
- a relief valve leaks, will not reseat or cannot be operated as documented;
- water remains trapped and the manual's drain path cannot be confirmed;
- the system combines domestic hot water with hydronic cabin heating; or
- the instructions require removal of sealed panels, gas work or electrical diagnosis.
The useful winterizing checklist is not "turn three valves and pull a plug." It is a small identity record: exact RV, exact appliance, exact manual revision, valve locations, drain hardware, pressure limit, antifreeze route and return-to-service positions. Build that record while the system still works, then follow those manuals line by line when storage day arrives.
Sources
- [1] Suburban Tank Water Heaters Operation & Maintenance Guide (part 206244, 2023).
- [2] Dometic L.P. Gas Water Heater Installation and Operation Manual, WH-6GA/WH-6GEA.
- [3] Truma AquaGo Basic, Comfort and Comfort Plus Operating Instructions (official component manual hosted by Forest River).
- [4] Girard GSWH-2 Tankless Water Heater Owner's Manual (Lippert document CCD-0006120, rev. 2025).
- [5] 2026 Winnebago View Operator Manual.
What's Your Reaction?