








Before you climb: an RV roof-access safety check
A ground-first RV roof-access plan: verify the exact ladder and roof permissions, count the whole load, choose safer alternatives, and know when to stop for service.

Before you climb: an RV roof-access safety check
Tips and Trends
A ladder bolted to the back of an RV answers only one question: the coach has a ladder. It does not prove that the roof is walkable, that the ladder still has sound attachments, or that your weight plus tools falls within its rating. Those answers belong to the exact RV manual, the installed ladder's label, and, when either is unclear, the manufacturer or an authorized service department.
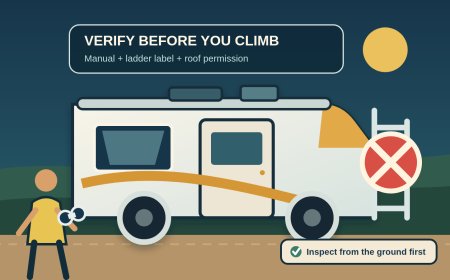
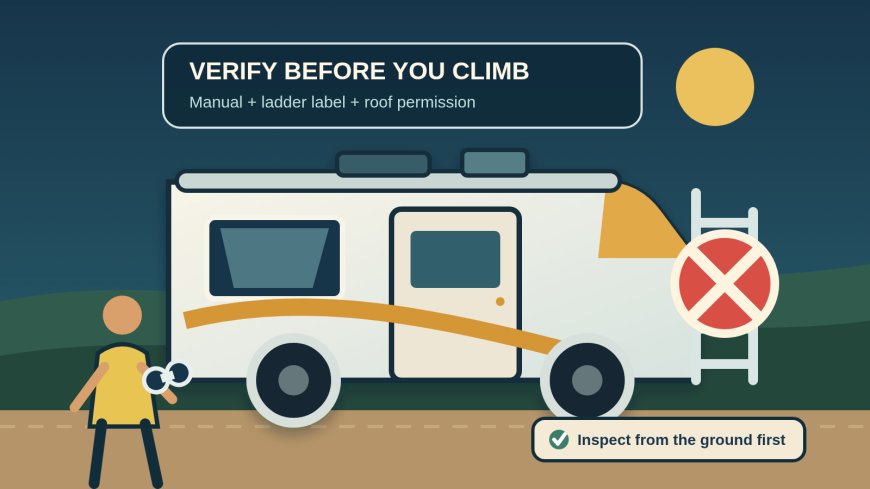
The safest roof inspection often starts and ends on the ground. If a useful view requires a risky climb, a long reach, or a step onto a roof whose access rules you have not confirmed, stop and arrange service.
First, prove that access is allowed
Find the manual for the RV's make, model, model year, floorplan, and, if the maker offers it, VIN or serial-number range. Read the roof and exterior-ladder sections. Then compare the illustrations and hardware with the ladder actually installed. A broad family manual may cover several configurations, as the different ladder types in the Jayco manual show.[2] An aftermarket ladder may have its own instructions.
Manufacturer rules can differ sharply. The cited Winnebago EKKO manual calls its ladder "limited access," sets a 225-pound maximum, prohibits the owner from going onto the roof, and directs roof jobs to trained service personnel with proper safety equipment.[1] The cited Jayco towable manual says equipped roofs have decking for cautious maintenance access, but it also describes a 250-pound self-storing ladder and a 330-pound On-The-Go ladder. Its warning section directs the owner to the capacity label under the bottom step.[2]
That contrast is the point. Do not borrow a number from another RV, another model year, a sales brochure, or a forum post. If the manual and label are missing, unreadable, contradictory, or do not match the hardware, ask the RV maker or dealer to identify the installed system in writing. Until then, treat roof access as unverified.
Check two separate permissions:
- Does the manufacturer allow use of this ladder, and what is its total rated load?
- Does the manufacturer allow a person on this roof, in which areas, and for which tasks?
A "walkable roof" claim does not cancel the ladder limit.[2] A ladder rating does not make every roof panel a walking surface.[1][2] Nor does either number approve leaning an unrelated portable ladder against trim, an awning, a gutter, fiberglass, or another part that was not designed as a ladder support.
Count the whole load, not just body weight
Use the rating stated on the exact installed ladder. Include the climber, clothing, footwear, tools, camera, cleaning supplies, and anything else carried. Jayco explicitly says its maximum includes the person's weight plus the items carried.[2]
This is also where a tool bag becomes a balance problem. Climbing with something in either hand defeats the basic need for secure contact.[2] The Jayco manual tells users to face the ladder, keep their weight centered, maintain three points of contact, and keep their hands free.[2] If equipment cannot be moved without breaking those conditions, the task needs a different access method.
Never "test" an uncertain ladder by putting weight on it. Corrosion, a loose mount, cracked sealant, a bent rail, missing locking pins, or damage hidden at an attachment point needs inspection and repair before use. Winnebago tells owners to inspect the ladder first and never use a damaged one.[1]
Make the first inspection from the ground
Park on firm, level ground, set the parking brake, and follow the RV maker's parking and stabilization instructions. The cited Jayco ladder setup specifically requires firm, level ground.[2] Keep the inspection area away from traffic, open doors, power lines, wet electrical equipment, and soft shoulders. Wait for daylight and dry, calm weather; Winnebago prohibits using its cited ladder in rain, snow, or ice.[1]
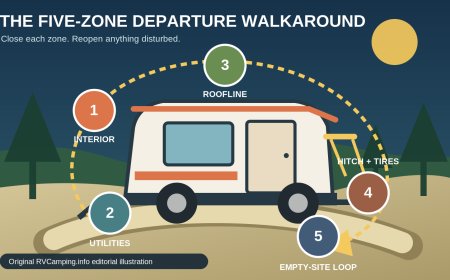
Walk all four sides before touching a ladder. Scan high areas with binoculars, a zoom lens, or a pole-mounted camera. These tools can reveal loose covers, raised sealant edges, cracked vent lids, storm debris, displaced solar hardware, and changes in the roofline. Look inside too. Ceiling stains, damp cabinets, drips near vents, and new odors can justify service even when the roof edge looks normal.
From the ground, inspect the access system itself; both manufacturer manuals and NIOSH put inspection before use.[1][2][3]
- rails and rungs for bends, cracks, corrosion, looseness, contamination, or missing parts;
- wall mounts, receiver sockets, stand-offs, fasteners, and surrounding sealant for movement or gaps;
- hinges, pins, clasps, extensions, and locks for complete engagement;
- the capacity and warning labels for legibility; and
- the ground below for slope, mud, gravel, ice, holes, cords, and trip hazards.
Do not tug hard on a suspect mount or step onto it to learn whether it is loose. Photograph the condition and send it to a qualified RV service facility.
A portable ladder is not an automatic workaround
A separate extension or telescoping ladder introduces its own rating, condition, setup, support-surface, and transition questions. NIOSH's ladder-safety guidance includes tools for duty-rating selection, inspection, and setup, and identifies about 75 degrees as the proper extension-ladder angle.[3] Jayco gives the same 75-degree or 4-to-1 setup for the specific removable ladder described in its manual, along with firm, level ground and clean rungs and shoes.[2]
Those numbers are guidance, not permission to rest a ladder anywhere on an RV. In the cited Jayco procedure, the removable ladder hooks into a purpose-built receiver.[2] If the RV maker has not identified an approved support or receiver, do not improvise one.
NIOSH publishes workplace fall-prevention research, but it also makes this ladder resource relevant to users away from work.[3] This article uses that material as practical ladder guidance, not as a claim that occupational regulations automatically apply to a private owner at a campsite.
Choose an inspection method that avoids the fall exposure
For a routine look, use ground-based optics and interior checks. For cleaning, sealant work, solar troubleshooting, air-conditioner service, or anything that requires two hands, arrange a mobile RV technician or service bay that can provide a stable work platform and the fall protection suited to the job. Winnebago assigns roof work on the cited EKKO to qualified service personnel working with proper safety equipment.[1] A dealer may also confirm access points and roof load restrictions for the exact unit.
A drone can sometimes document the roof without a climb, but only where flight is lawful, permitted by the campground or property owner, and safe around people, trees, wires, and other aircraft. It is a camera option, not a substitute for hands-on service when damage, moisture, electrical faults, or loose components are suspected.
Do not rely on a spotter to turn a damaged ladder, bad footing, high wind, or an unauthorized roof into a safe setup. A second person can summon help and control the area, but cannot repair the underlying hazard.
Stop and book service when any gate fails
Do not climb when any permission, rating, condition, or setup check fails.[1][2][3]
- the exact manual, roof permission, or ladder rating cannot be confirmed;
- the person-and-equipment total exceeds the stated limit;
- a rail, rung, mount, receiver, pin, lock, fastener, or adjacent wall area is damaged or loose;
- the ladder or shoes are wet, muddy, icy, oily, or otherwise slippery;
- wind, rain, lightning, heat, poor light, traffic, overhead wires, or unstable ground complicates the setup;
- the task requires carrying bulky gear, reaching outside the rails, or working with both hands while on the ladder;
- there is no manufacturer-approved support point for a portable ladder;
- a safe transition to and from the roof cannot be maintained; or
- the roof is sagging, punctured, soft, actively leaking, electrically damaged, or holding a loose component.
Stop even after access begins if the RV shifts, the ladder moves or flexes unexpectedly, a mount makes noise, a rung feels loose, footing changes, or the next move requires a reach. Descend while three-point contact is still available; do not stretch for "one quick photo."
When calling for service, send the RV identification, ladder photos, label photos, the relevant manual page, the reason access stopped, and the roof area that needs inspection. Ask the facility to confirm whether it will use a lift, scaffold, platform ladder, roof-edge protection, or another controlled method. The goal is not to find someone willing to climb. It is to have the work done with equipment and access rules that fit the RV.
A rear ladder is hardware, not a standing invitation. Verify permission, verify both load limits, inspect from below, and let a safer access method win whenever the answers are incomplete.
Editorial note: This research-based safety guide does not claim hands-on inspection, engineering analysis, or approval for any specific RV. Use the current documents and warning plates for the specific coach and ladder in front of you. Manufacturer instructions take priority. Sources were checked October 3, 2026.
Sources
What's Your Reaction?